
Getting Started with the iBusiness Mobile Application
Overview
This guide provides step-by-step instructions for setting up, accessing, and navigating the iBusiness Mobile App. It also covers key features such as managing accounts, viewing transactions, and approving requests.
Register and Pair Your Device
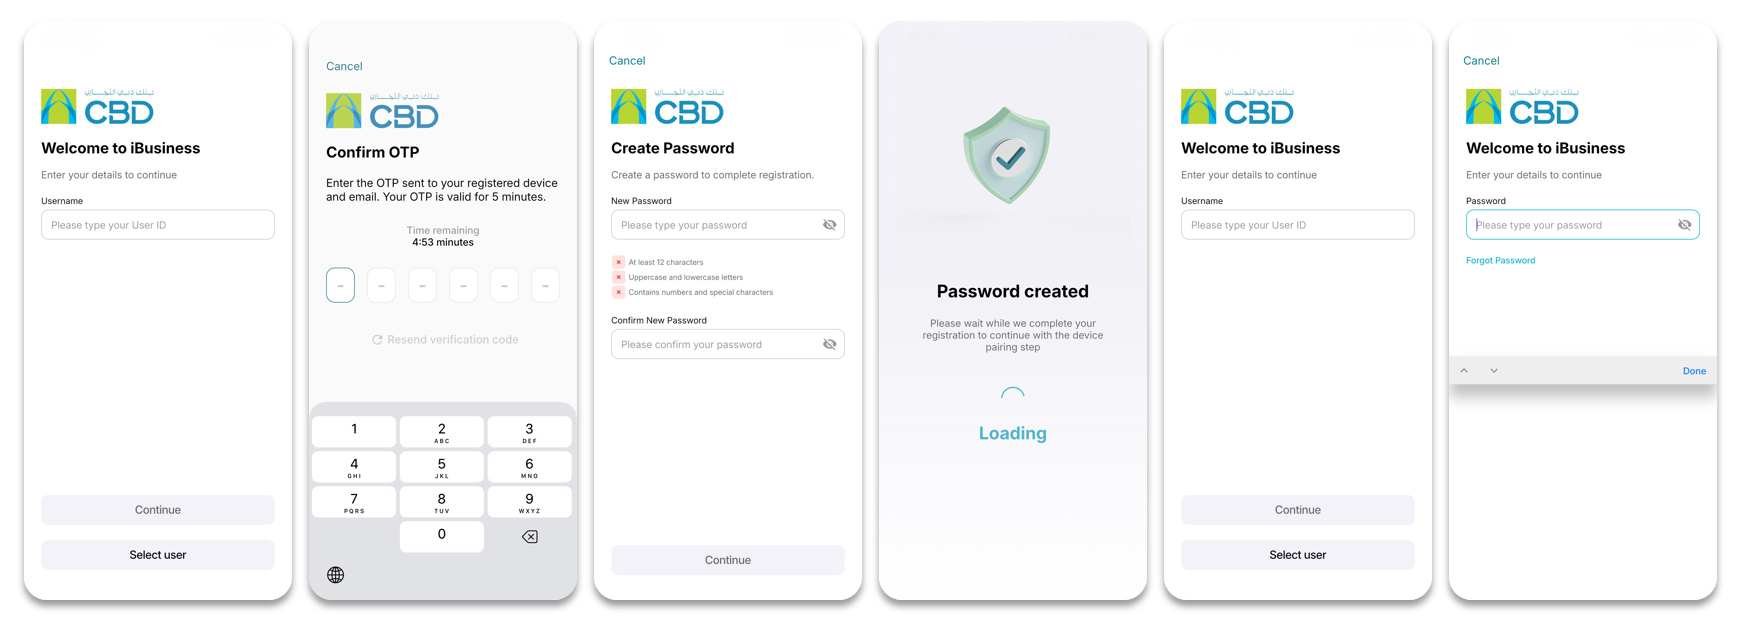
When logging in to the iBusiness Mobile App for the first time, you will need to complete the registration and device pairing process.
Account Verification
- Open the iBusiness Mobile App.
- Enter your Username.
- Tap Continue.
- Enter the One-Time Password (OTP) sent to your registered email address.
- Tap Continue.
Create Your Password
- Enter a new password.
- Confirm the password.
- Ensure the password meets the displayed password requirements.
Log In
- Enter your username and password.
- Tap Continue.
Complete Device Pairing
Enable the following features:
- Biometric Authentication (Face ID / Touch ID)
- Push Notifications
Once these steps are completed, your device will be paired successfully and ready to use.
Note: If biometric authentication is not enabled, you can continue using alternative authentication methods such as Google Authenticator.
Explore the Dashboard
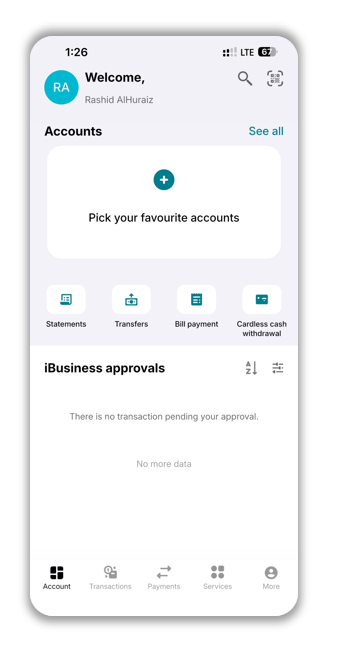
After logging in, you will be directed to the dashboard.
From the dashboard, you can quickly access:
- Favorite Accounts
- Account Balances
- Pending Transactions
- Transaction Approvals
- QR Code Approvals
- Main Navigation Menu
- Enquiries and Transaction Services
Set Favorite Accounts
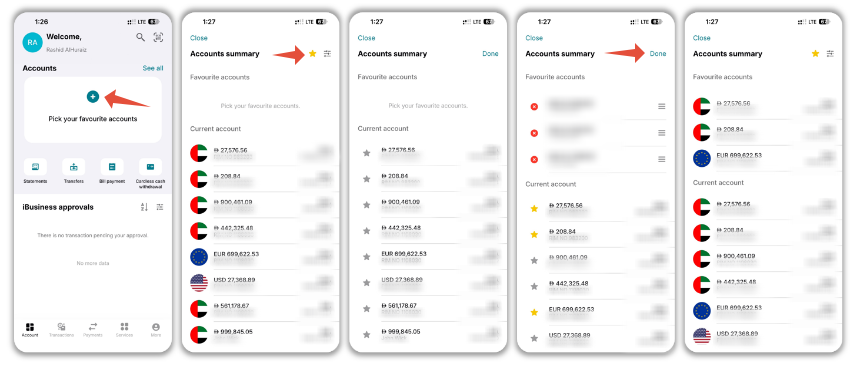
Favorite Accounts allow quick access to frequently used accounts directly from the dashboard.
First-Time Setup
- Tap Pick Your Favorite Accounts.
- Tap the Star icon
 next to an account.
 - Select the accounts you wish to mark as favorites.
View Account Information
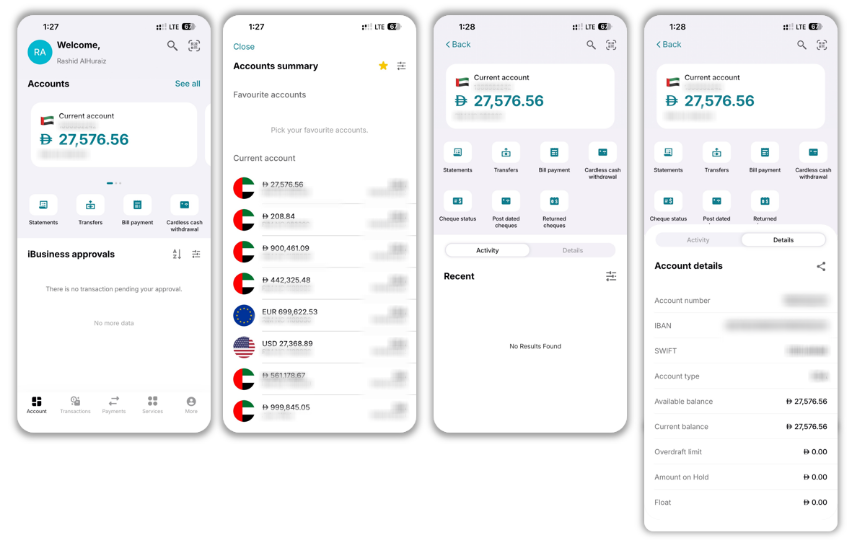
You can access detailed account information directly from the dashboard.
- Select the required account.
- Tap See All to display all available accounts.
- View available account services, including:
- Account Summary
- Account Activity
- Account Details
- Account Statements
Review Pending Transactions
Transactions awaiting approval are displayed directly on the dashboard.
You can view:
- Transaction Type
- Transaction Status
- Pending Approval Requests
This allows approvers to quickly identify transactions requiring action.
Approve Transactions Using a QR Code
The iBusiness Mobile App supports QR Code-based transaction approvals.
Generate the QR Code in iBusiness Web
- Log in to iBusiness Web.
- Navigate to Transactions Hub.
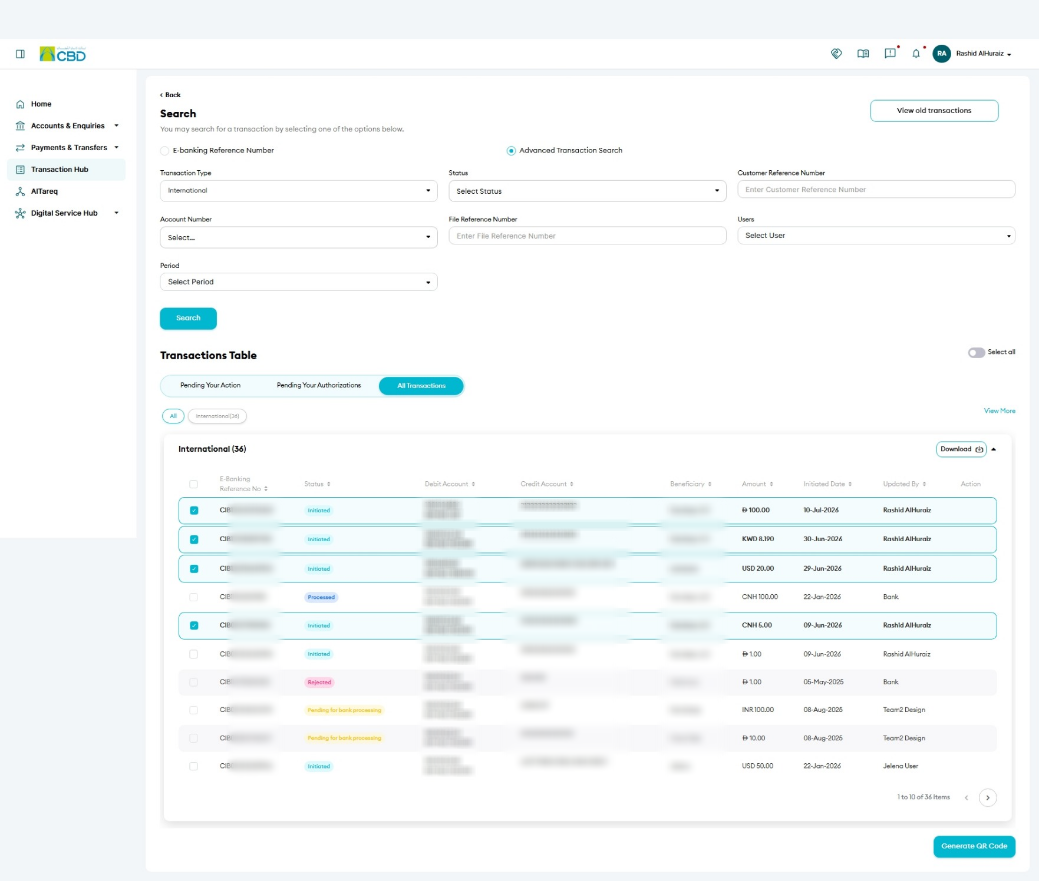
- Select the transactions that require approval by ticking the checkbox next to each transaction.
- Click Generate QR Code.
You can also generate a qr code for multiple transactions
From transaction hub select the transaction that are needed by ticking the box on the right
Then click generate QR code
Review the Summary
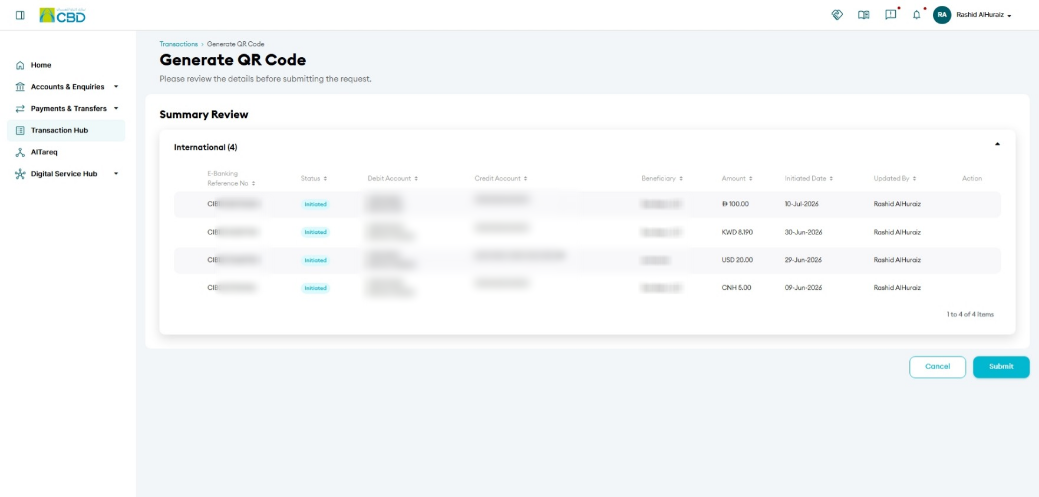
- A Summary Review screen will display all selected transactions.
- Review the transaction details carefully before proceeding.
- Verify:
- Transaction Type
- Amount
- Reference Number
- If the information is correct, tap Submit.
Authenticate the Request
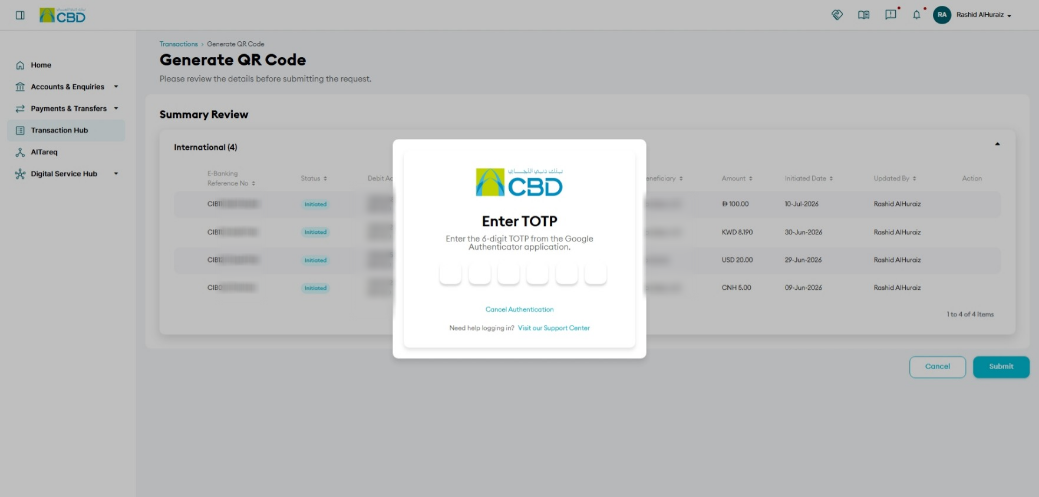
Complete authentication using one of the following methods:
- Biometric Authentication (Face ID / Touch ID)
- Google Authenticator OTP
Approve Using the Mobile App
- Open the iBusiness Mobile App.
- Tap the QR Scanner from the Dashboard.
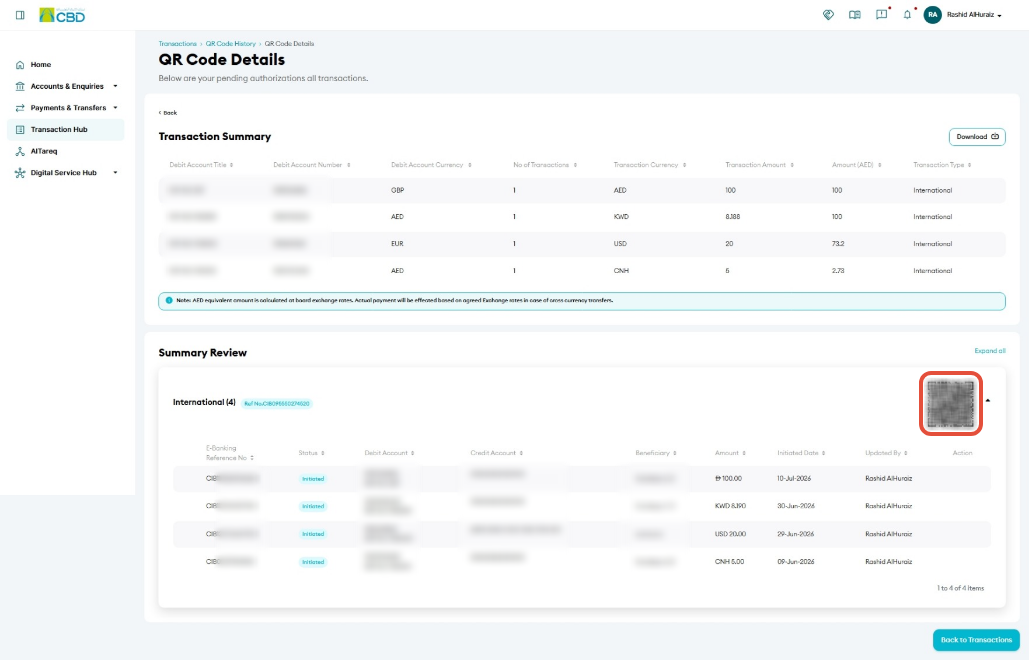
- Scan the QR code displayed in iBusiness Web.
- Review the list of transactions included in the request.
- Authenticate using biometric verification or your configured authentication method.
- Submit the approval request.
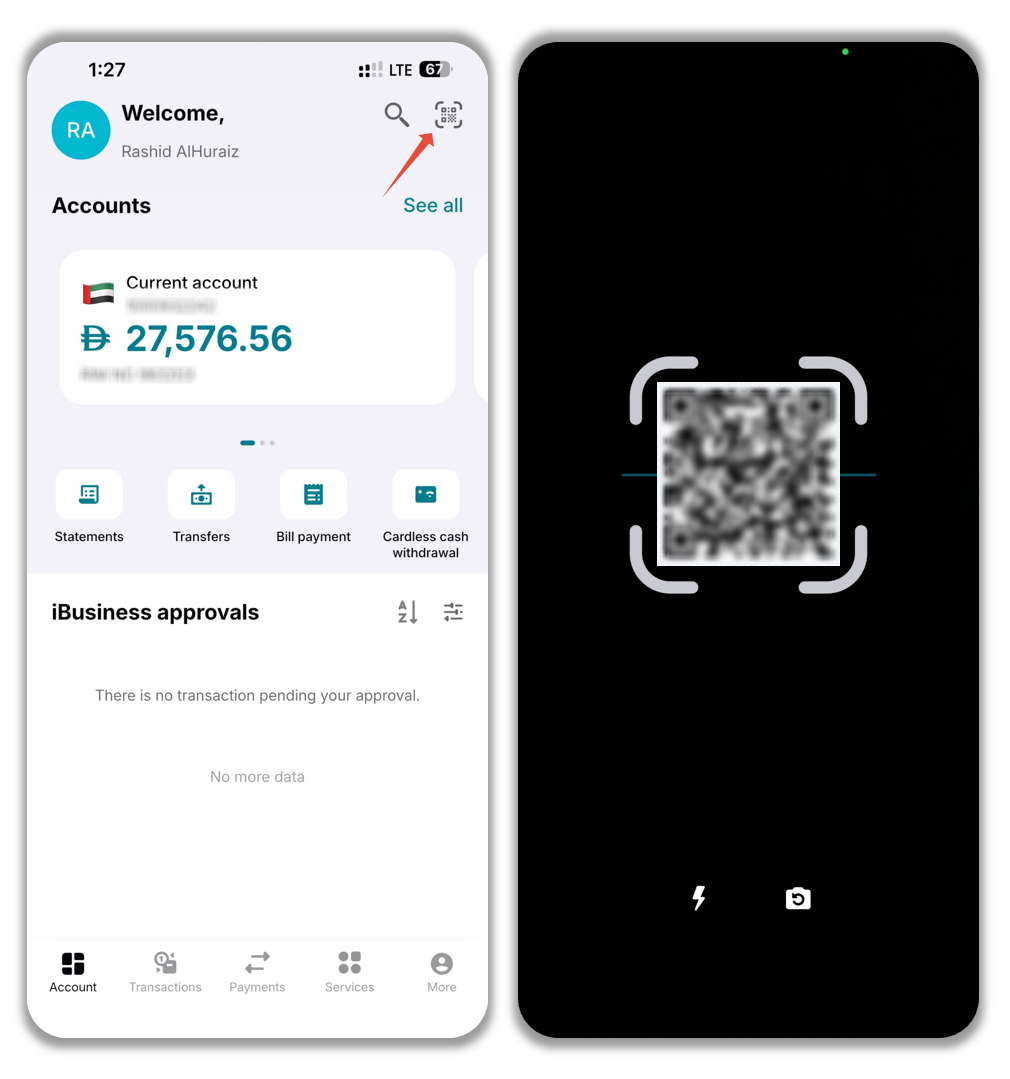
Once authentication is completed successfully, all selected transactions will be approved in a single authorization action.
View All Transactions
To review transaction activity:
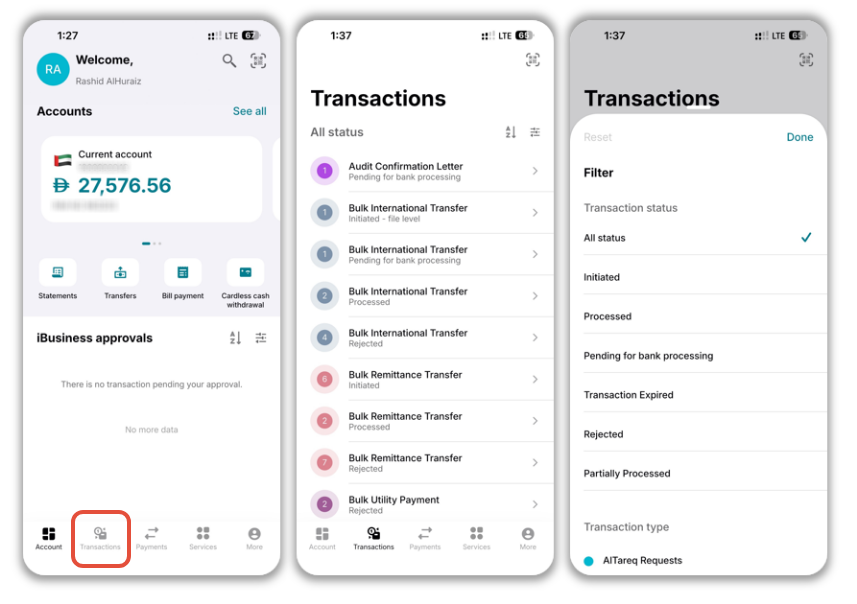
- Tap Transactions from the menu.
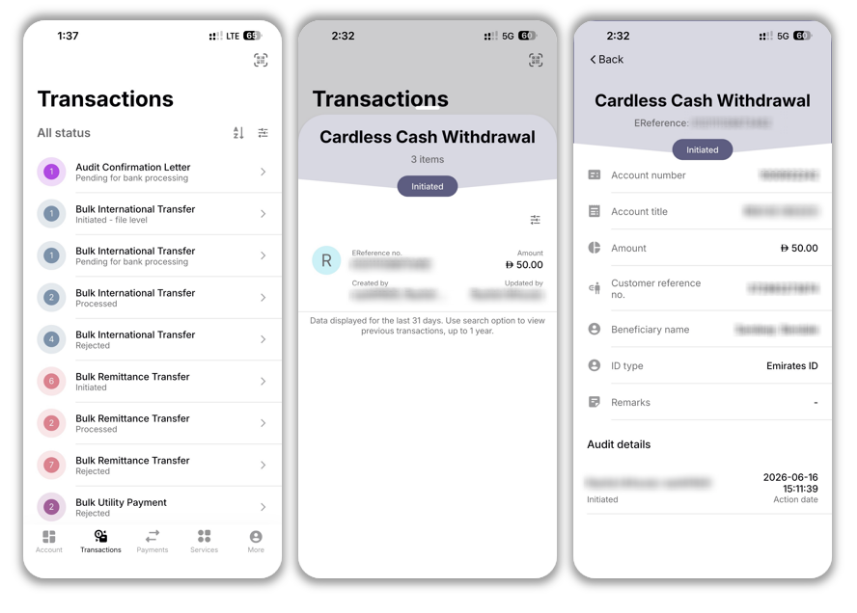
- View all transactions associated with your profile.
- Check transaction statuses and details.
Support Notes / Best Practices
- Enable biometric authentication for faster and more secure access.
- Enable push notifications to receive approval requests and transaction updates.
- Use Favourite Accounts to quickly access frequently used accounts.
- Review pending authorizations regularly to avoid transaction delays.
- Use QR code approvals for a faster transaction authorization experience.
- Ensure your registered email address remains up to date to receive OTPs when required.