
Overview
This guide provides step by step instructions for understanding and managing Push Notifications in the iBusiness Mobile App.
Push notifications are used to inform users about transaction activities and approval actions. The notification behavior follows the same subscription logic as email notifications. If a user is subscribed to receive transaction status updates via email, they will also receive push notifications on the mobile app.
Notification Types
Makers receive notifications when:
- Transaction is completed
- Transaction is rejected transaction
Checkers/Approvers receive notifications:
- Transaction requires approval
- Transaction is completed
- Transaction is rejected
Note: If push notifications are not being received, verify that notifications are enabled both on the mobile device and within the iBusiness Mobile App settings.
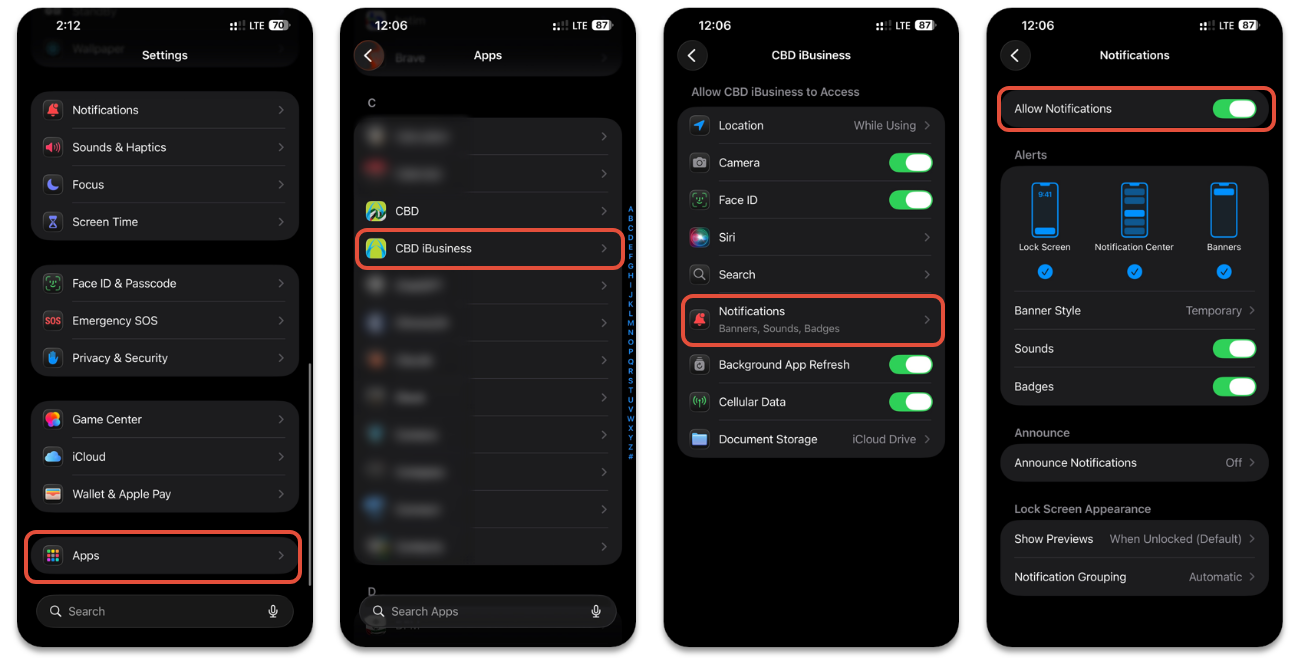
Enabling Push Notifications for iBusiness Mobile App
- Open Settings.
- Navigate to Apps ➜ iBusiness.
- Select Notifications.
- Enable Allow Notifications.
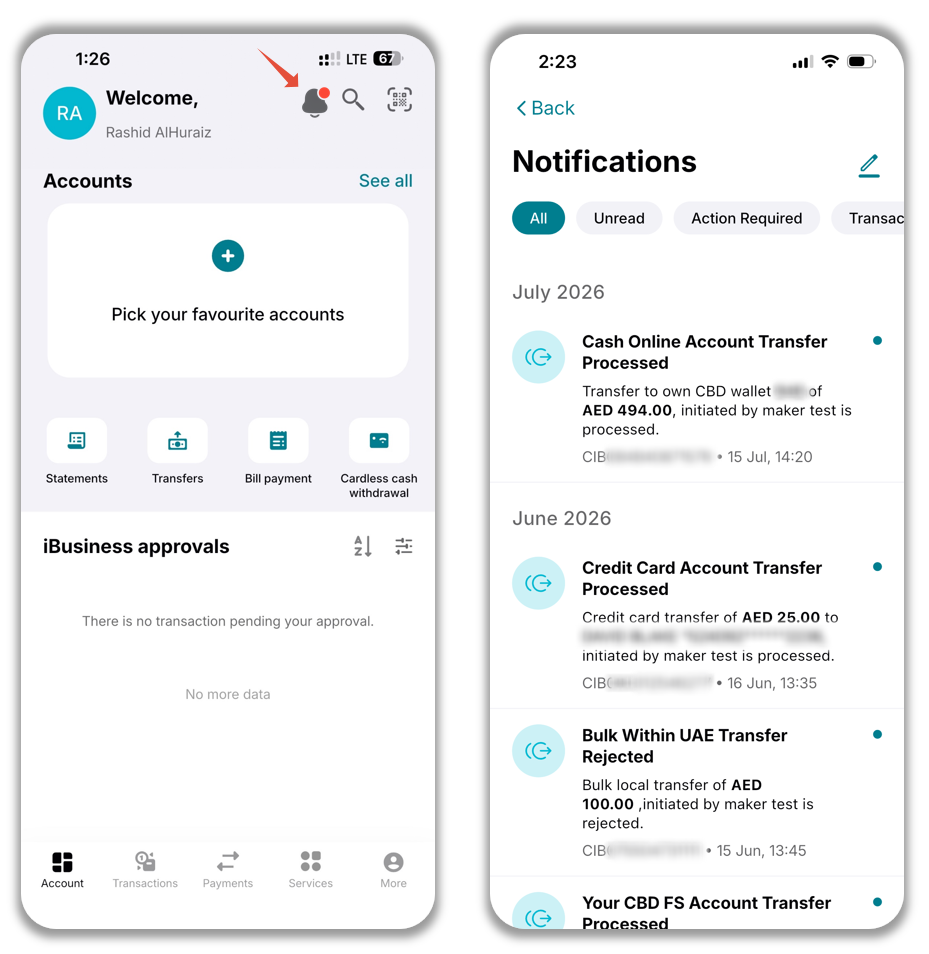
1. Navigating to the Notification Centre
The Notification Centre allows users to view all push notifications sent by the bank.
- Log in to the iBusiness Mobile App.
- Tap the Bell icon
 located in the top right corner of the screen.
Available Actions
From the Notification Centre, users can:
- View all received push notifications
- Search for notifications
- Filter notifications using available criteria
- Mark notifications as Read or Unread
- Perform bulk Read/Unread actions on multiple notifications
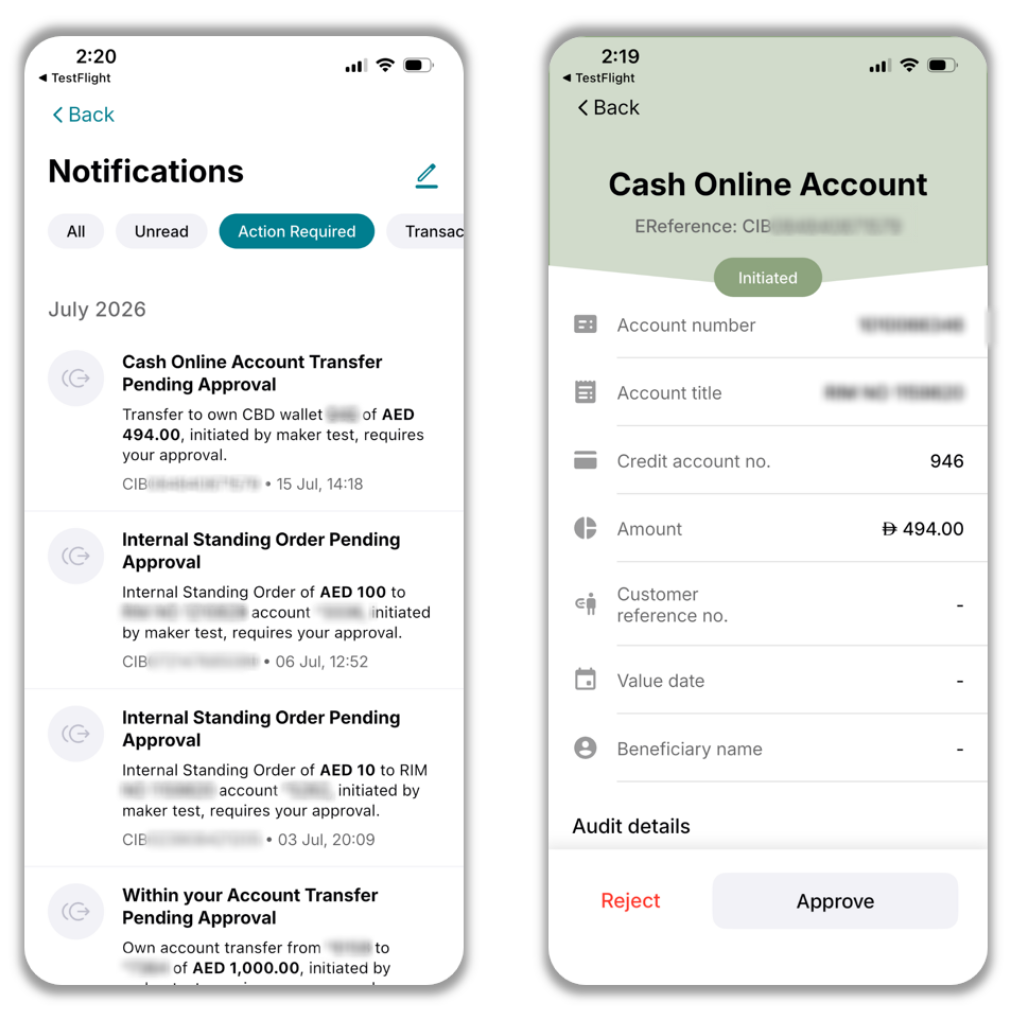
Viewing Notification Details
- Select a notification from the list.
- Tap the notification to view the associated transaction details.
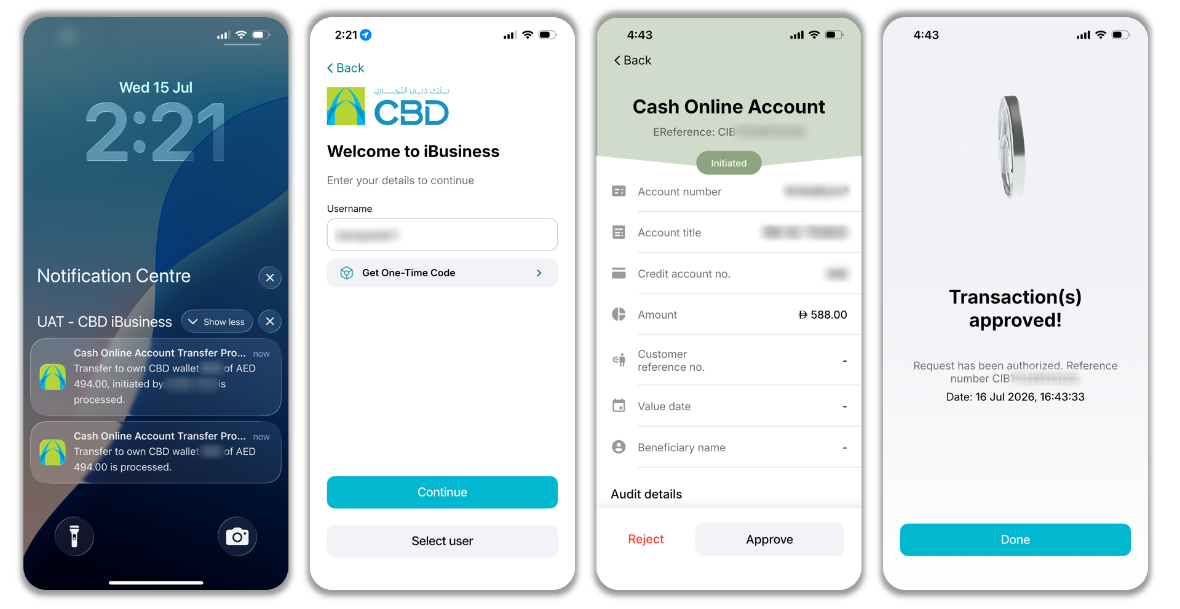
2. Receiving a Push Notification on Your Mobile Device
When a push notification is received on your mobile device, you can directly access the related transaction details through the notification.
Steps:
- Tap the push notification from your device's notification tray.
- The iBusiness Mobile App will open and redirect you to the login screen.
- Biometric authentication will be initiated automatically (if enabled).
- After successful authentication, the app will navigate directly to the notification details screen.
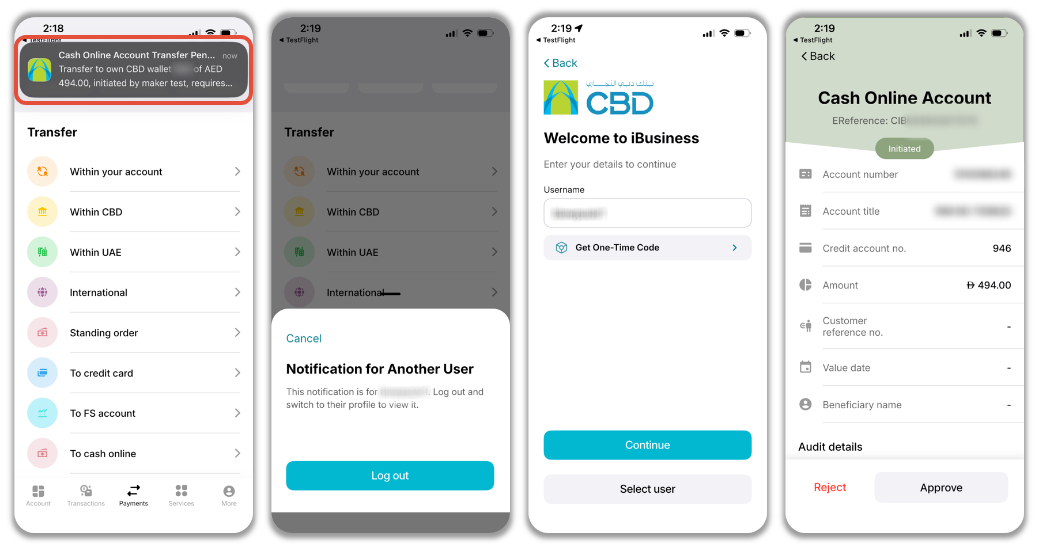
3. Receiving Notifications for Another Account on the Same Device
If multiple iBusiness user accounts are configured on the same mobile device, users may receive notifications for different accounts.
Steps:
- A push notification is received for a different iBusiness User ID registered on the device.
- Tap the notification.
- The application will identify that the notification belongs to a different account.
- A prompt will appear requesting you to:
- Log out of the currently active account
- Switch to the account associated with the notification
- Confirm the account switch to continue.
Support Notes / Best Practices
- Ensure push notifications are enabled on the mobile device.
- Use the Notification Centre to review historical notifications and transaction updates.
- Mark notifications as Read or Unread to assist with tracking outstanding actions.
- When using multiple accounts on the same device, always verify which account the notification belongs to before proceeding.
- If notifications are not received, confirm that the user is subscribed to transaction status notifications and that device notification settings are enabled.