
Overview
This guide provides step-by-step instructions for initiating and completing fund transfers using the iBusiness Mobile App.
Step 1: Access Transfers
- Log in to the iBusiness Mobile App.
- From the dashboard, select Transfers
 from the Quick Links section.
OR
- Tap Payments
 from the bottom navigation menu.
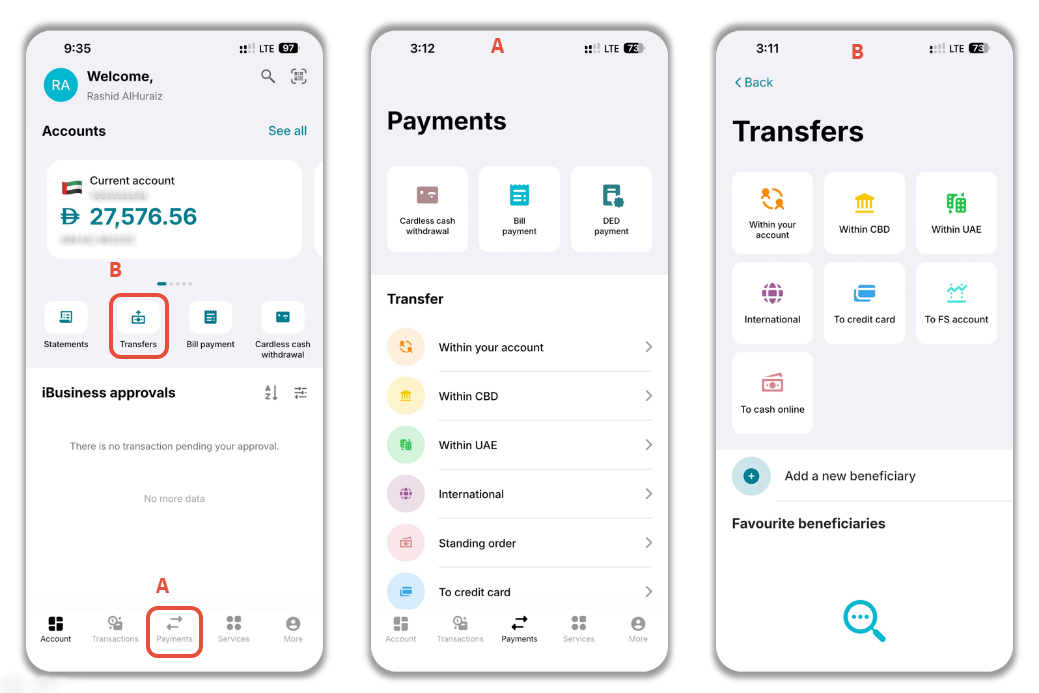
Step 2: Select a Transfer Type
Choose the type of transfer you wish to perform:
- Within Your Accounts: Transfer funds between your own CBD accounts.
- Within the Bank: Transfer funds to another CBD account.
- Within UAE: Local bank transfer within the UAE.
- Standing Order: Schedule recurring transfers.
- International: Transfer funds to a beneficiary outside the UAE.
- Cash Online Account: Top up your Cash Online account.
- To a Credit Card: Make payments to a UAE credit card.
- To FS Account: Transfer funds to a CBD FS account.
Alternatively, you can initiate a transfer directly to one of your Favourite Beneficiaries.
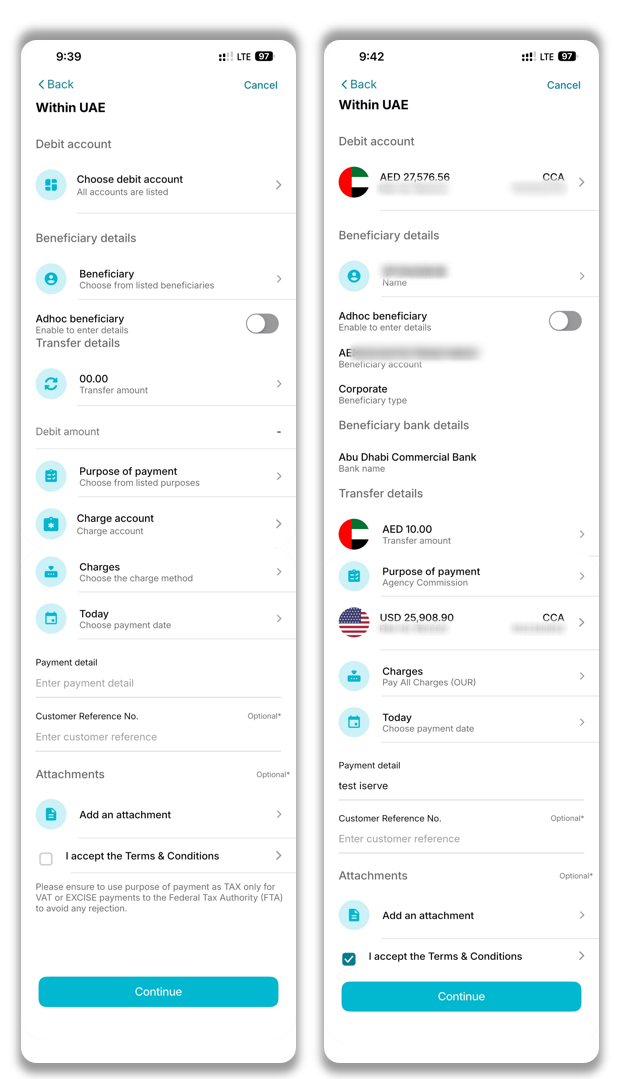
Step 3: Enter Transfer Details
Complete the required transaction information:
Account Information
- Debit Account: The account from which the funds will be deducted.
- Charge Account: The account used to debit applicable transfer charges.
Beneficiary Information
- Select an existing beneficiary from the beneficiary list.
OR
- Enable Adhoc Beneficiary to create a one-time beneficiary and enter the beneficiary details manually.
Transfer Information
- Transfer Amount
- Purpose of Payment
- Payment Date
Charge Method
Select one of the following charge options:
- OUR: Sender pays all charges.
- BEN: Beneficiary pays all charges.
- SHA: Charges are shared between the sender and beneficiary.
Optional Information
- Reference Number
- Remarks
Accept the Terms and Conditions.
Future-Dated Transfers
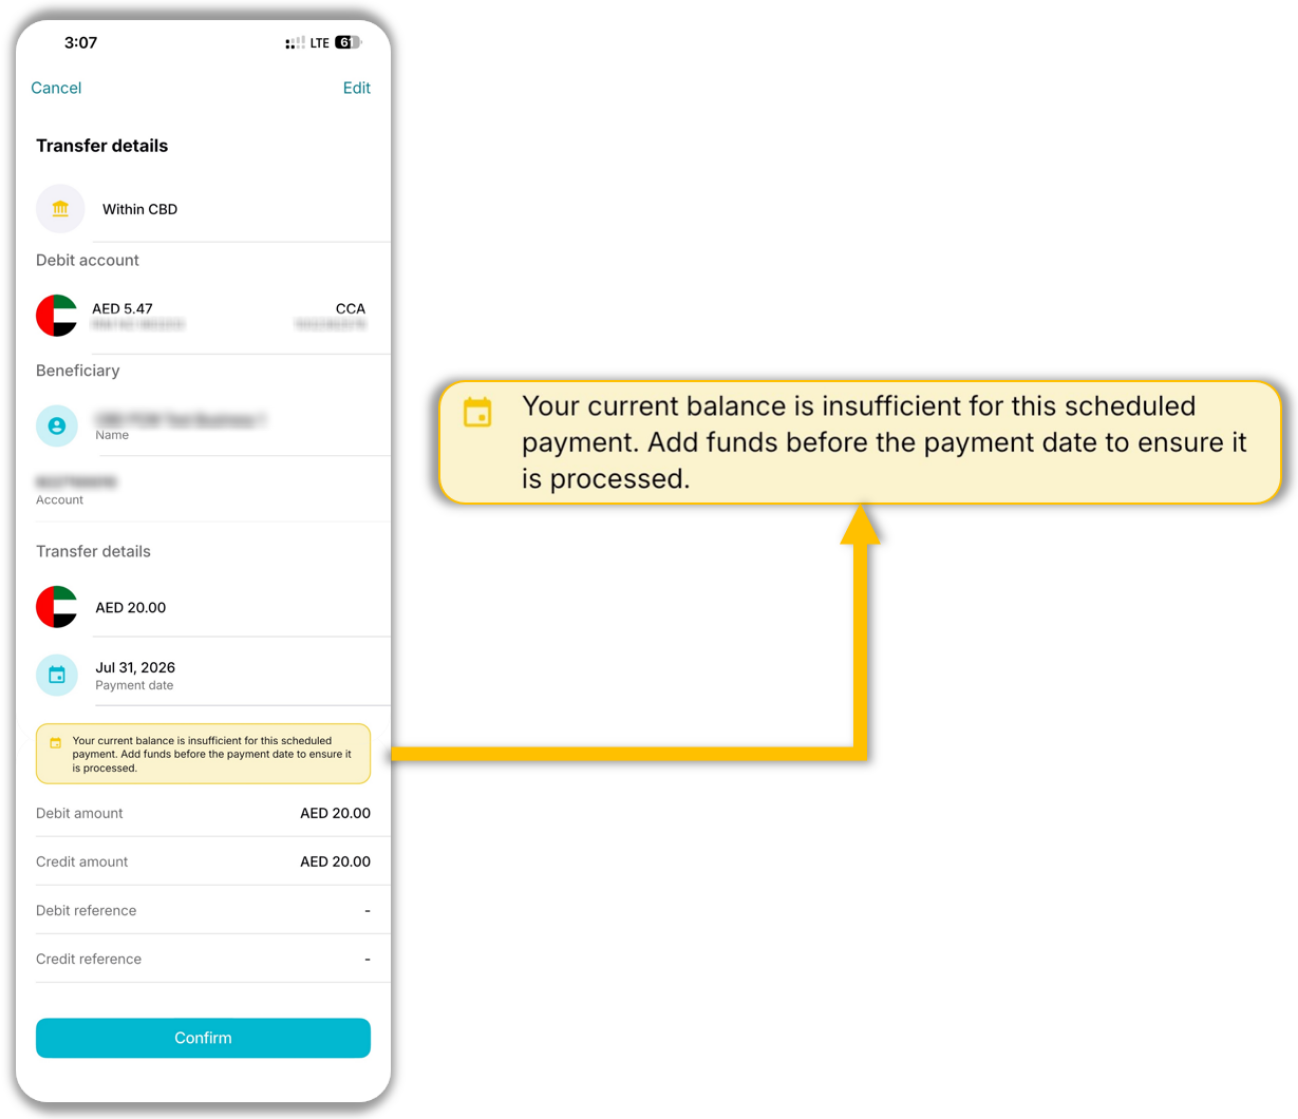
When you schedule a payment for a future date, the system will display a message based on the available balance in the selected debit account.
Insufficient Funds
If there are currently insufficient funds in the account, the following warning will be displayed:
Key Points
- The payment can still be submitted.
- Ensure sufficient funds are available before the payment date.
- If funds are not available on the payment date, the payment may not be processed.
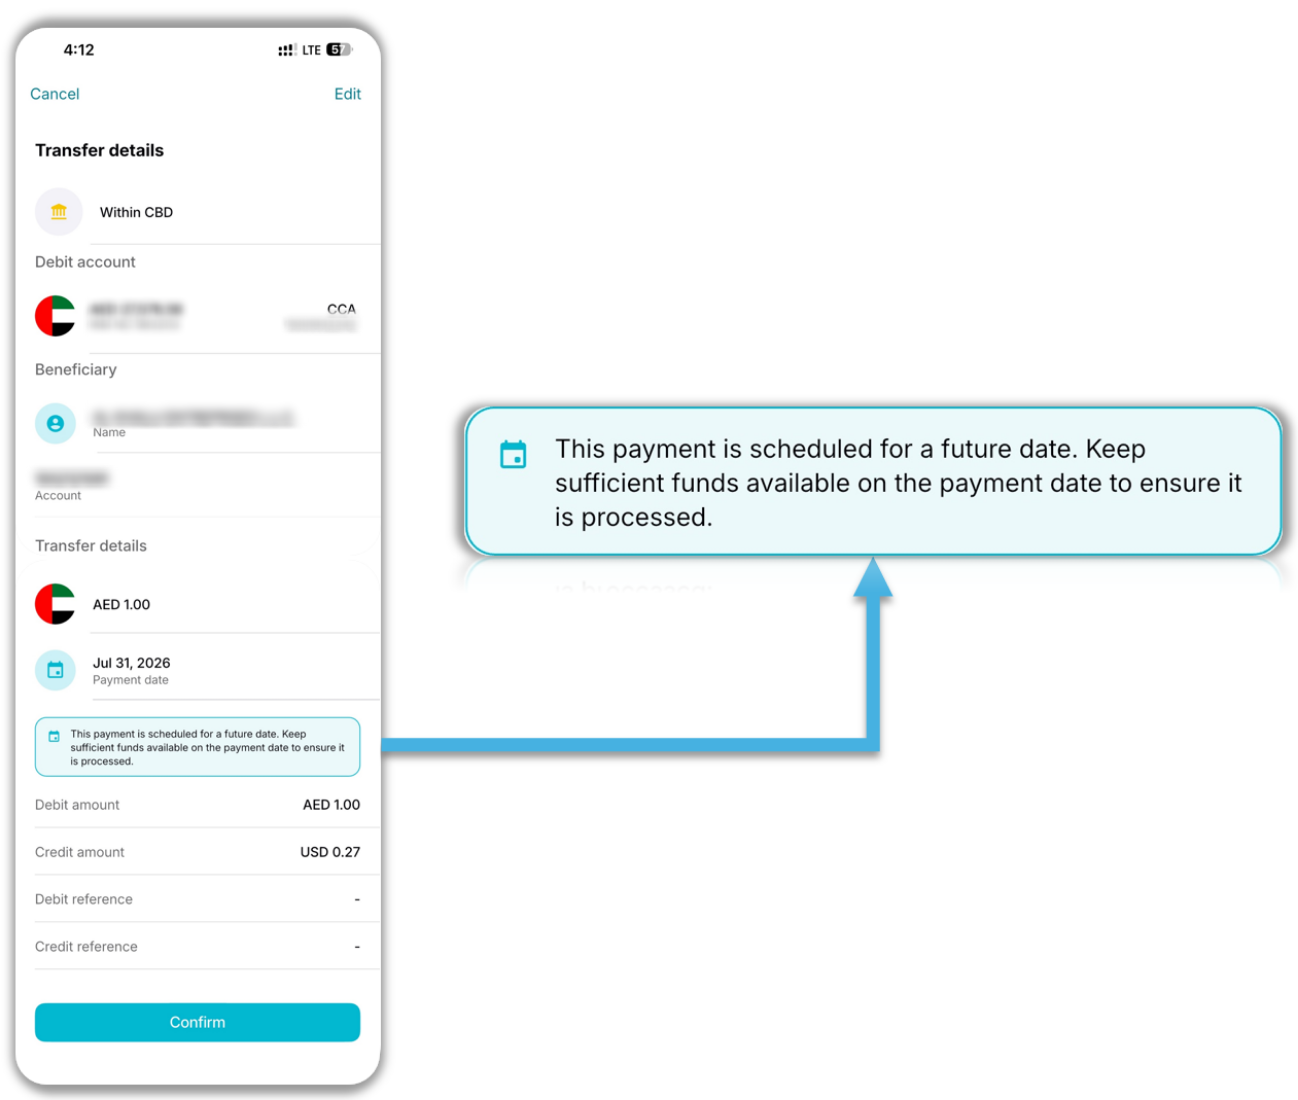
Future-Dated Payment Scheduled
If the payment is scheduled successfully, the system will display a confirmation message:
Key Points
- The payment has been scheduled successfully.
- Funds are not reserved when the payment is created.
- Ensure sufficient funds are available on the payment date.
Best Practice: Keep enough funds in the debit account before the scheduled payment date to avoid payment delays or failures.
Step 4: Review and Submit
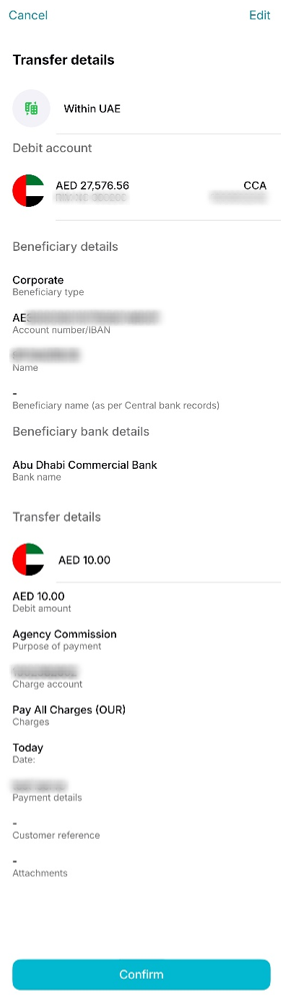
- Review all transfer details displayed on the Summary Review screen.
- If changes are required, tap Edit to update the information.
- Tap Submit.
Step 5: Confirmation
After successful authentication:
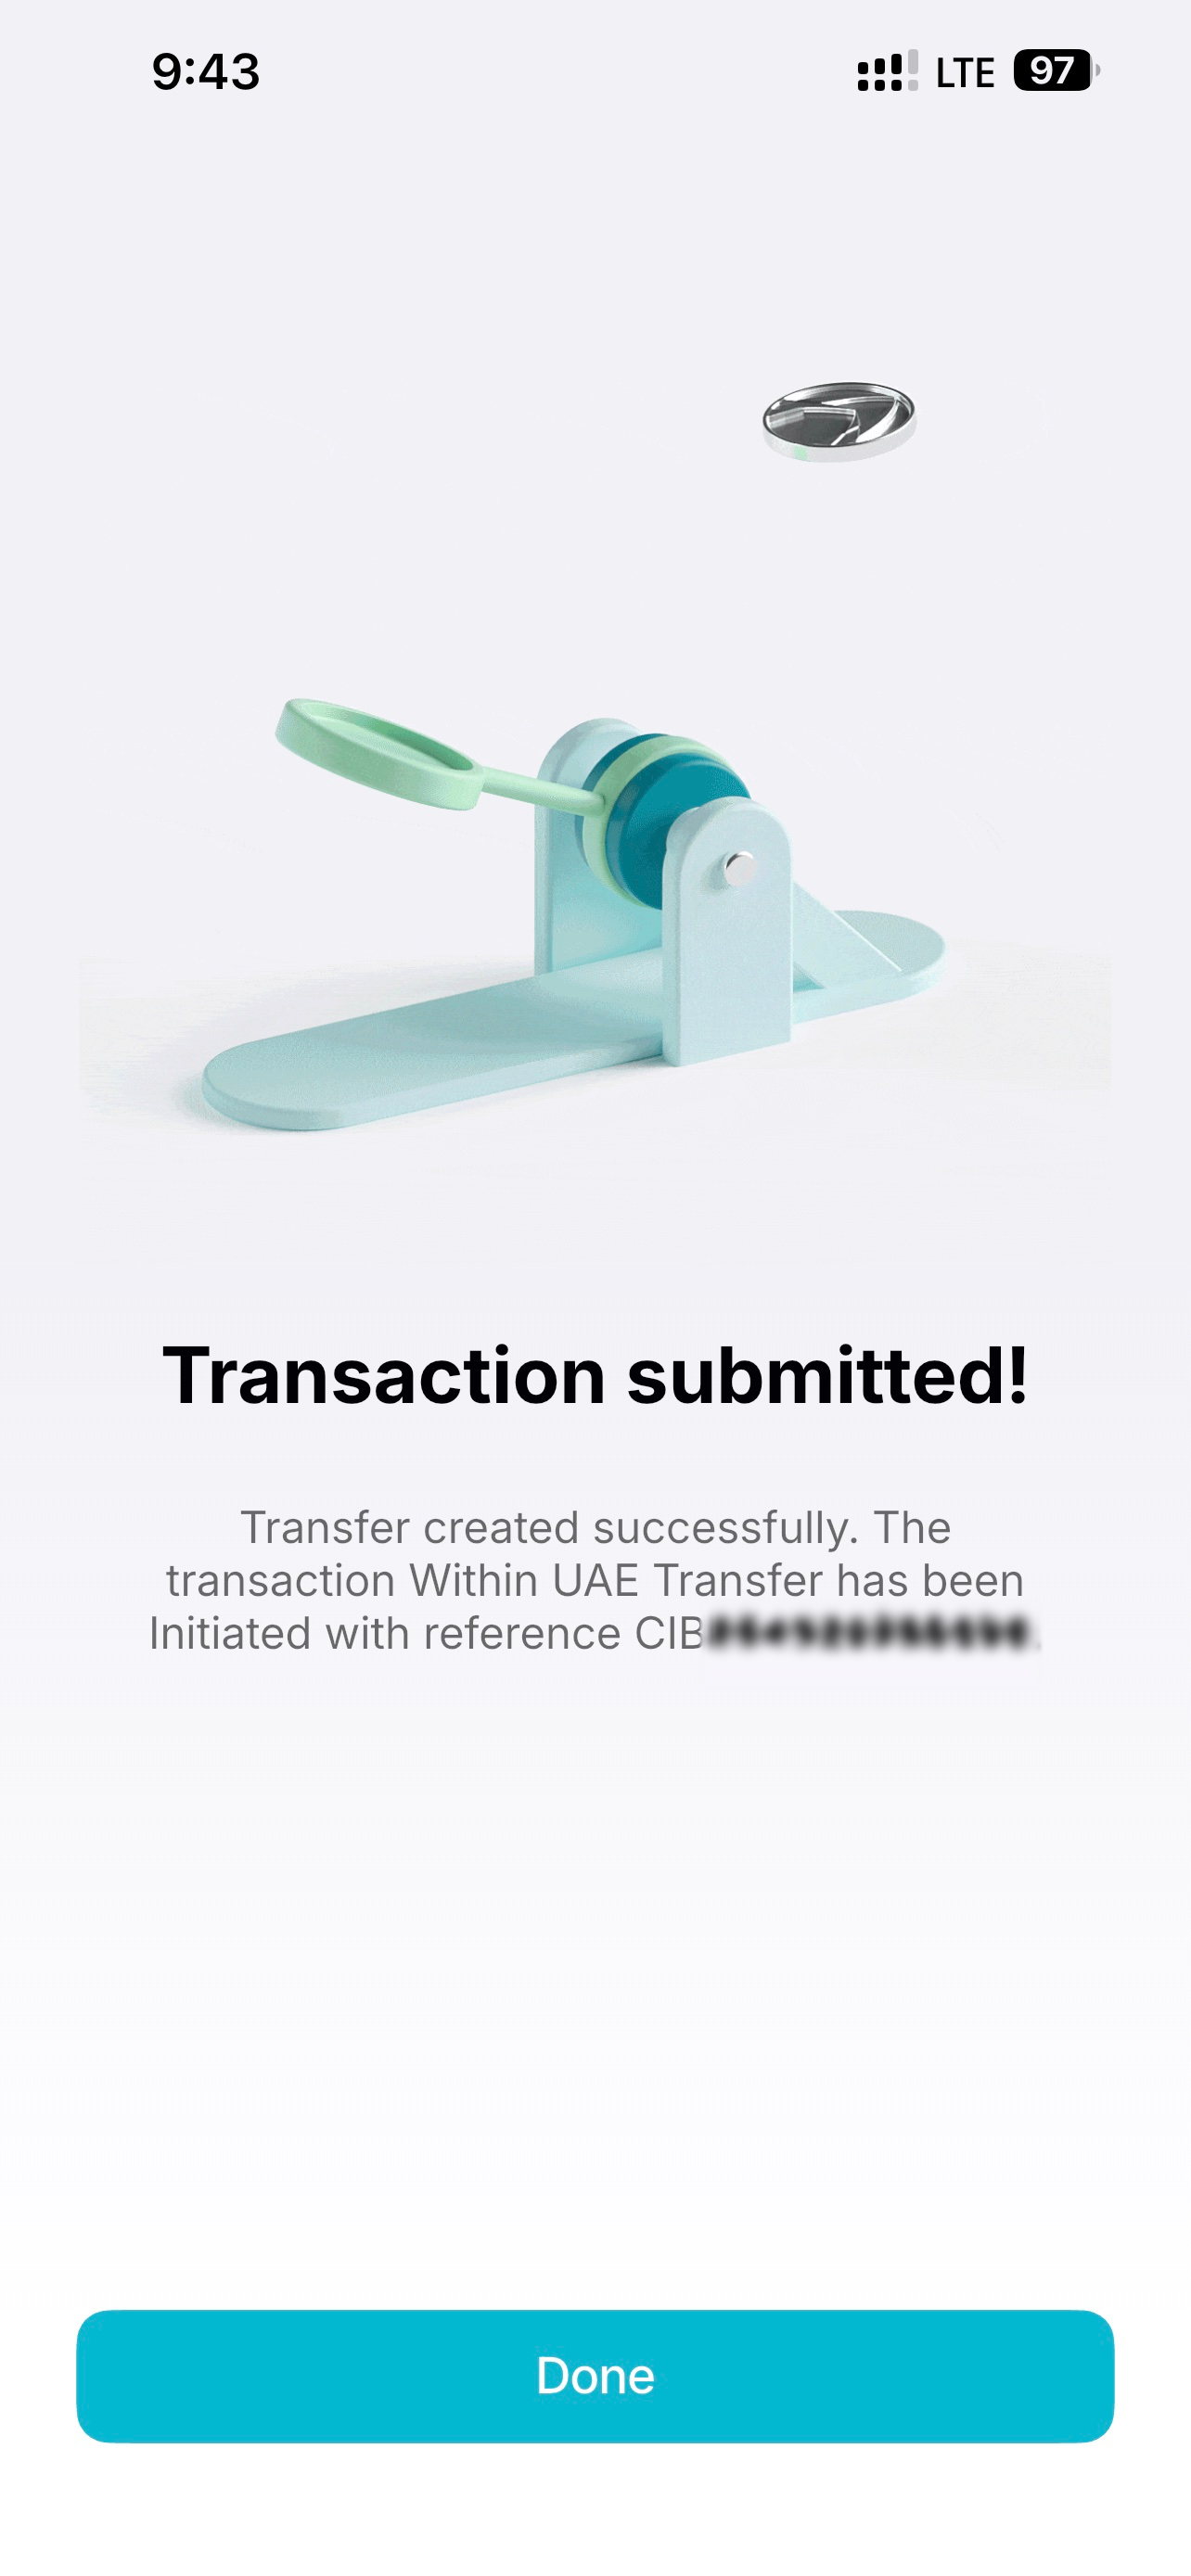
- A confirmation message will be displayed.
- A payment reference number will be generated.
- Save the reference number for tracking, support, or audit purposes.
Support Notes / Best Practices
- Always verify beneficiary and account details before submitting a transfer.
- Ensure sufficient funds are available in the selected debit account.
- Select the correct charge method (OUR, BEN, or SHA) based on business requirements.
- Review all details carefully on the Summary Review screen before authentication.
- Keep a record of the generated payment reference number for future enquiries.
- For recurring payments, consider using the Standing Order transfer option.