
Enable UAE-PGS (UAE Payment Gateway) Payments in iBusiness
Overview
This guide provides step-by-step instructions for enabling UAE-PGS (UAE Payment Gateway) Payments within the iBusiness Web Portal. This configuration allows selected accounts to initiate UAE-PGS payment transactions through iBusiness.
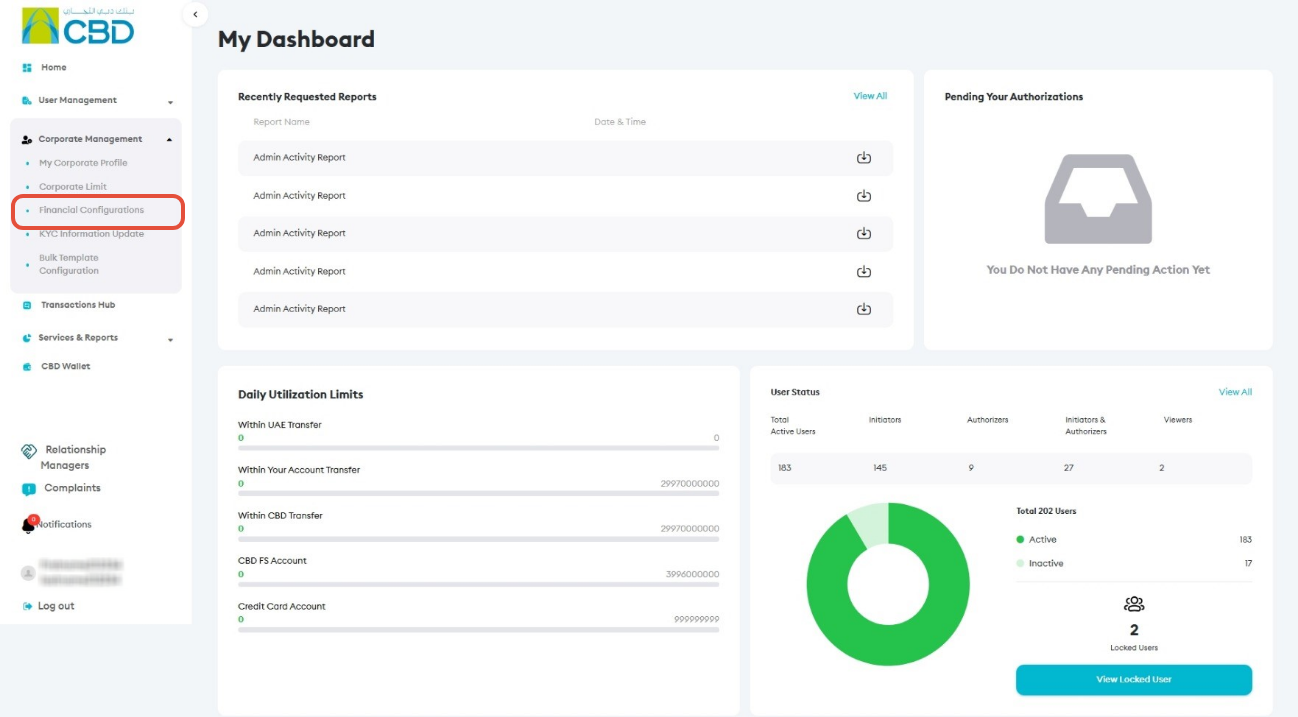
Step 1: Access Financial Configurations
- Log in to iBusiness.
- Navigate to: Corporate Management ➜ Financial Configurations
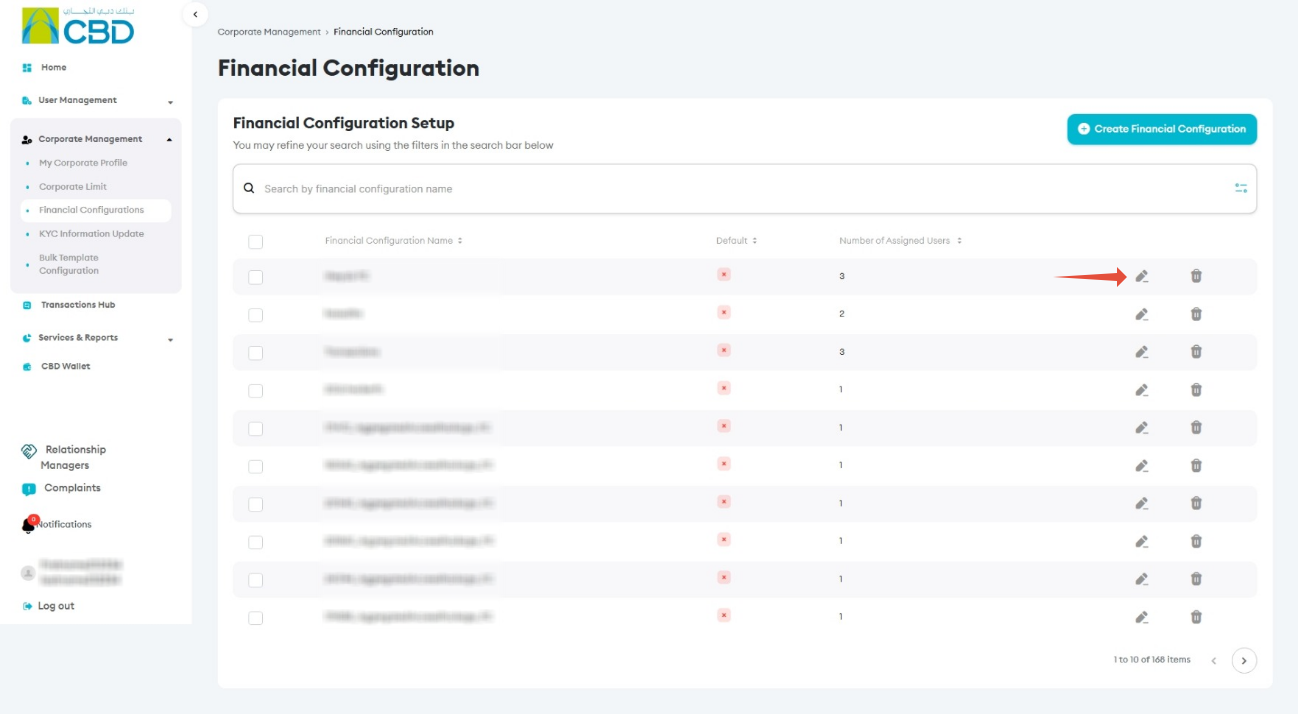
Step 2: Edit the Financial Configuration
- Locate the Financial Configuration you want to update.
- Click the Edit icon.
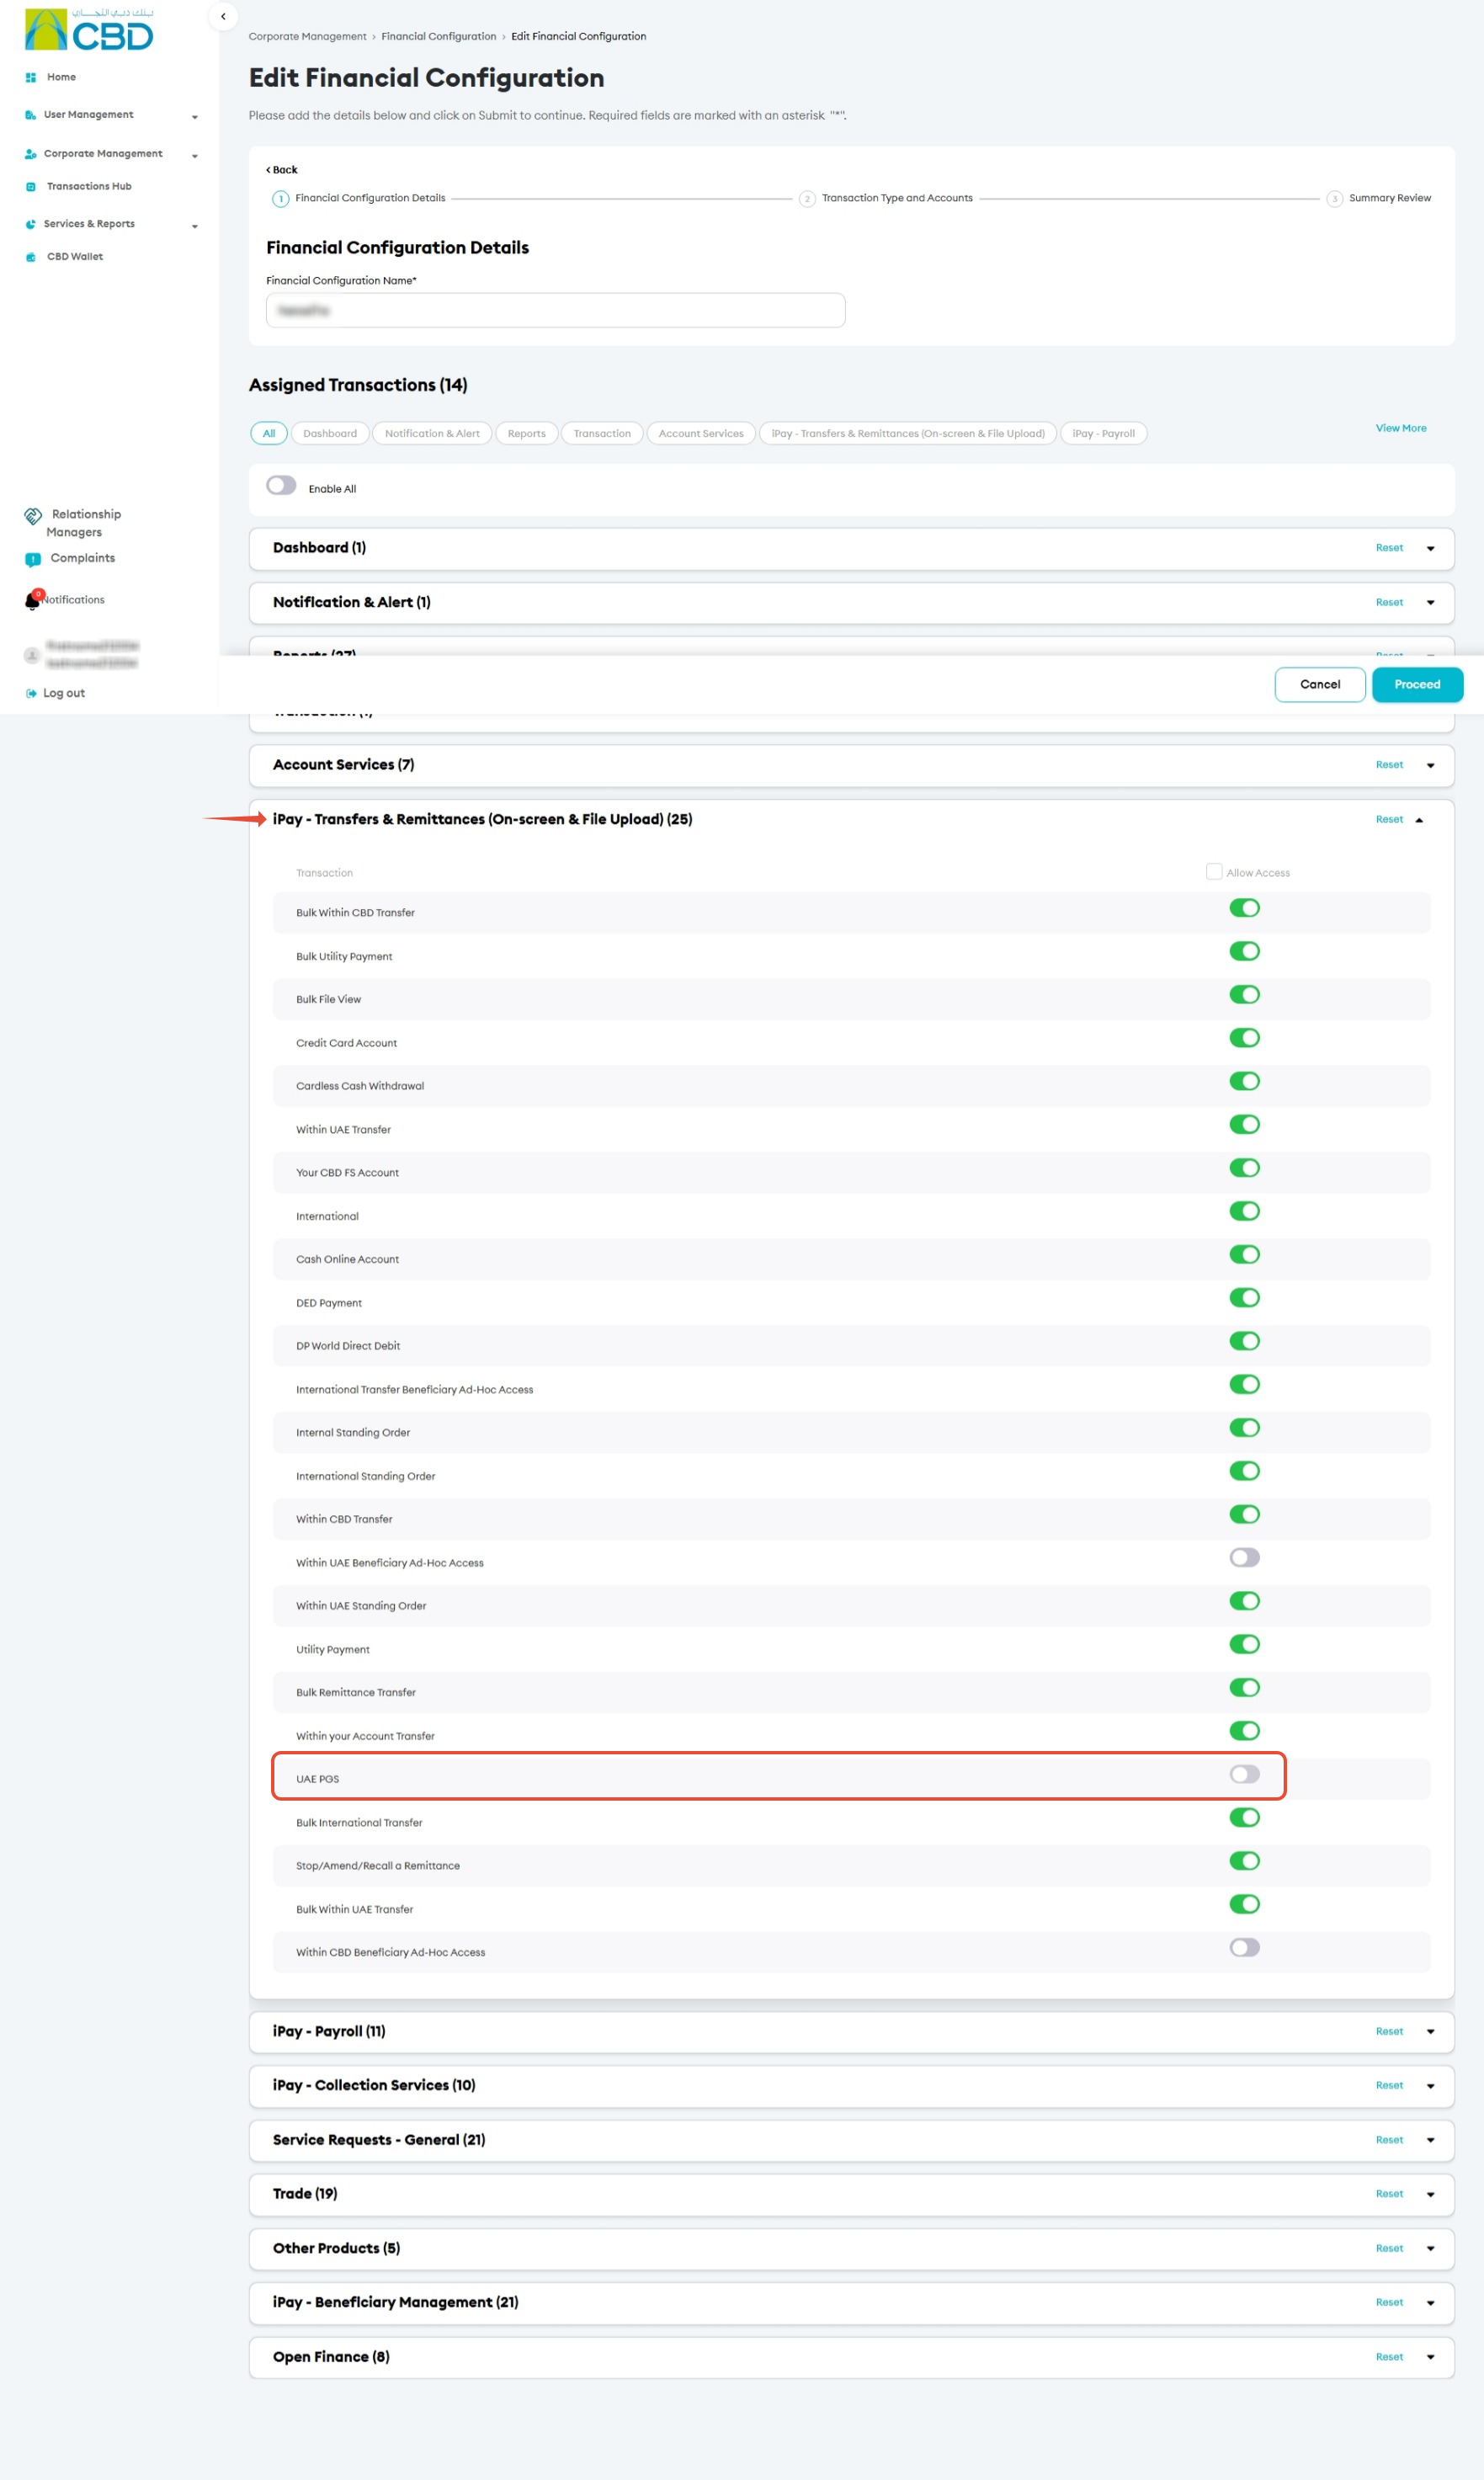
Step 3: Enable UAE-PGS Payments
- Navigate to:
- iPay – Transfers & Remittances (On-Screen & File Upload)
- Locate the UAE-PGS Payment option.
- Click Enable.
- Click Proceed to continue.
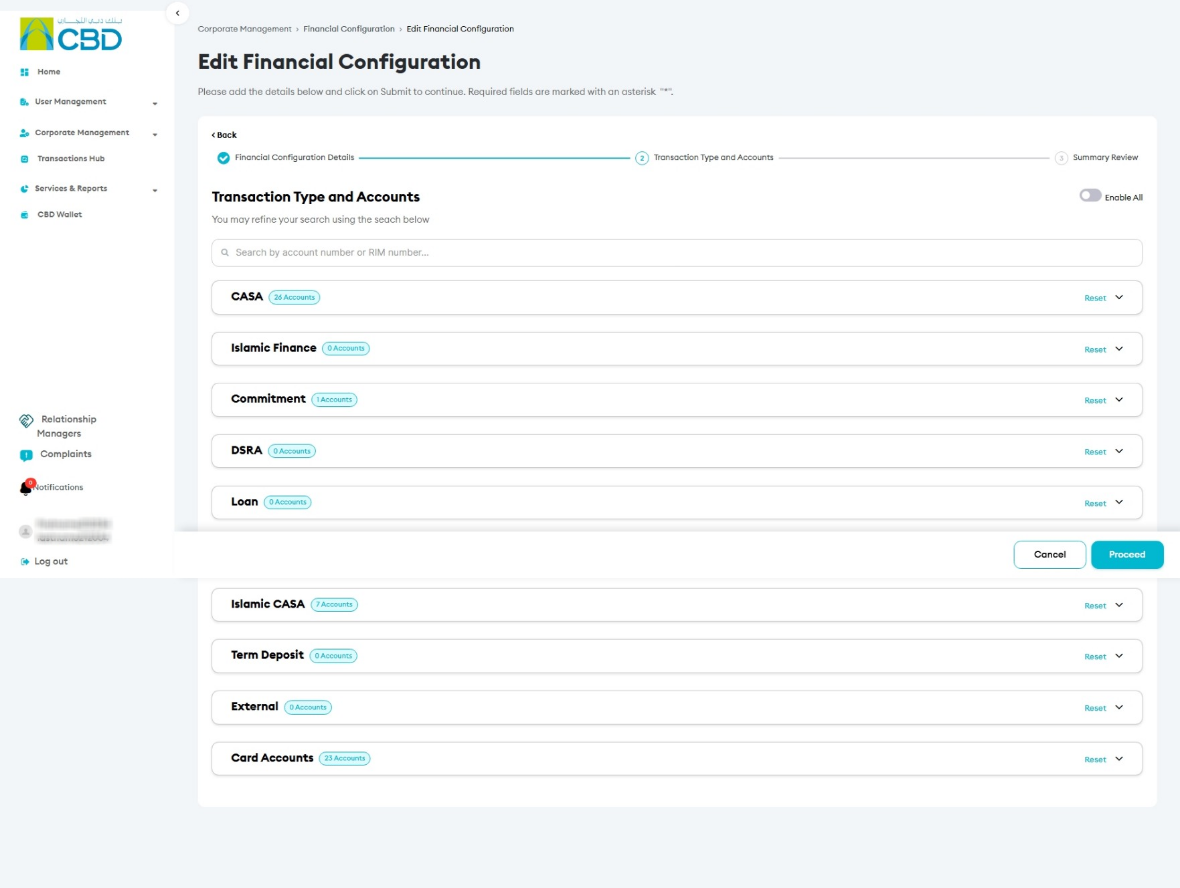
Step 4: Select Accounts
- Select the account(s) that should be enabled for UAE-PGS transactions.
- Review the selected accounts carefully.
- Click Proceed.
Step 5: Review and Submit
- Review the configuration details and selected accounts.
- Verify that all information is correct.
- Click Submit.
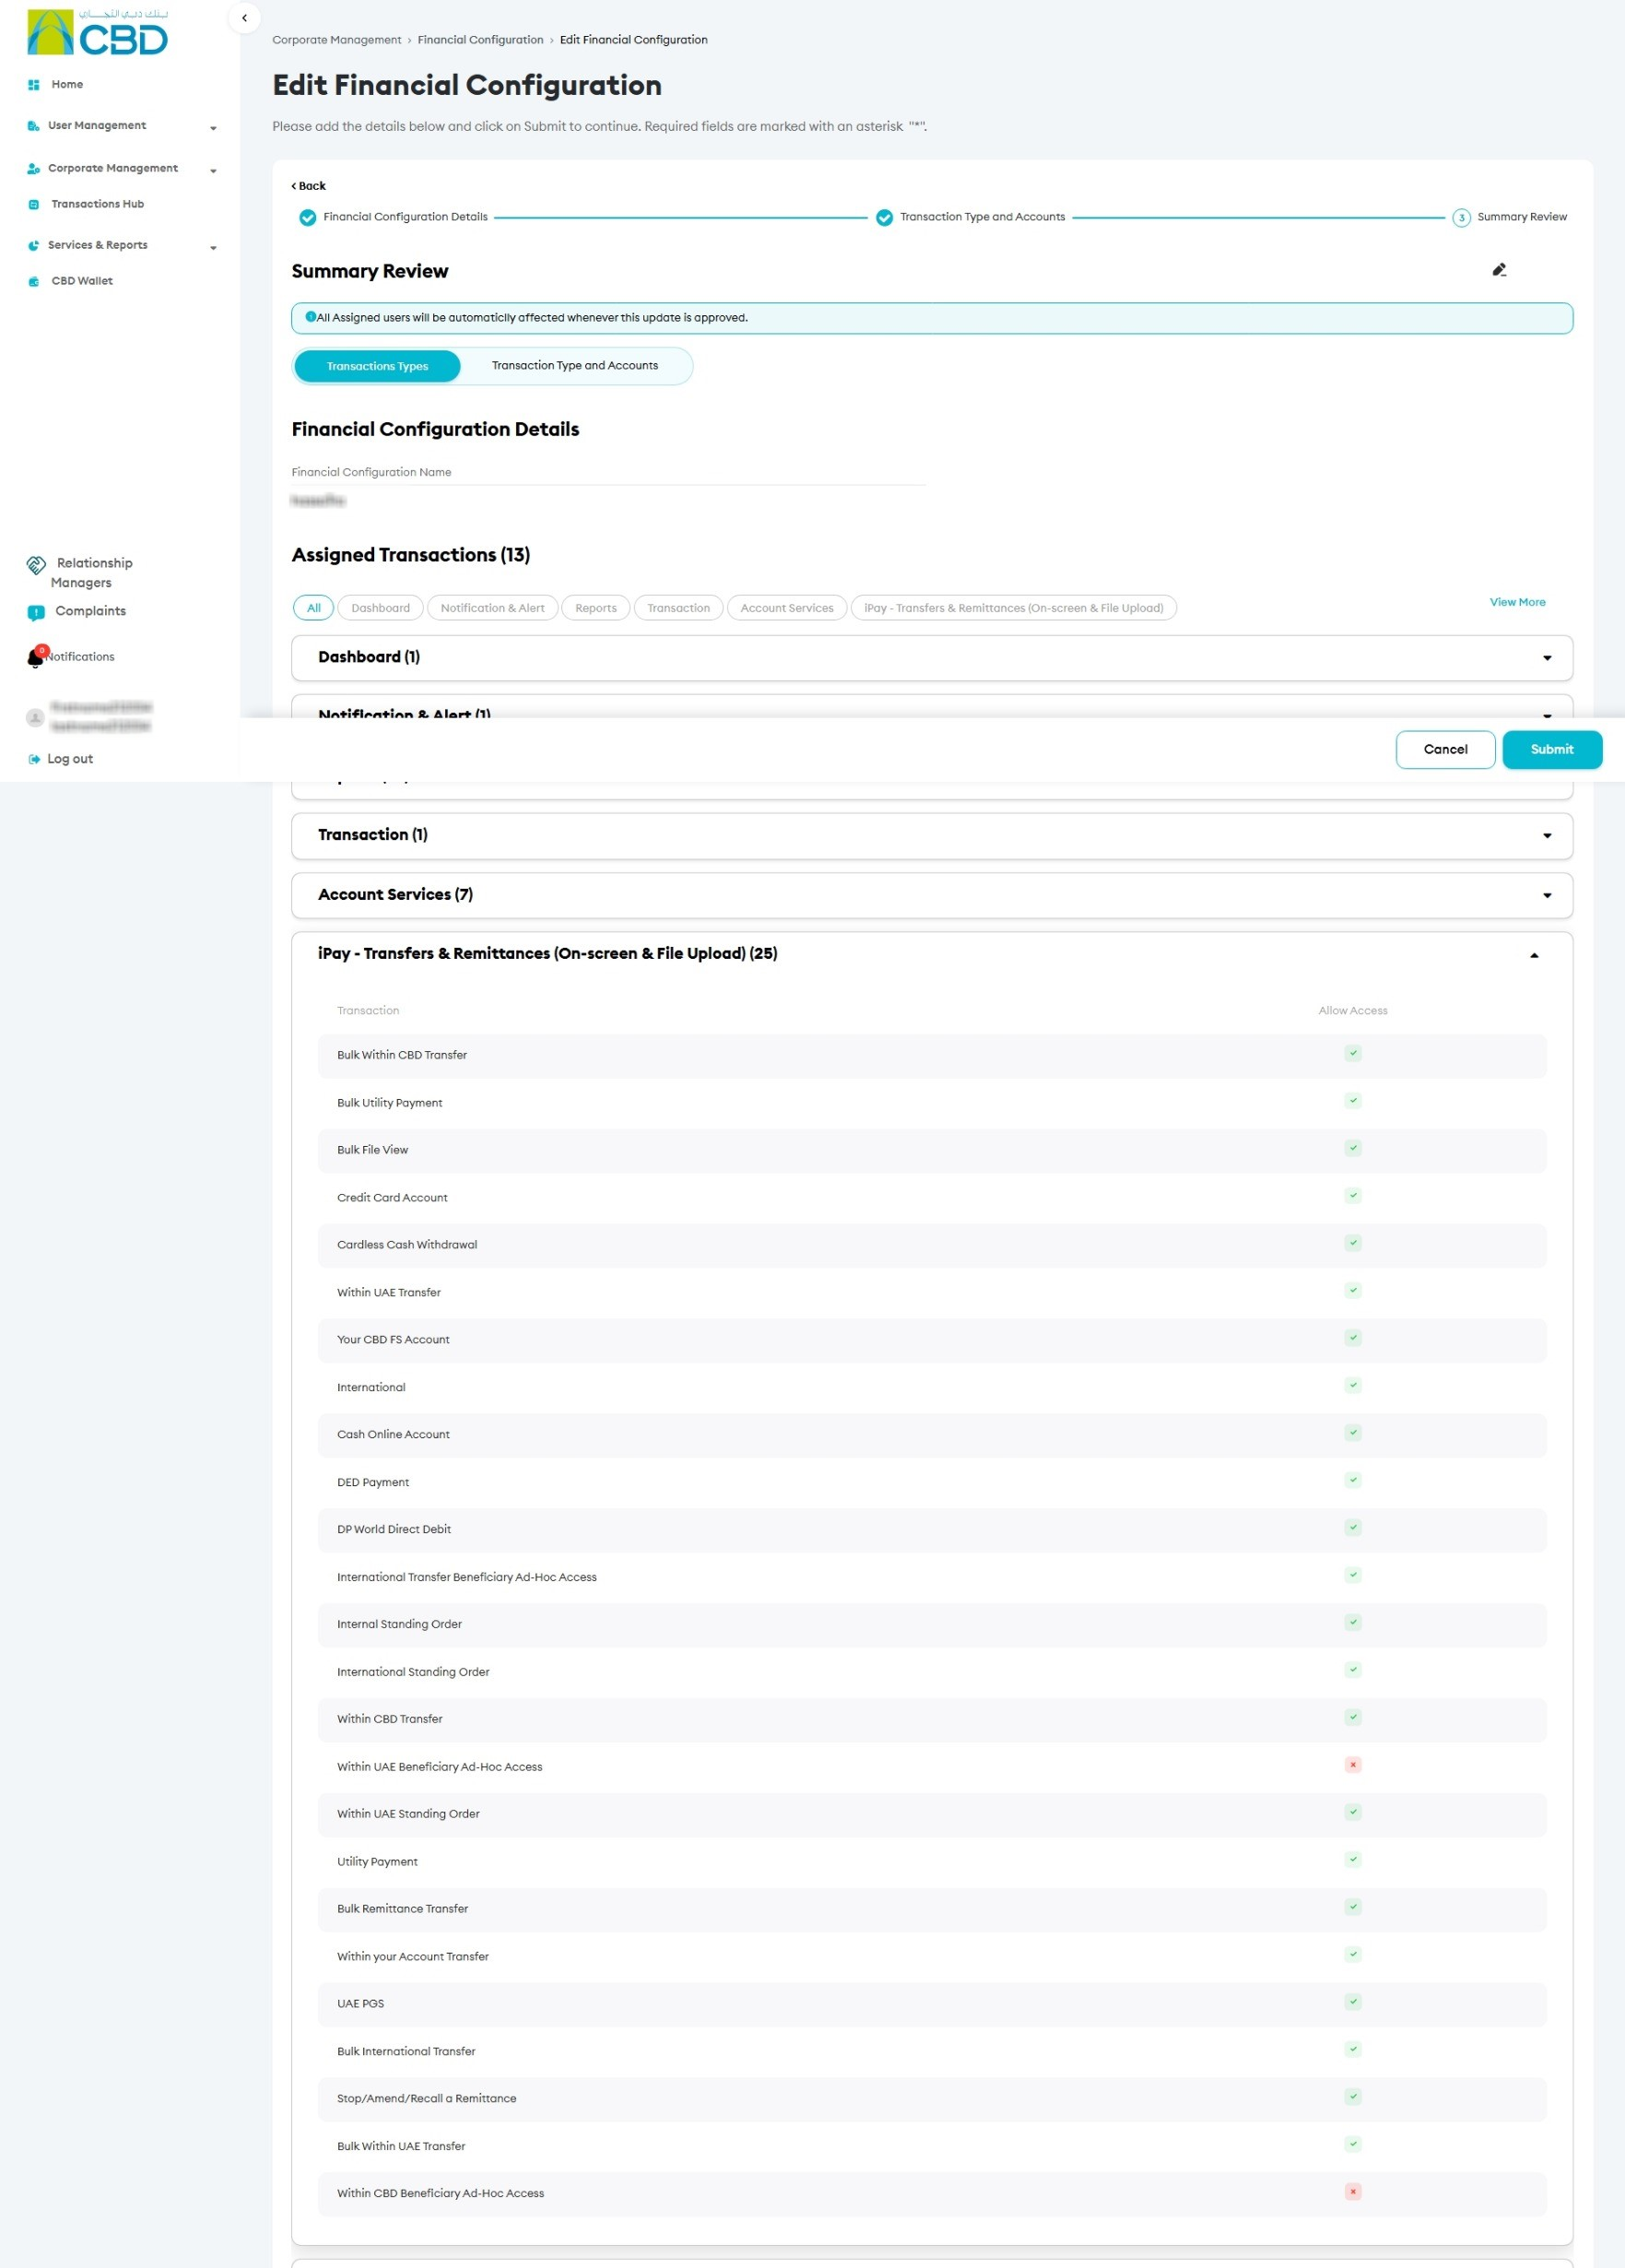
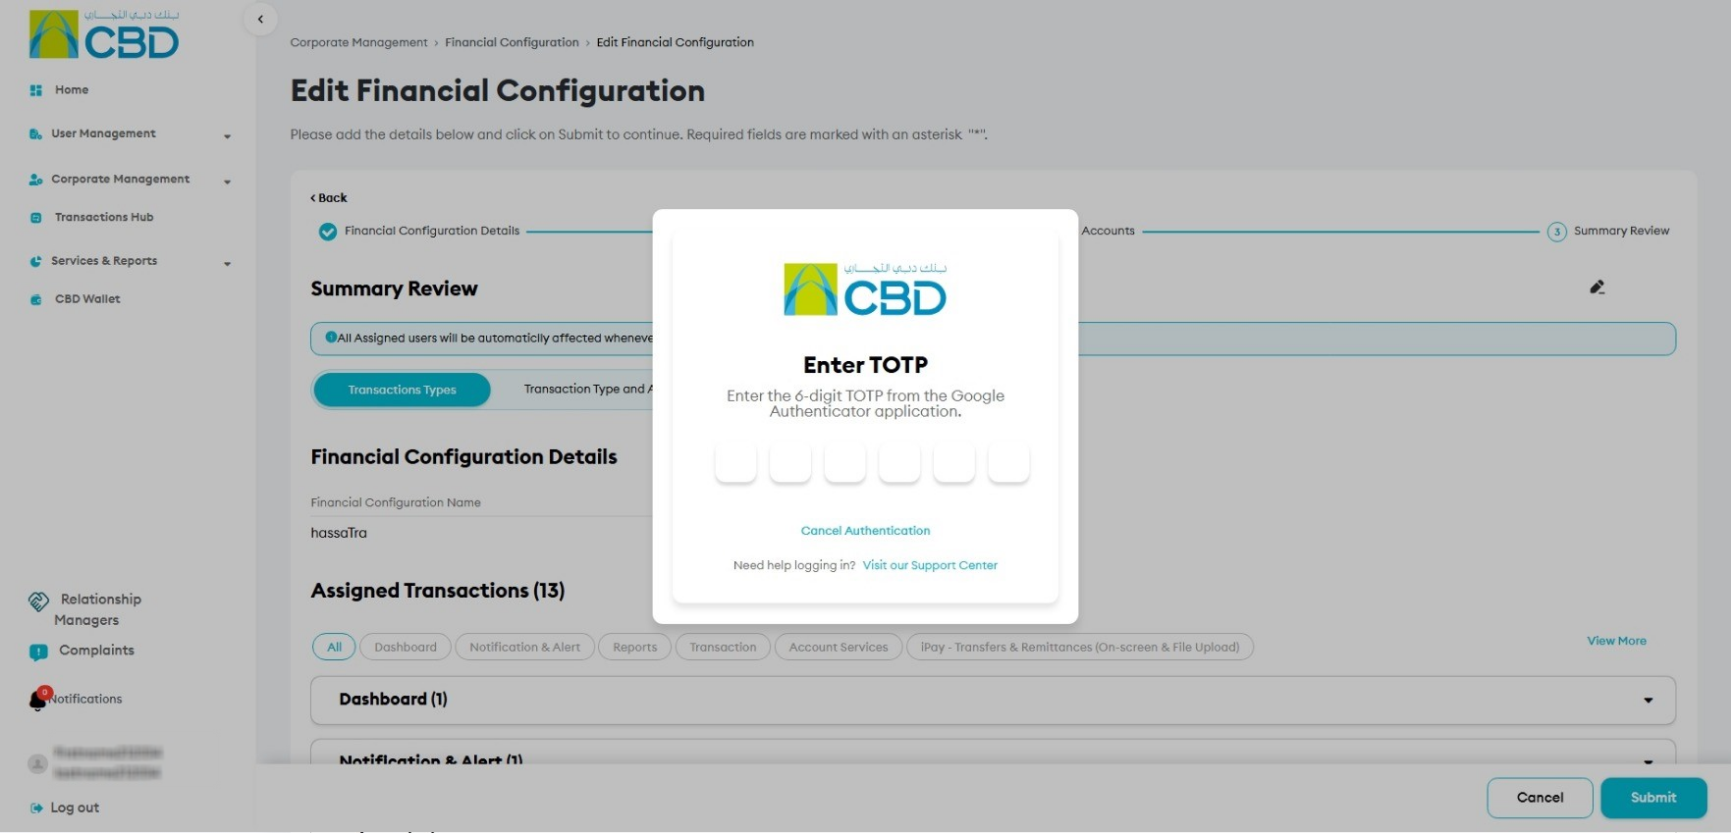
Step 6: Authenticate the Request
Complete authentication using one of the following methods:
iBusiness App Authentication
- Approve the request through the iBusiness Mobile App.
- Complete biometric or device verification.
Google Authenticator
- Enter the One-Time Password (OTP) generated by Google Authenticator.
After successful authentication, an acknowledgment screen will display the:
- Reference Number
- Date
- Time of Request Submission
An acknowledgment Screen will appear providing the user with a Reference Number, Date and Time of Transaction Initiation
- Step 7: Approval (If Maker–Checker Is Enabled)
- If your organization uses a Maker–Checker approval workflow:
- The request will be routed to the designated Approver.
- The Approver must:
- Log in to iBusiness
- Navigate to Transactions > Pending Your Authorizations
- Locate the request under: Modify Financial Configuration
- Review the request details.
- Select: Approve or Reject
- The configuration change will only take effect after the request has been approved.
- Approver can review the details of the request/documents uploaded, and act (Approve/Reject) on the request initiated.
Support Notes / Best Practices
- Ensure the correct Financial Configuration is selected before making any changes.
- Verify that all required accounts are selected before submitting the request.
- Keep a record of the generated reference number for future tracking and support enquiries.
- If Maker–Checker is enabled, the UAE-PGS service will not be activated until the request has been approved