
Use this guide to check, unpair, and manage registered devices for corporate users in Next Gen iBusiness.
Devices may need to be unpaired in the following scenarios:
- Lost or stolen device (to prevent unauthorized access)
- User upgrades to a new mobile device
- Employee exit or role change
- Inactive user accounts
- Technical issues (e.g. app or biometric failure)
- Removal of unused or multiple registered devices
1. Check if a Corporate User Has a Registered Device
Step 1: Access user details
- Log in to iBusiness as Admin
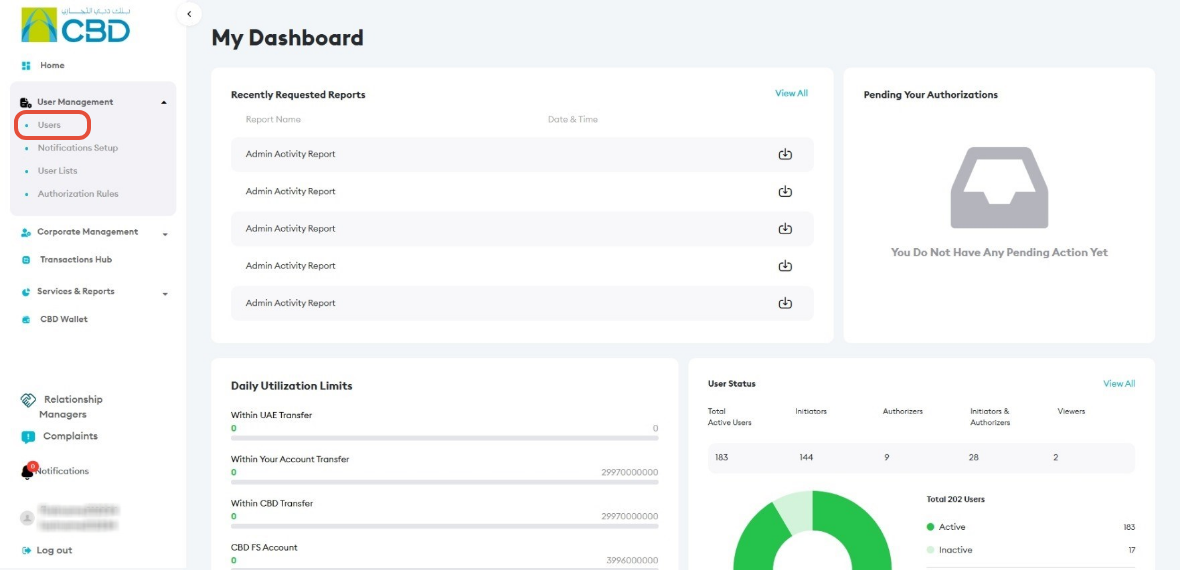
- Navigate to:
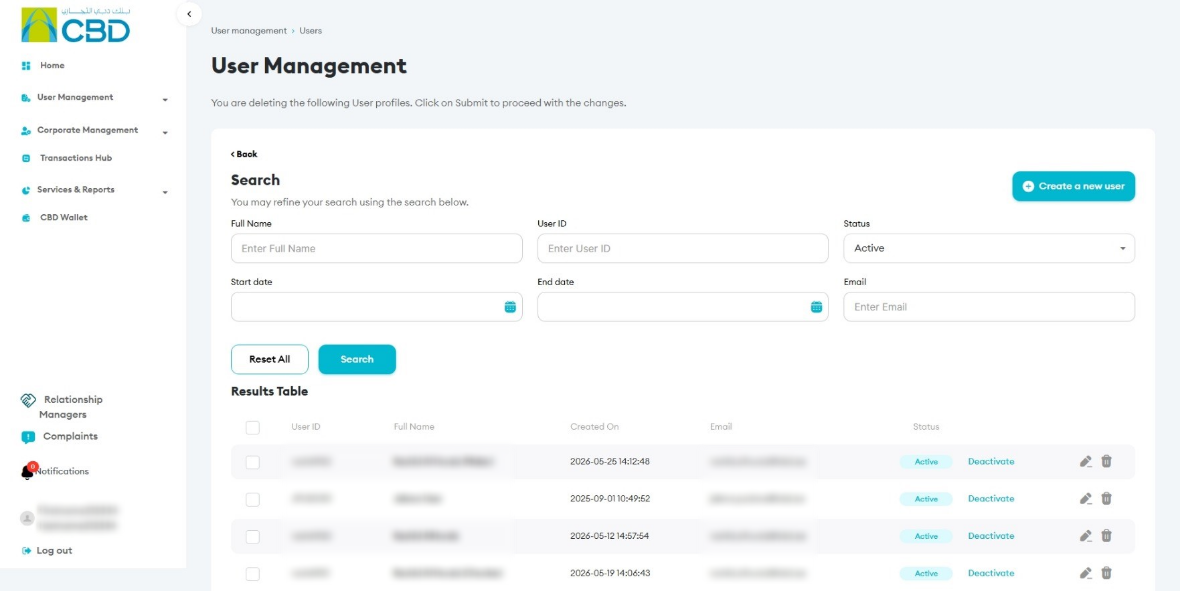
User Management ➜ Users - Search for the required user
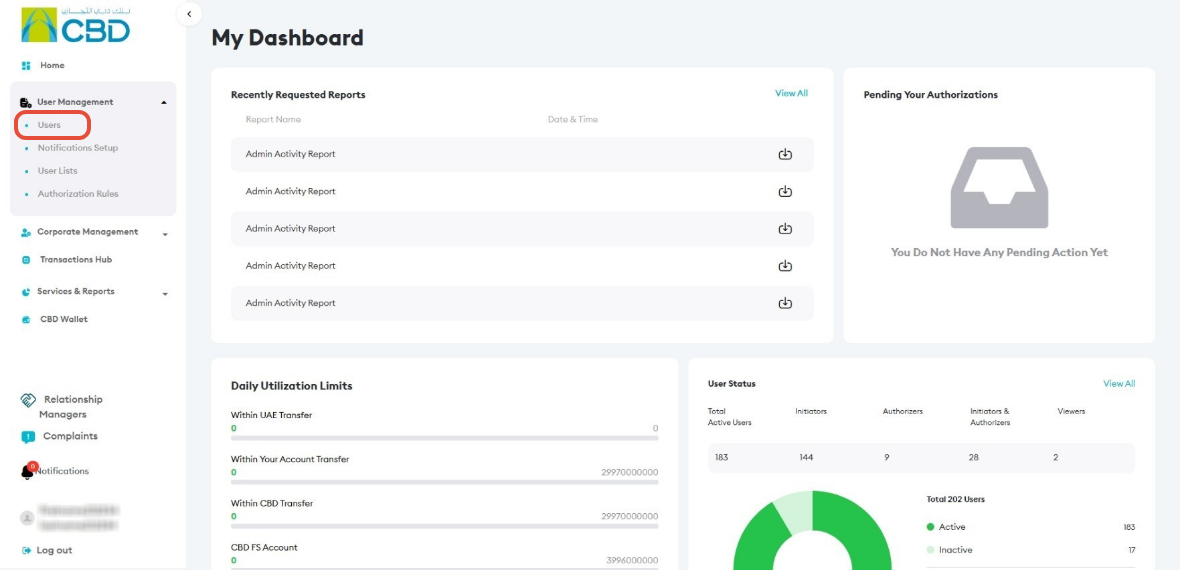
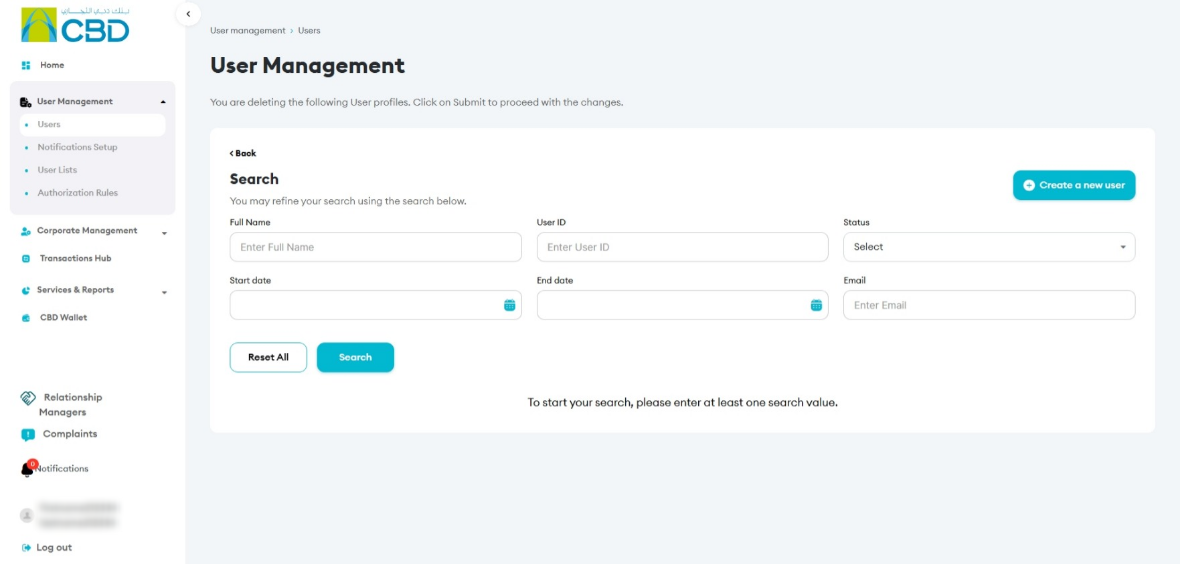
Step 2: View paired devices
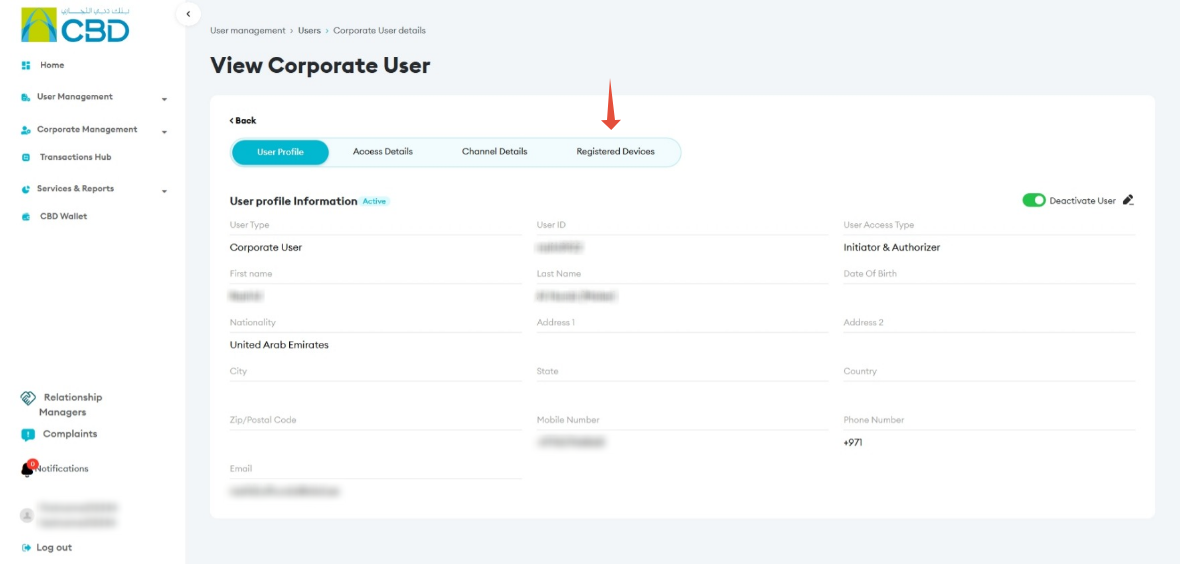
- Open the user profile
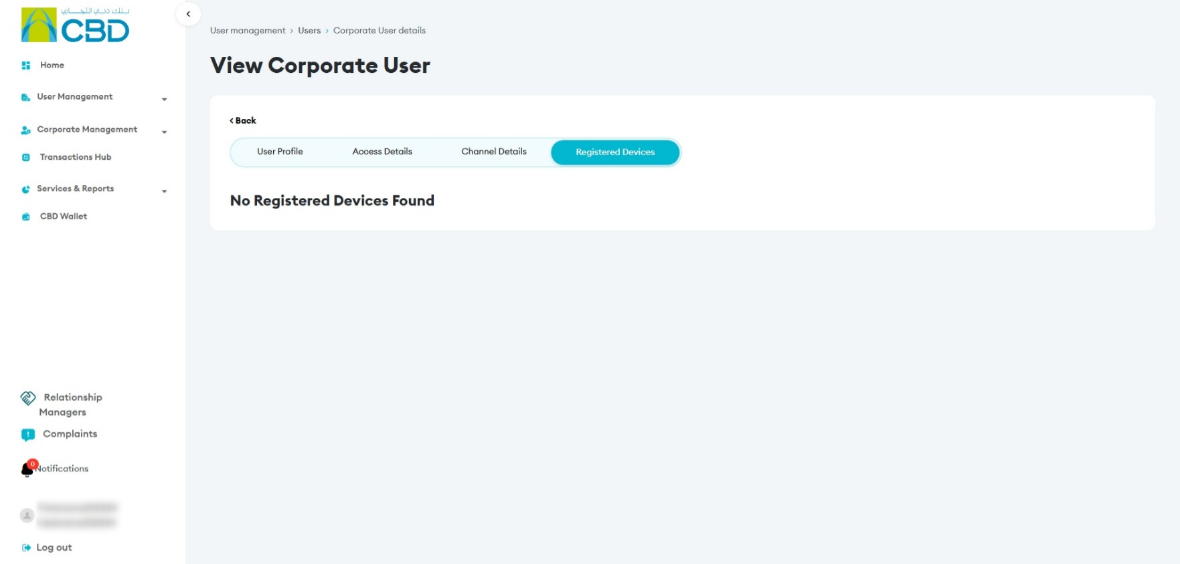
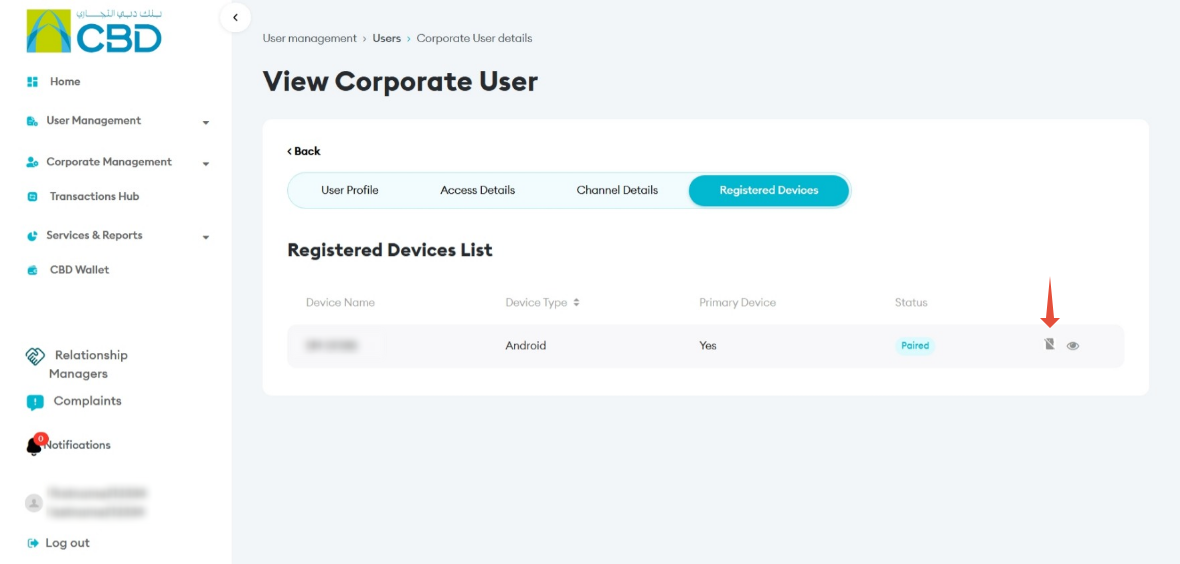
- Navigate to Registered Devices
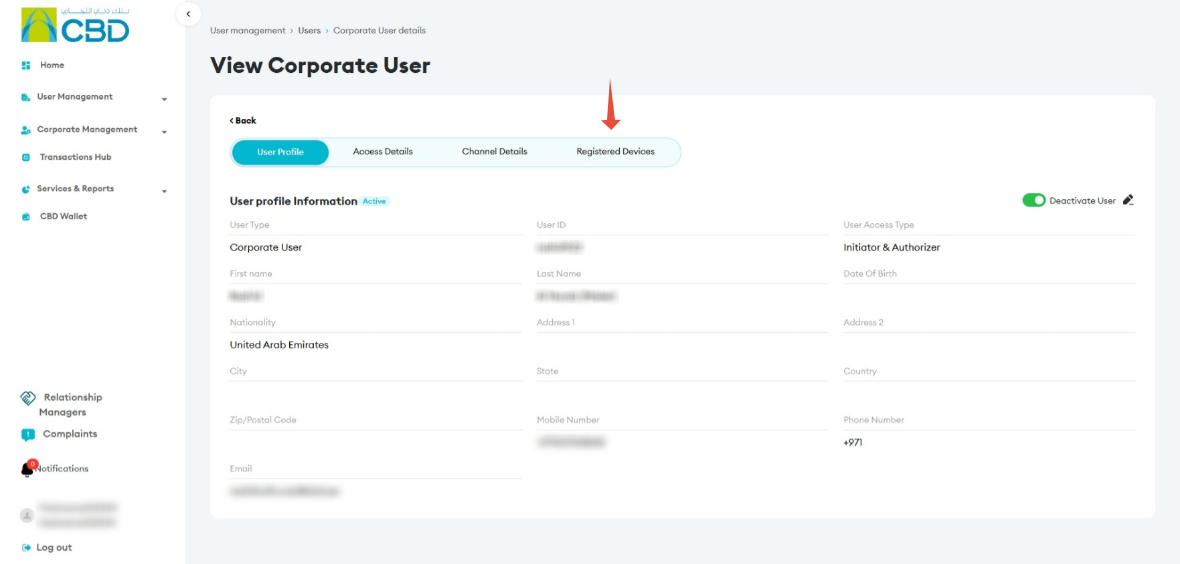
If a device is registered
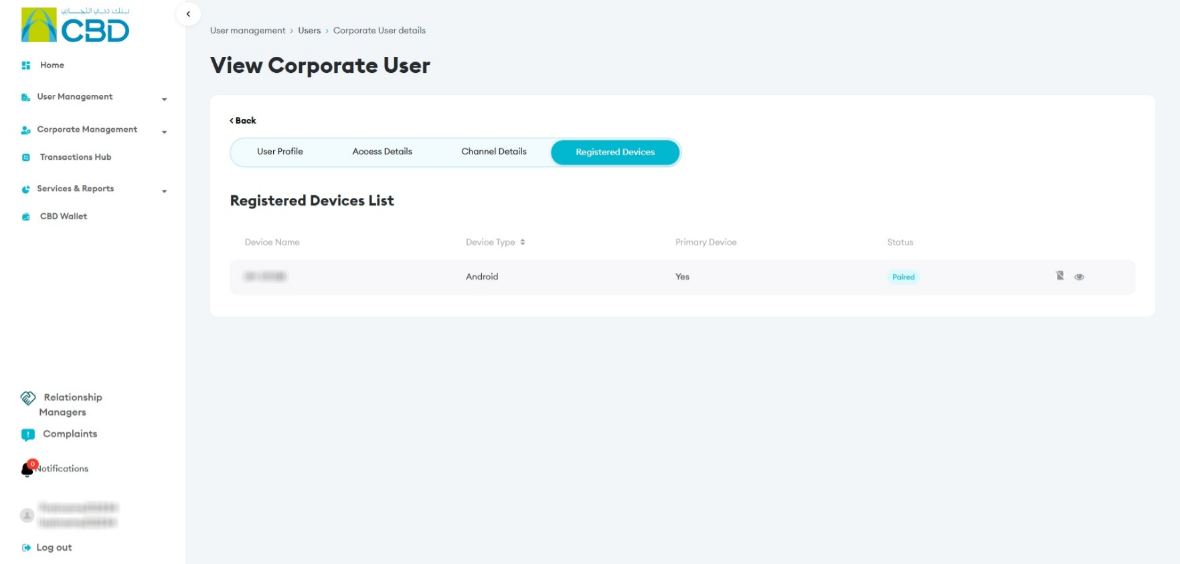
If no device is registered
2. Unpair a Device for a Corporate User
Step 1: Open user profile
- Log in as Admin
- Go to User Management ➜ Users
- Search and select the user
Step 2: Access registered devices
- Navigate to Registered Devices
- Click the eye icon
 to view device details
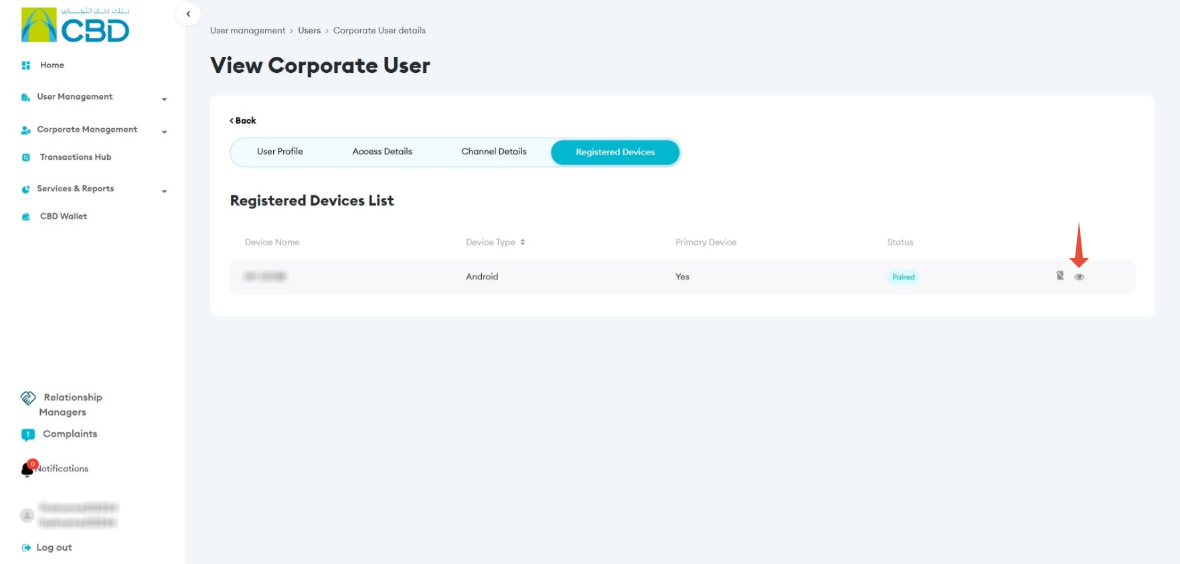
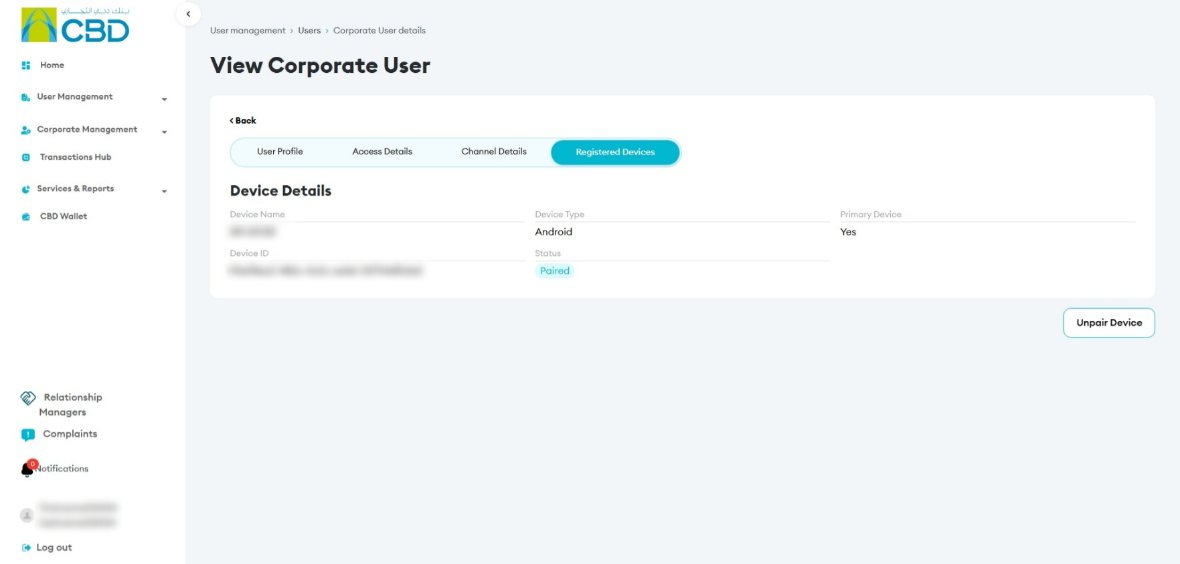
Step 3: Unpair the device
- Click Unpair Device
- Review the details
- Add a note (optional)
- Click Submit
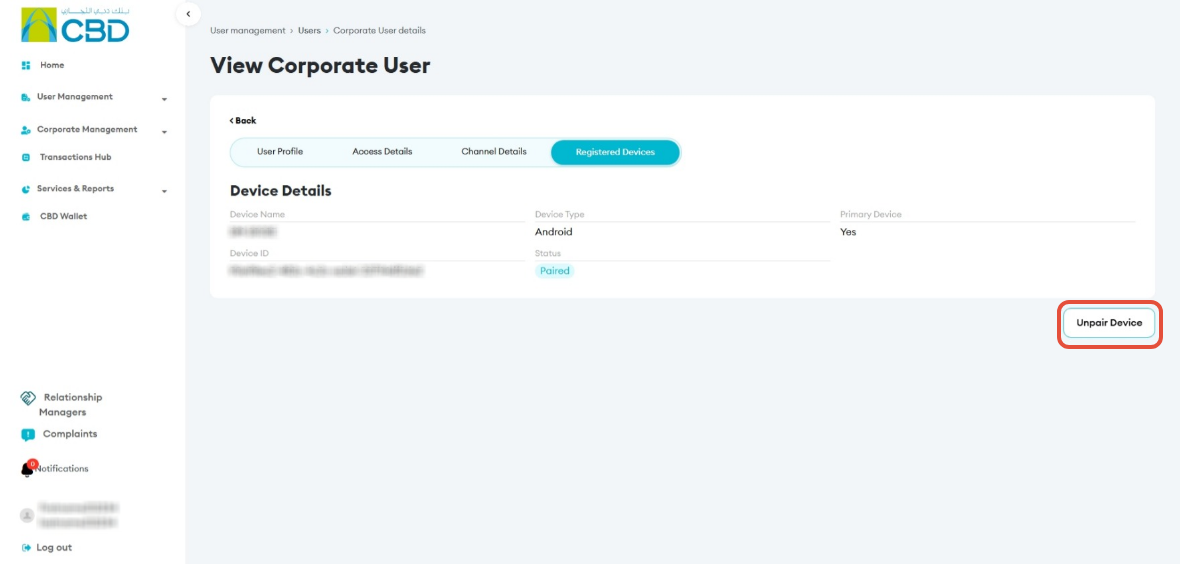
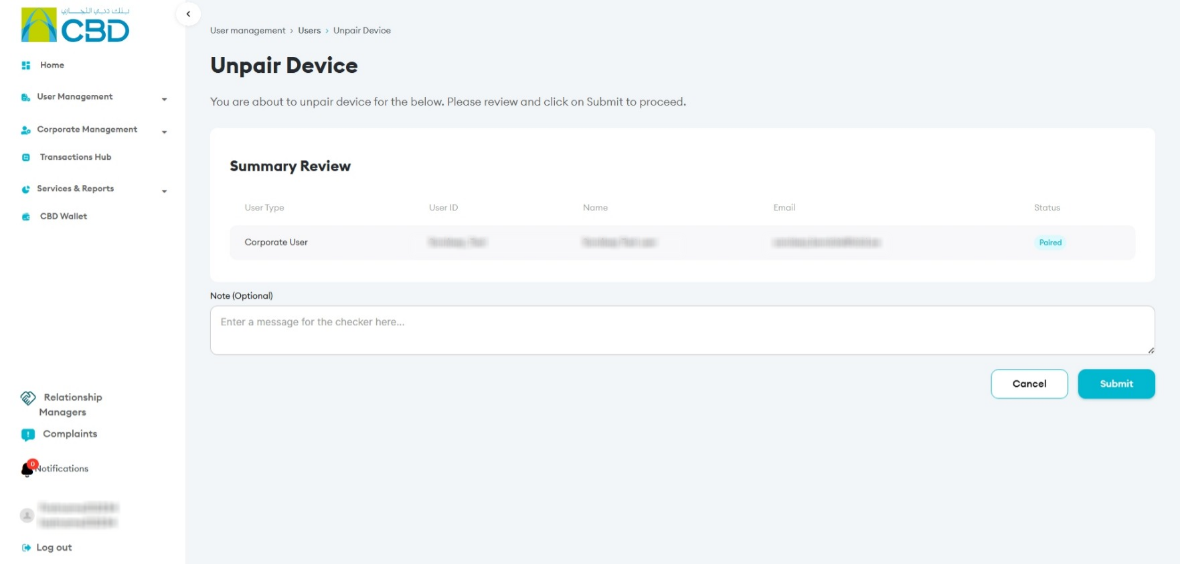
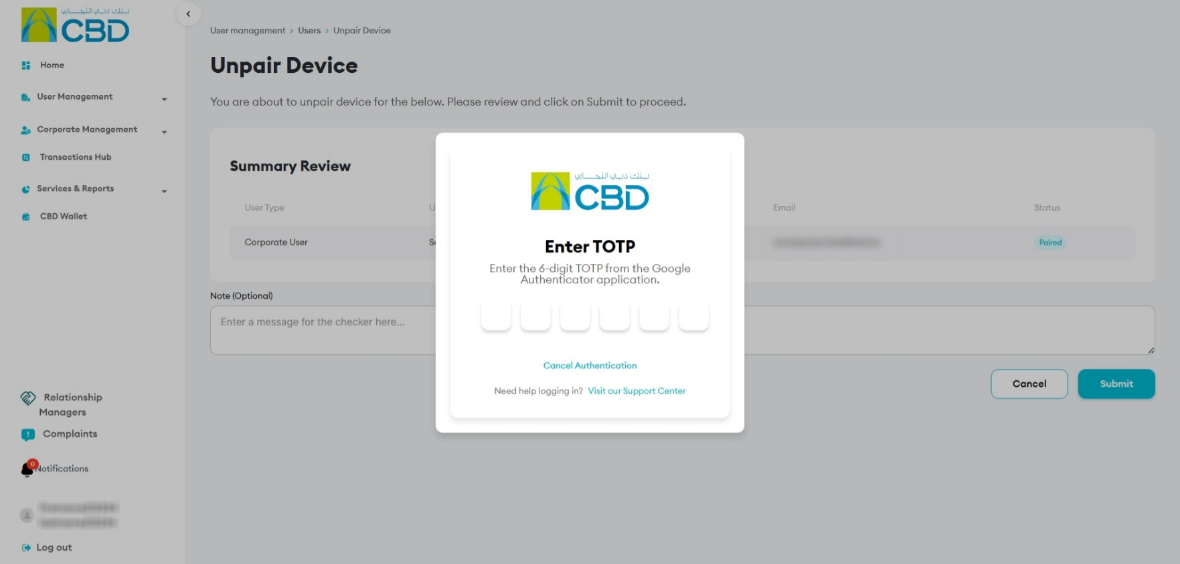
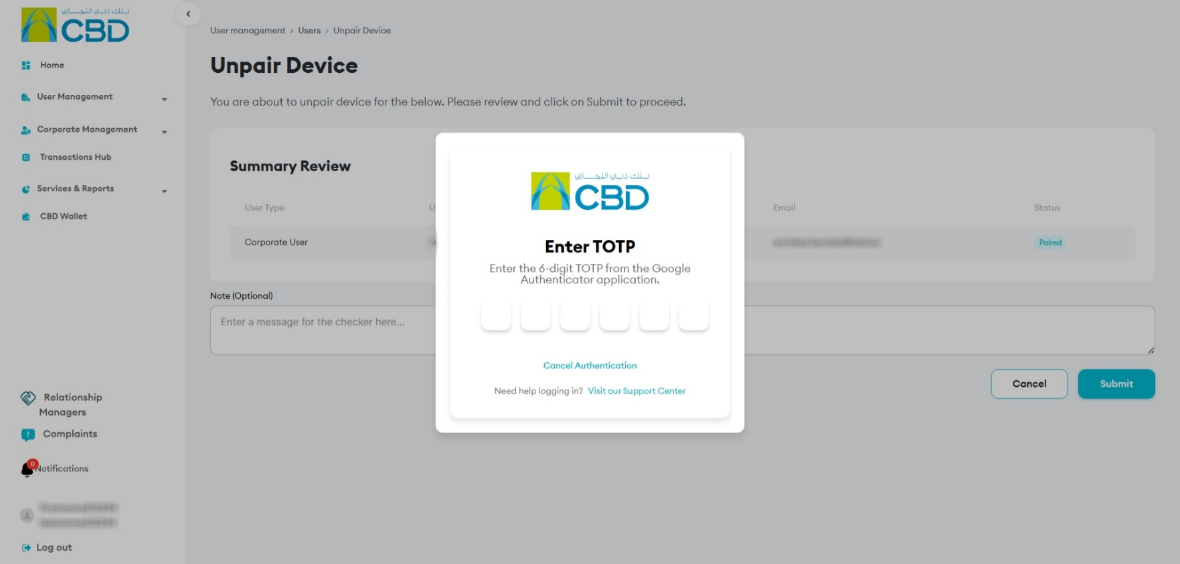
Step 4: Authenticate the request
- Approve the request using one of the following methods
- iBusiness Mobile App (biometric approval) using Face ID / fingerprint
- Google Authenticator by entering the OTP code
Once authenticated, you will be navigated to the confirmation screen with a reference number generated
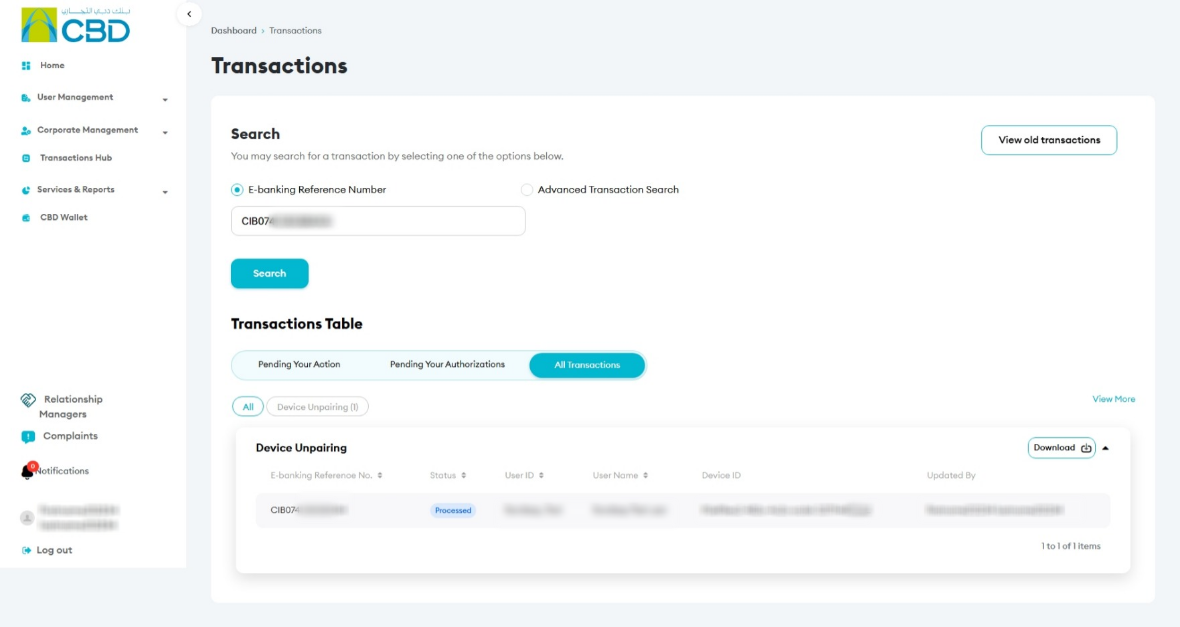
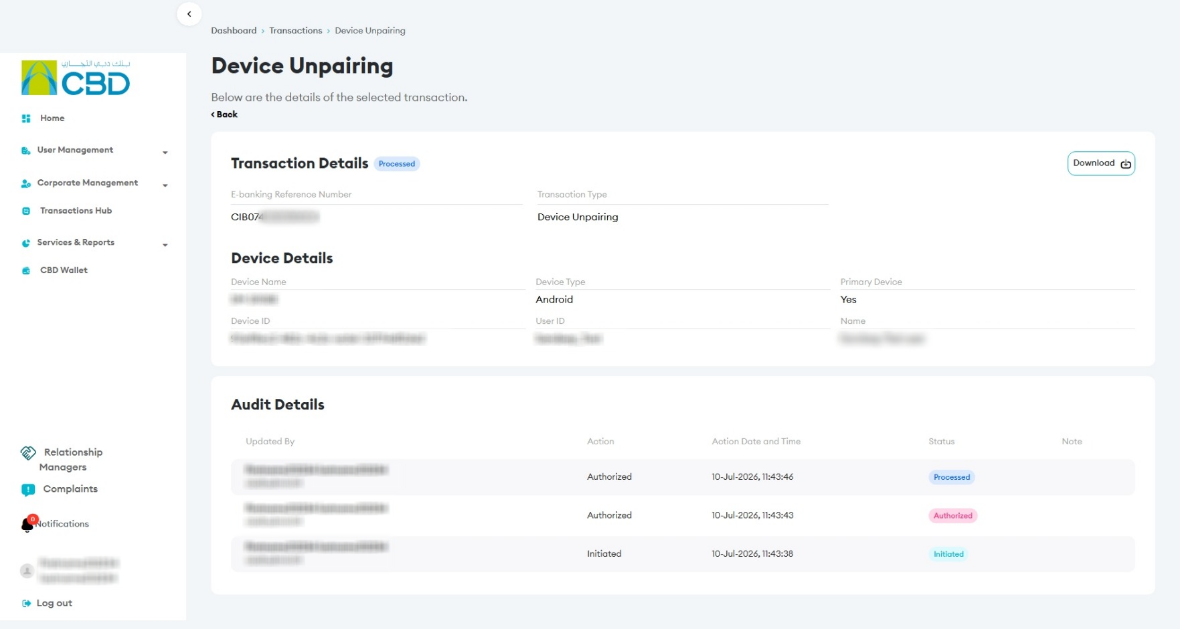
Step 5: Verify result
- The system will show successful unpairing status
- You can view:
- Transaction details
- E-banking reference number
3. Unpair Device for an Inactive User
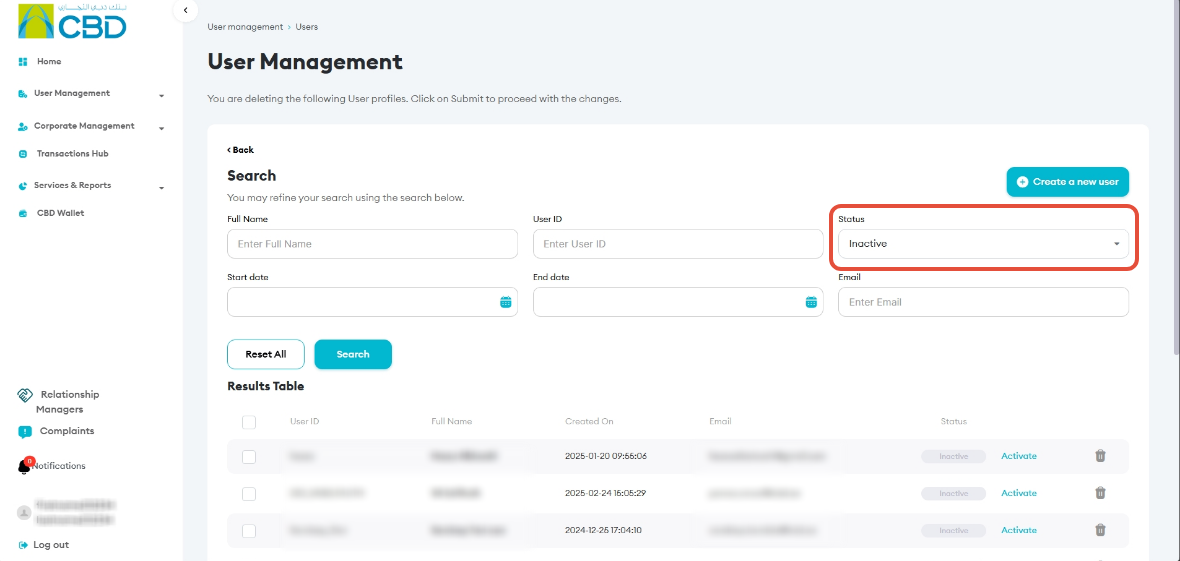
- Follow the same steps as above
- Ensure the correct inactive user is selected before proceeding
Authenticate the request
- Approve the request using one of the following methods
- iBusiness Mobile App (biometric approval) using Face ID / fingerprint
- Google Authenticator by entering the OTP code
4. Approval (If Maker–Checker is Enabled)
If a Maker–Checker setup is configured:
- The request is routed to a Checker/Approver.
- The Approver must review and Approve or Reject the request.
- The update is applied only after approval.