
Overview:
This guide provides step-by-step instructions for registering a Federal Tax Authority (FTA) Beneficiary in the iBusiness Web Portal for VAT payments.
Before creating the beneficiary, you must obtain your GIBAN and Invoice Number from the Federal Tax Authority (FTA) portal.
Before You Begin
Obtain Your GIBAN from the FTA Portal
- Log in to the FTA Portal.
- Navigate to the Dashboard.
- Locate and note the following information:
- GIBAN
- Invoice Number
Important: Each entity registered with the FTA is assigned a unique GIBAN. This GIBAN must be used when making VAT payments through UAEFTS.
Step 1: Access Beneficiary Creation
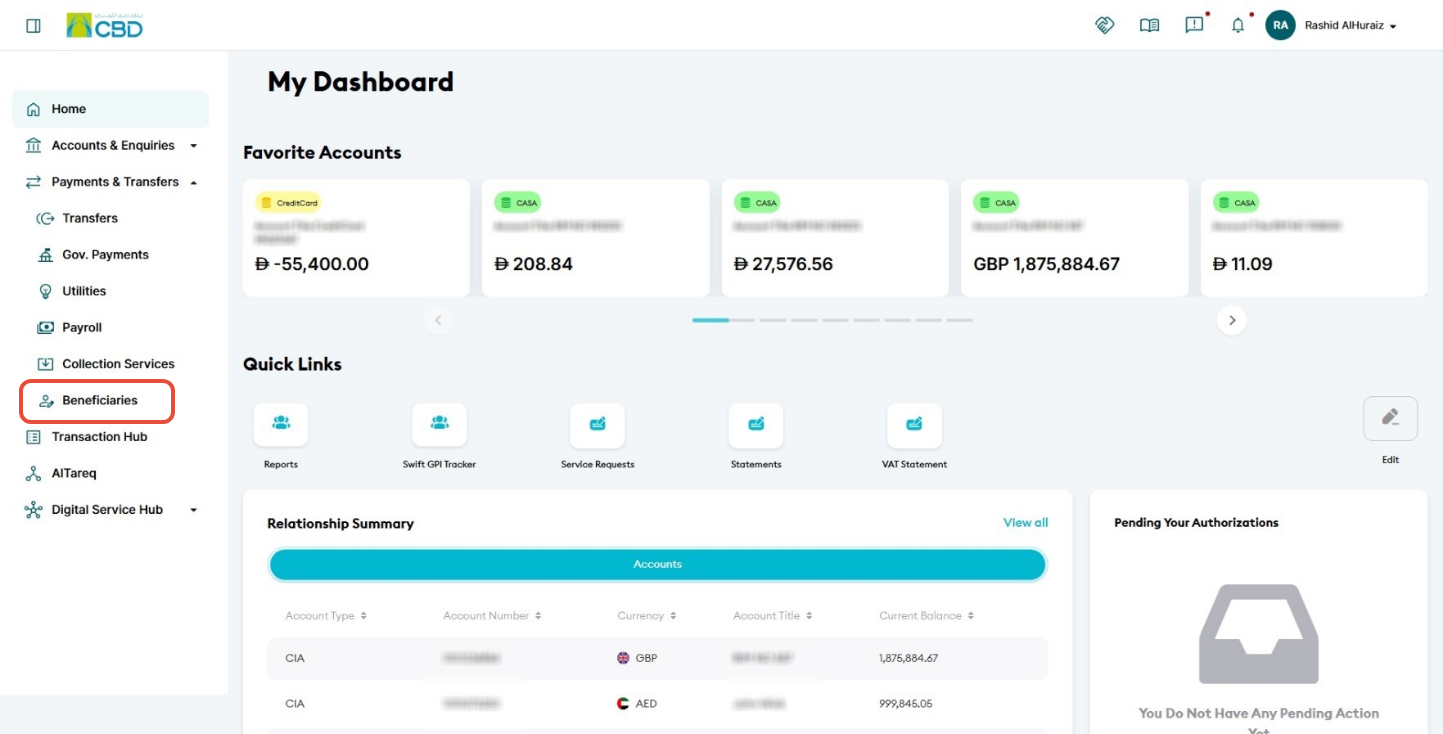
- Log in to iBusiness.
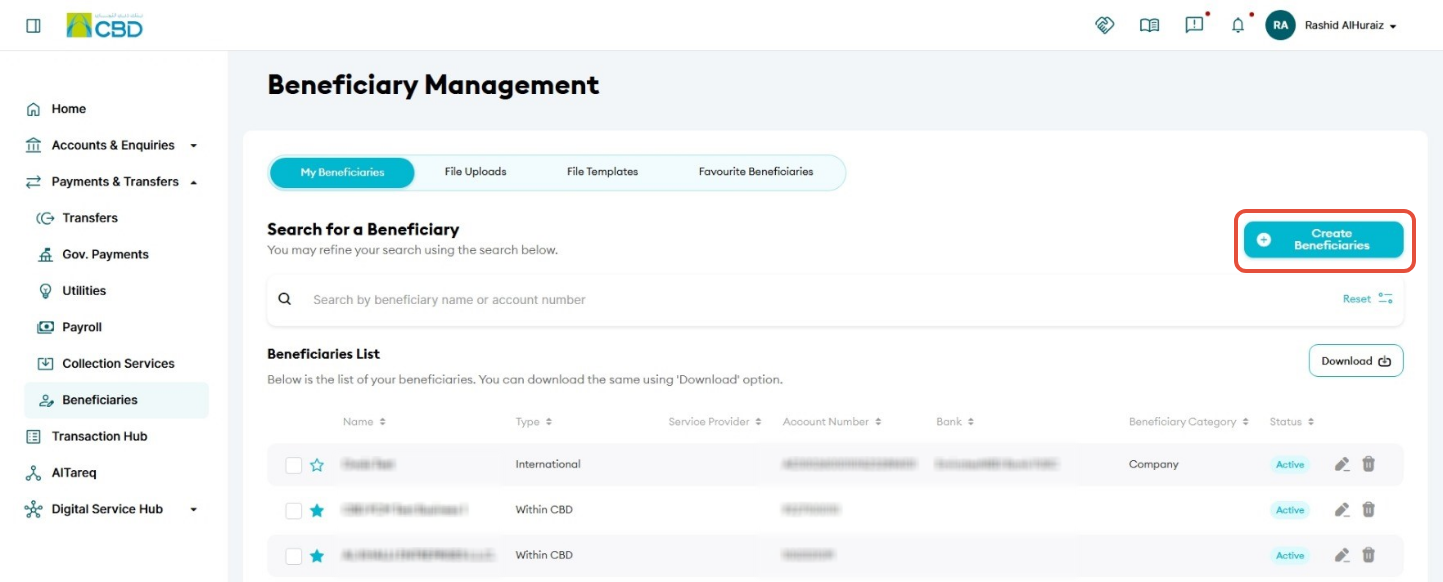
- Navigate to: Payments & Transfers ➜ Beneficiary Management
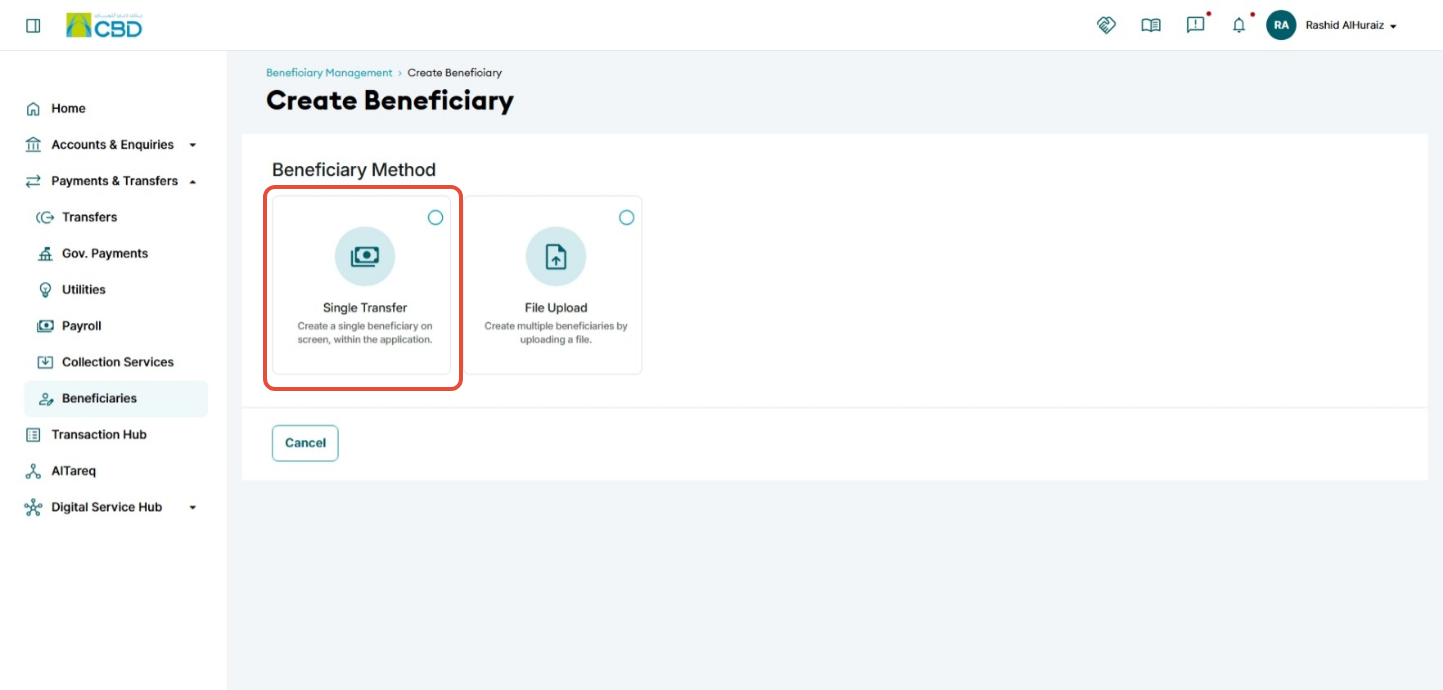
- Click Create Beneficiary.
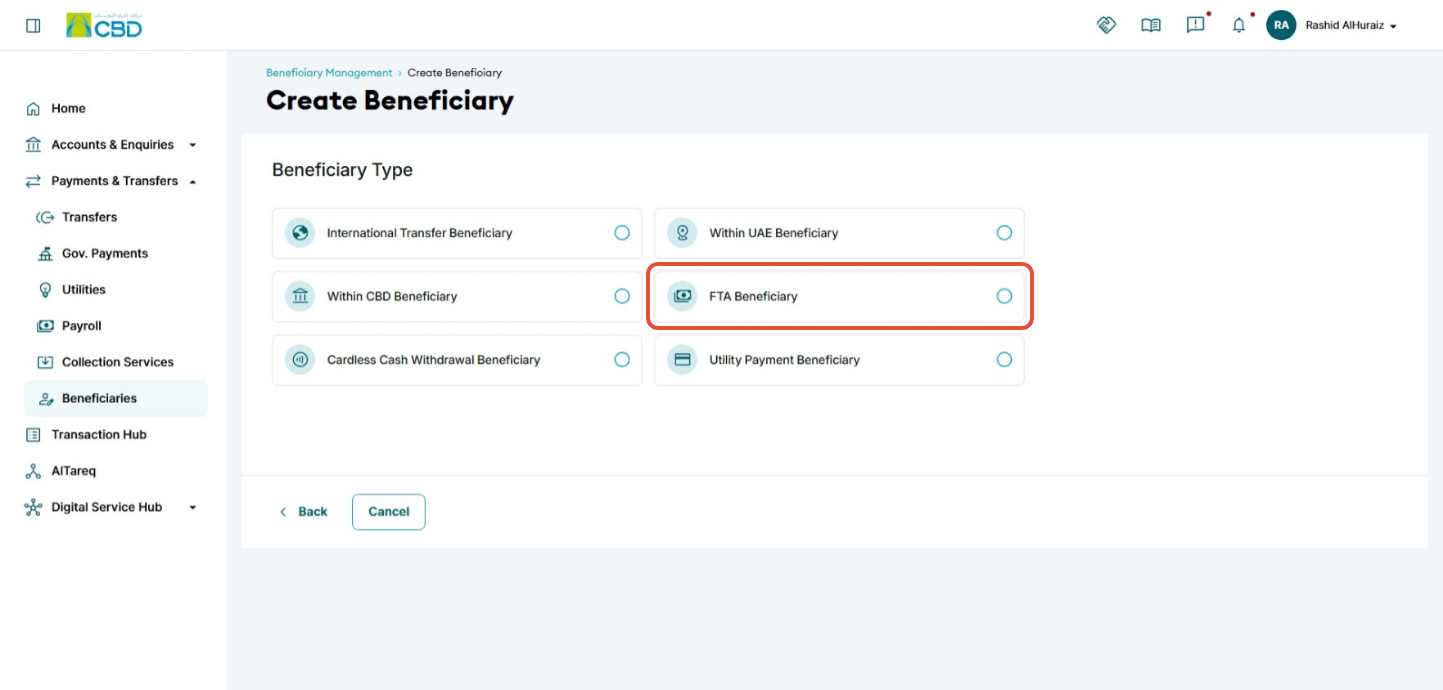
- Select FTA as the transaction type.
- Click Submit.
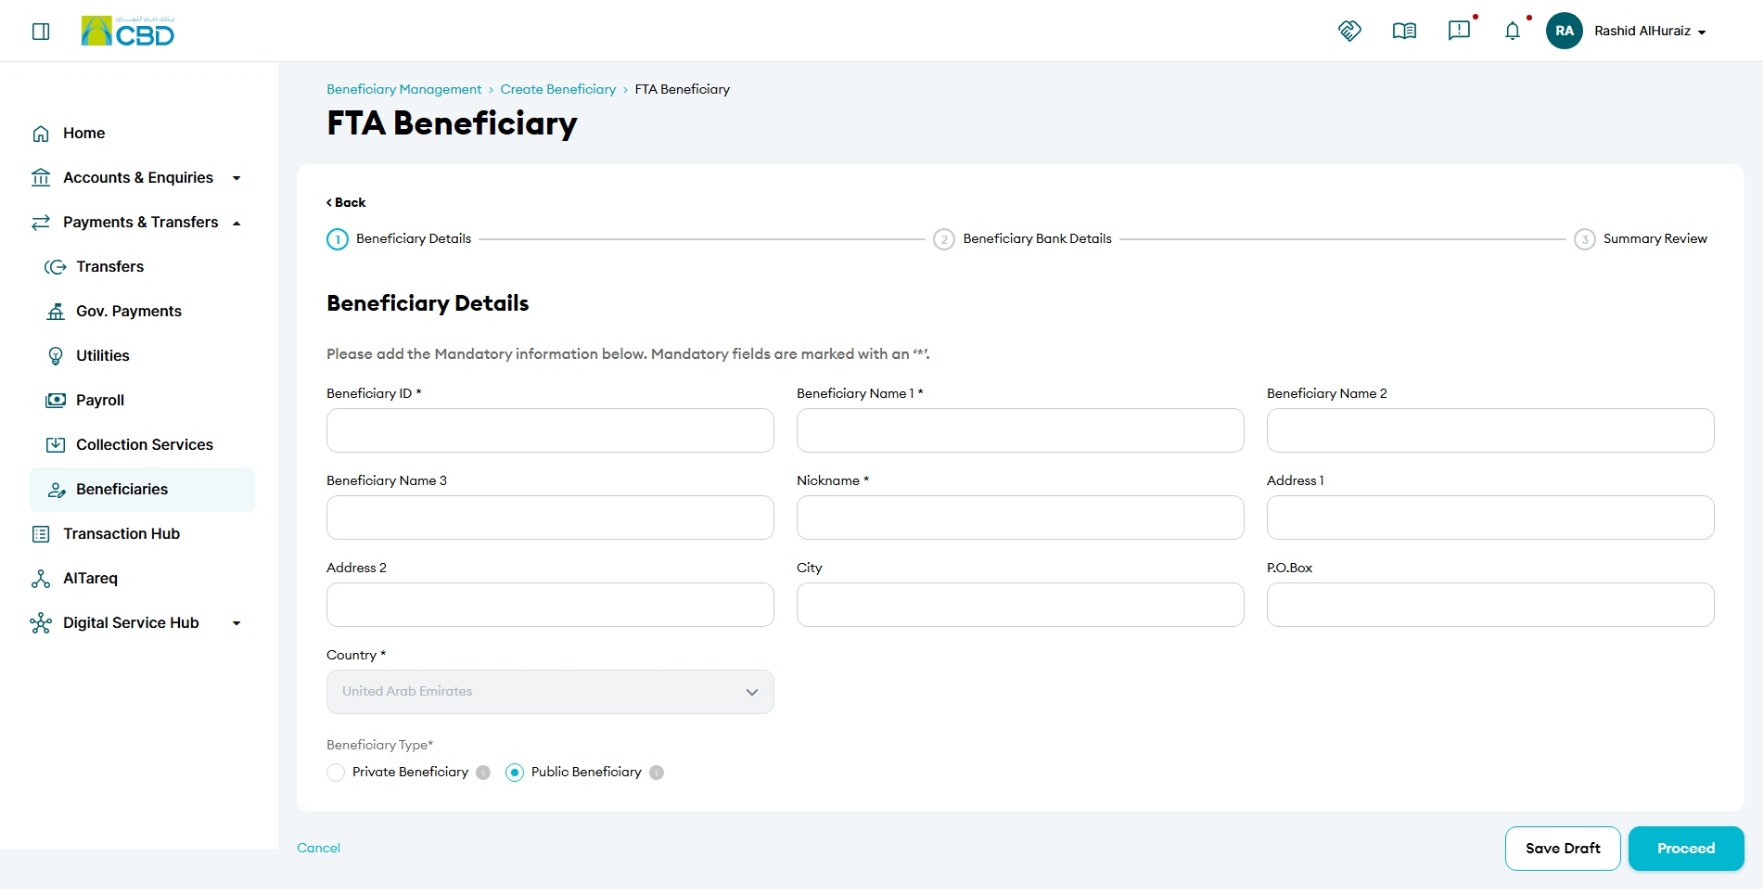
Step 2: Enter Beneficiary Details
Complete all mandatory beneficiary information.
Required Information
Beneficiary Information
- Beneficiary ID
- Beneficiary Name 1 (TRN 15-Digit Tax Registration Number)
- Beneficiary Name 2(if applicable)
- Beneficiary Name 3(if applicable)
- Nickname
Address Information
- Address Line 1
- Address Line 2
- City
- P.O. Box
- Country
Beneficiary Type
Select one of the following:
- Private
- Public
FTA Requirement
For Beneficiary Name 1, enter: TRN (15-Digit Tax Registration Number) – FTA
Once all details have been entered, click Proceed.
Step 3: Enter and Validate Bank Details
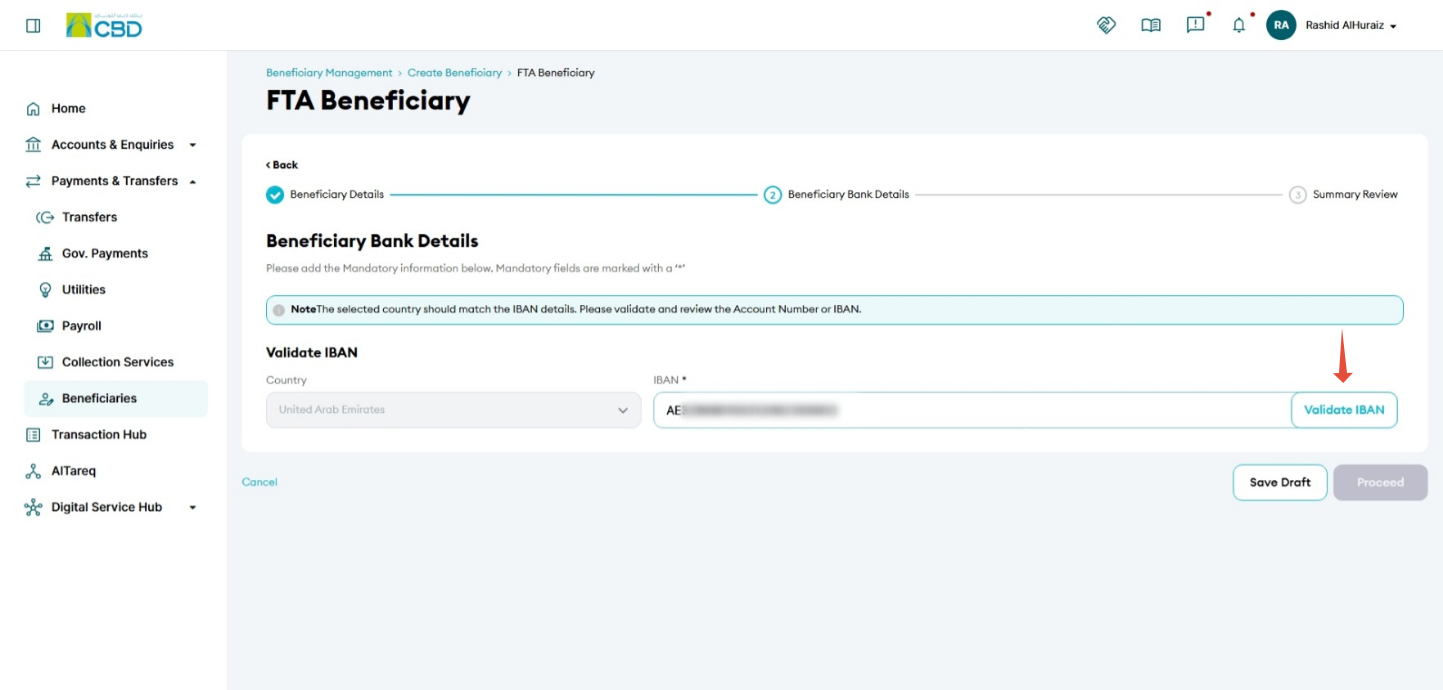
- Enter the 23-digit GIBAN obtained from the FTA portal.
- Click Validate IBAN.
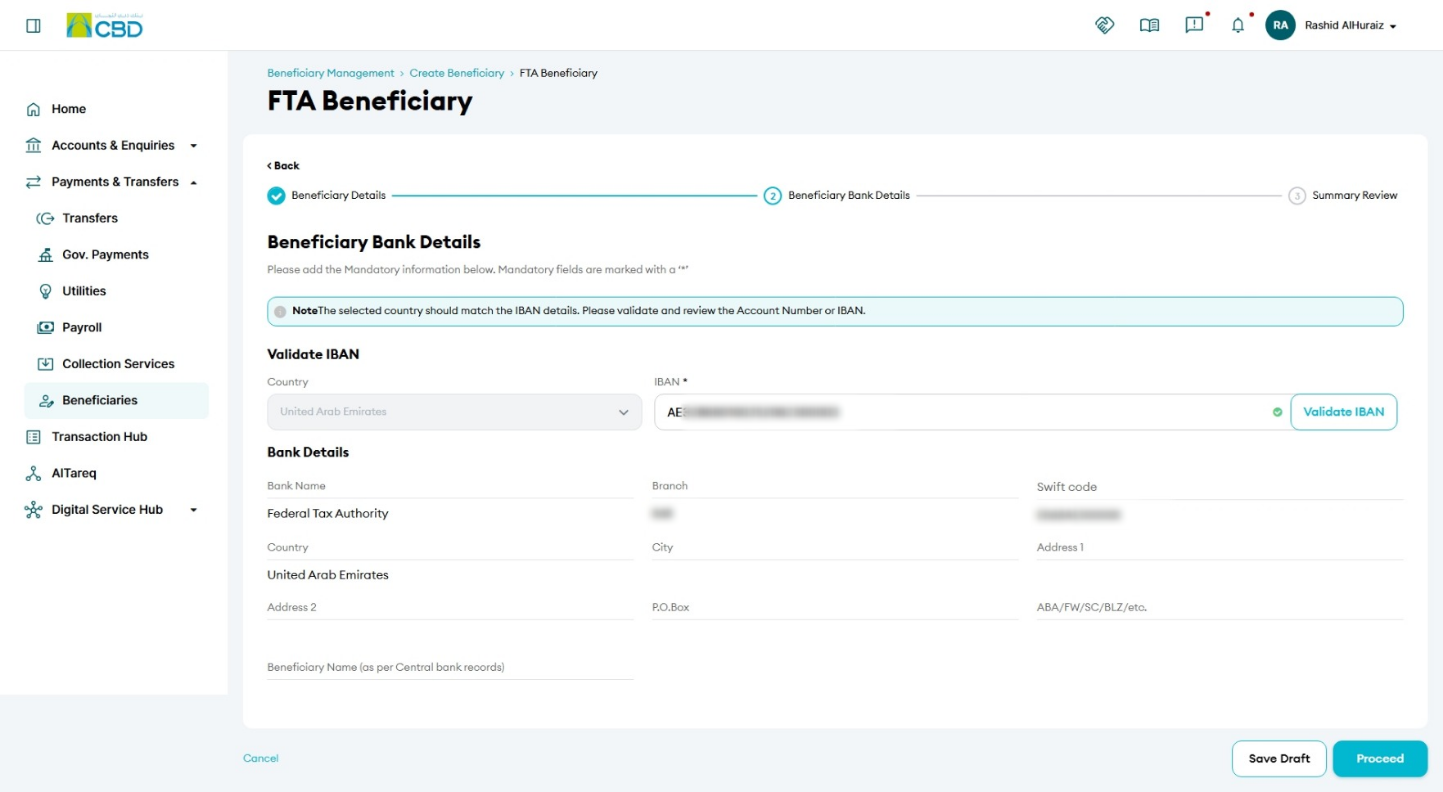
- The system will validate the GIBAN and automatically retrieve the beneficiary bank details.
- Review the populated bank information carefully.
- Click Proceed.
Important: Ensure the GIBAN is entered exactly as it appears on the FTA portal. An incorrect GIBAN may result in payment failures or delays.
Step 4: Review and Submit
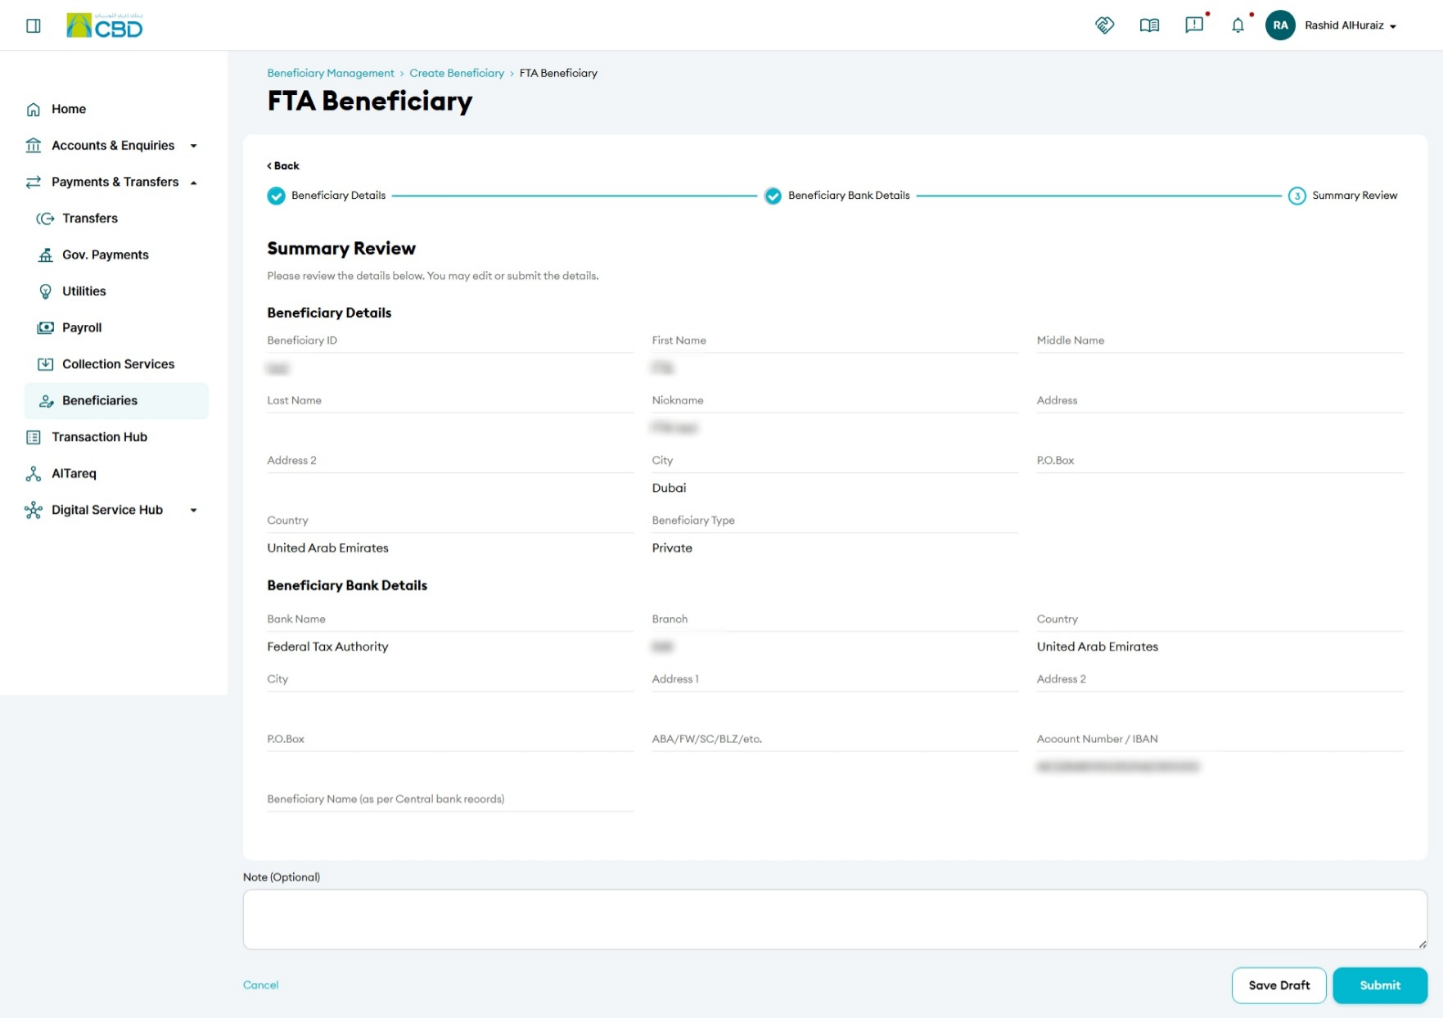
- Review all beneficiary and bank details.
- Verify that:
- TRN number is correct
- GIBAN is correct
- Beneficiary information is accurate
- Click Submit.
Step 5: Authenticate the Request
Complete authentication using one of the following methods:
iBusiness App Authentication
- A notification will be sent to the registered iBusiness Mobile App.
- Review the request details.
- Approve the request using biometric or device authentication.
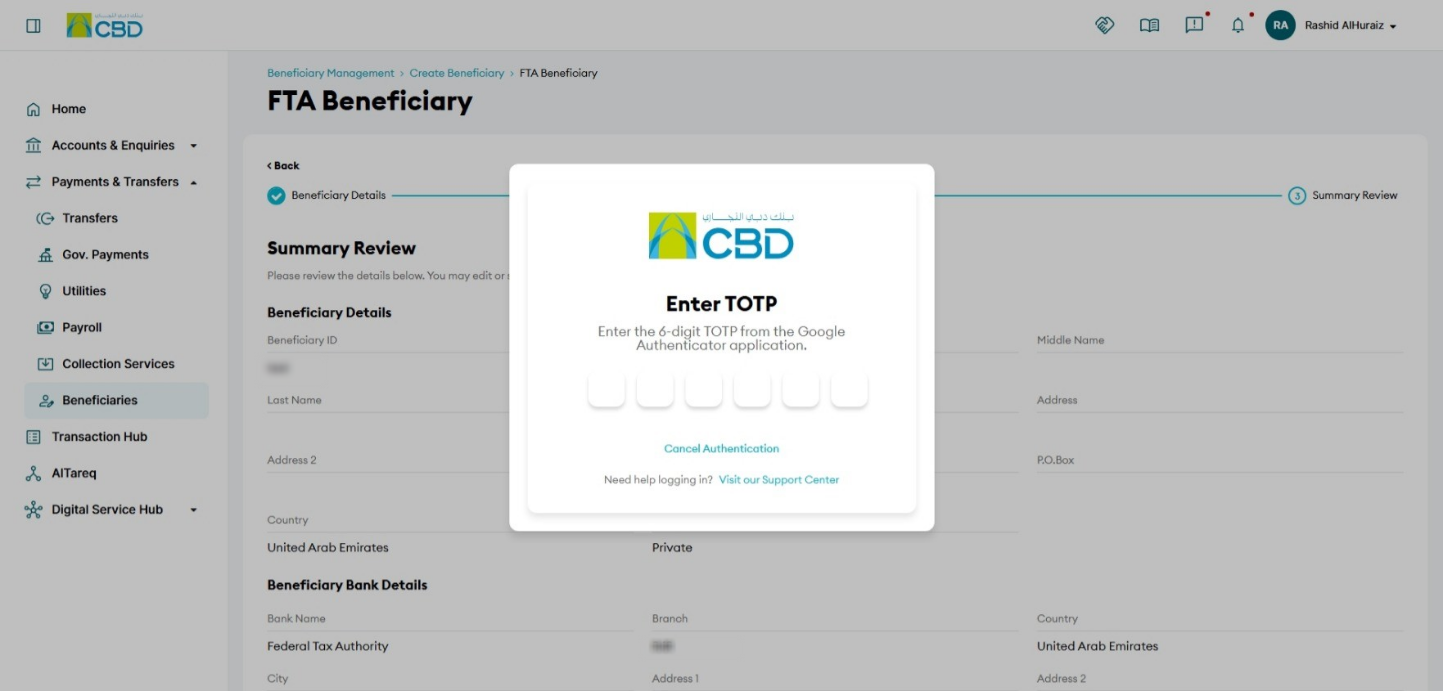
Google Authenticator
- Open the Google Authenticator application.
- Enter the generated One-Time Password (OTP).
Once authentication is completed successfully, the beneficiary registration request will be submitted.
Step 6: Approval (If Maker–Checker Is Enabled)
If your organization uses a Maker–Checker approval workflow:
- The request will be routed to the designated Approver.
- The Approver must:
- Log in to iBusiness
- Navigate to Transactions ➜ Pending Your Authorizations
- Locate the request awaiting approval.
- Review the beneficiary details.
- Select: Approve or Reject
The beneficiary will only become available for VAT payments after all required approvals have been completed.
Support Notes / Best Practices
- Obtain the GIBAN directly from the FTA portal before creating the beneficiary.
- Ensure the TRN (15-digit Tax Registration Number) is entered correctly in Beneficiary Name 1.
- Always validate the GIBAN before submitting the request.
- Review all beneficiary and bank details carefully to avoid payment processing issues.
- Retain the generated reference number for future tracking and support enquiries.