
This guide provides step-by-step instructions for registering a WPS MOL ID in Next Gen CIB using the iBusiness platform. A registered MOL ID is required before initiating WPS Salary File Transfers.
Step 1: Access WPS Registration
1. Log in to iBusiness.
2. Navigate to: Payment & Transfers ➜ Payroll
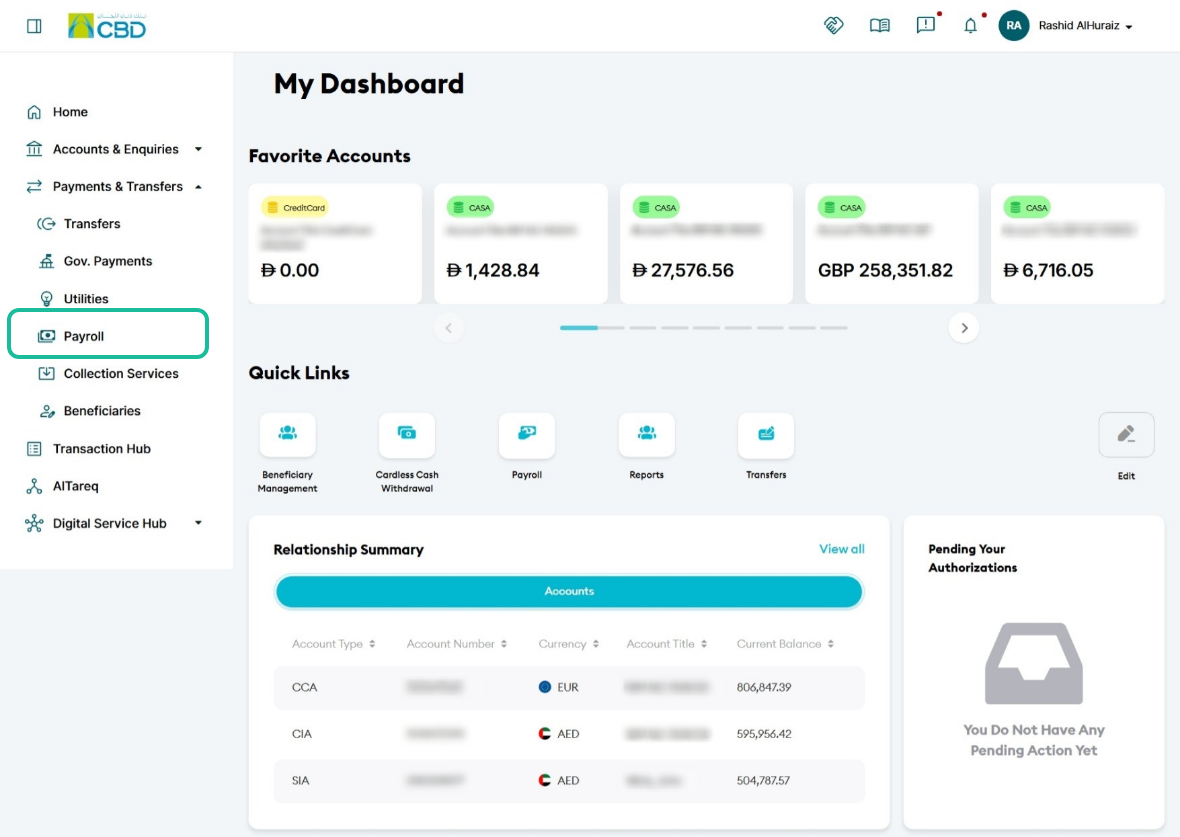
3. Select the Registered WPS tab.
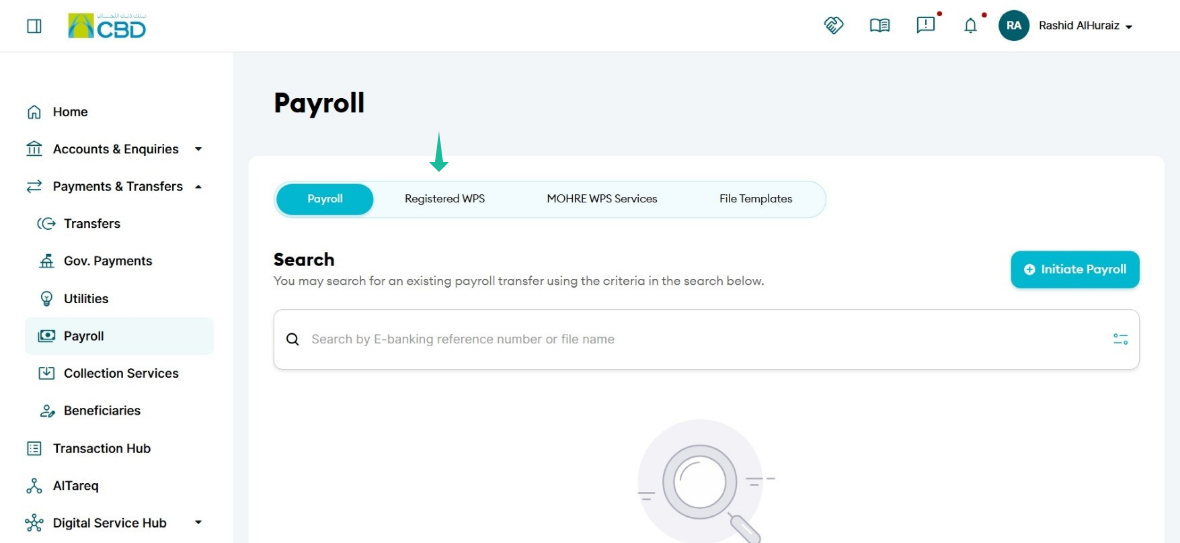
4. Click Register WPS.
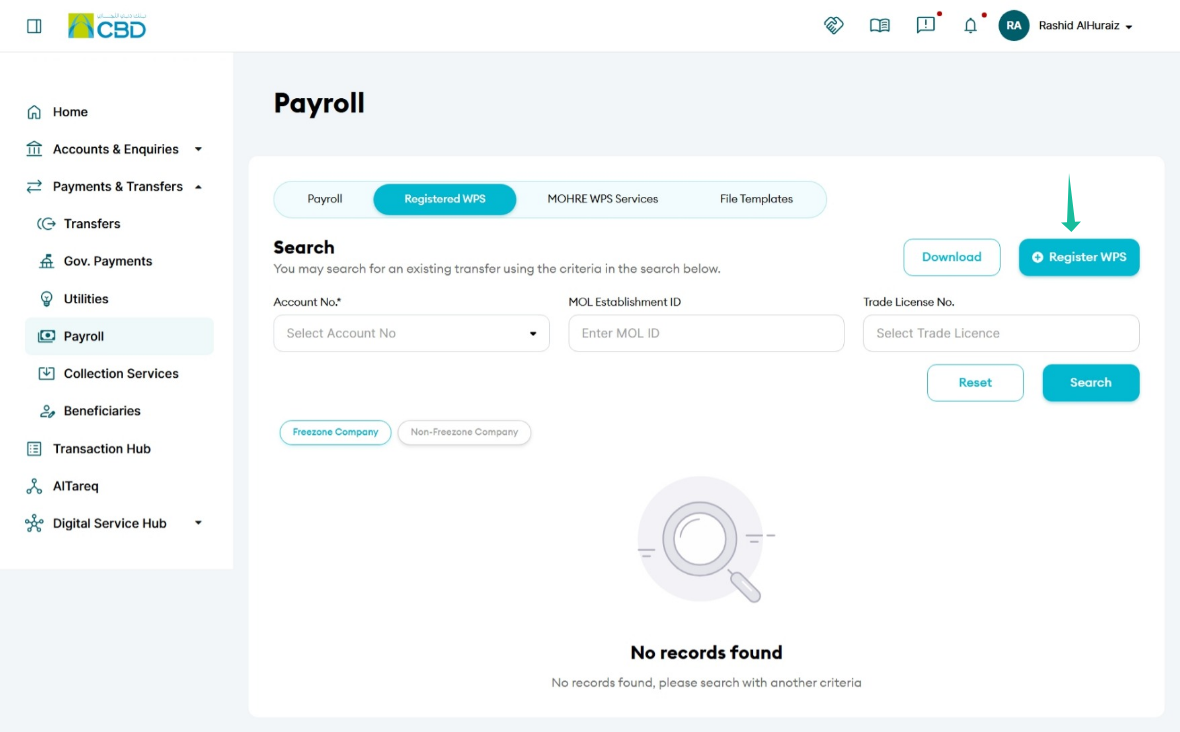
Step 2: Enter Company Details
Select the appropriate Company Type:
• Free Zone Company
• Non-Free Zone Company
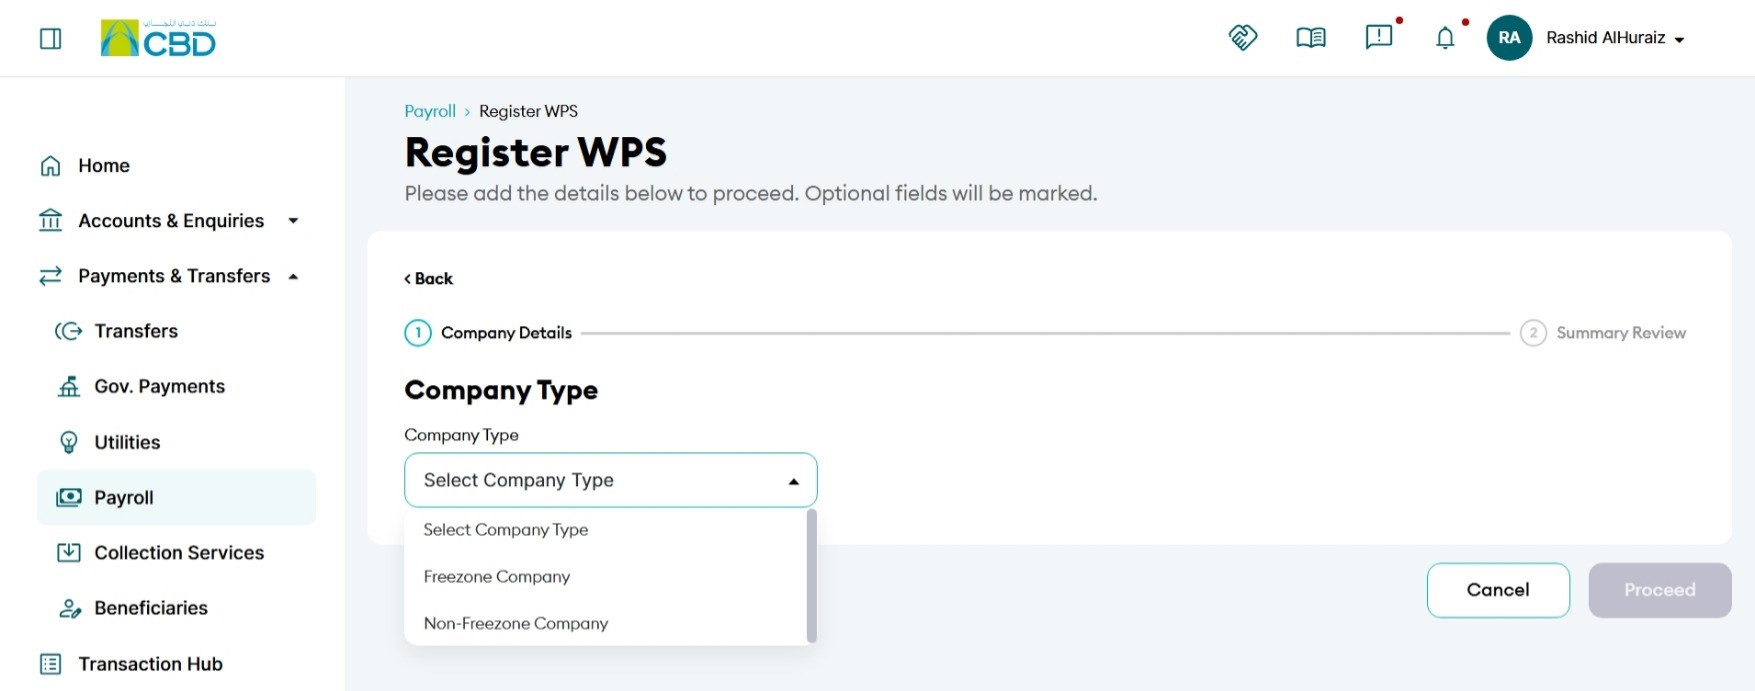
Freezone Company Details
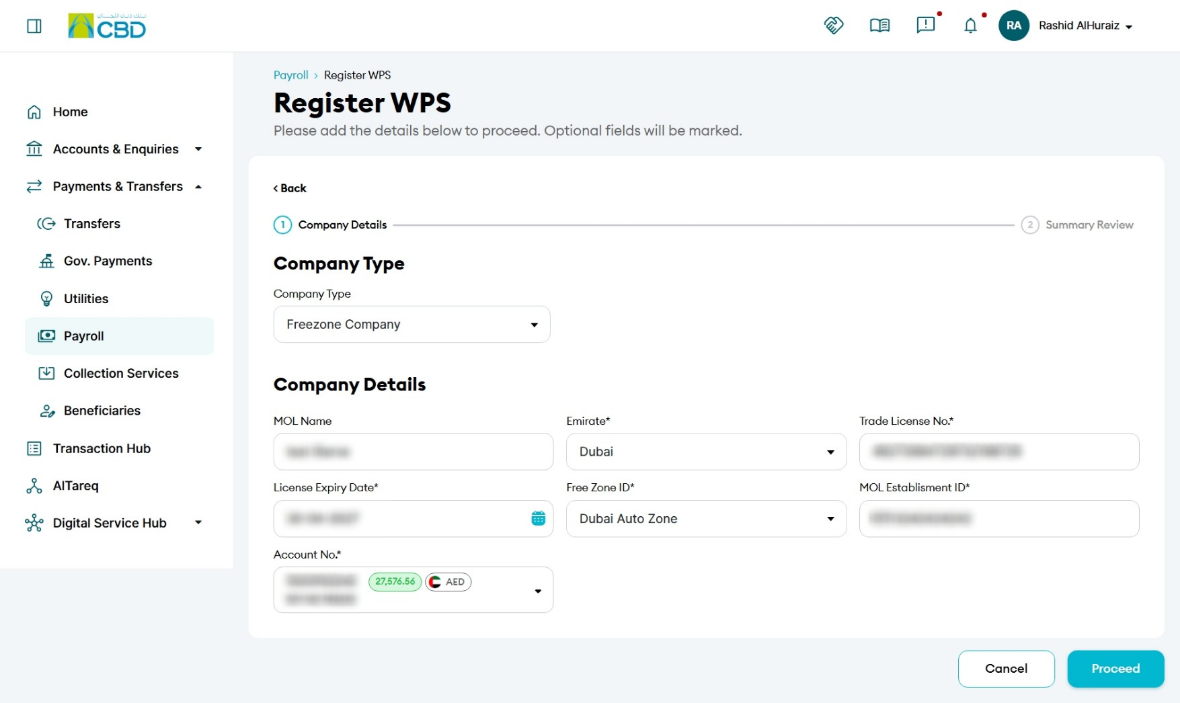
Provide the following information:
• MOL Name: Company name as registered with the Ministry of Labor (MOL)
• Emirate: Emirate in which the trade license was issued
• Trade License Number
• License Expiry Date
• Free Zone ID: Applicable to Free Zone companies only
• MOL Establishment ID
• Account Number
MOL Establishment ID Format
The MOL Establishment ID must contain 13 digits. If the ID contains fewer than 13 digits, add leading zeros until the total length reaches 13 digits.
Example:
• MOL ID: 1234
• Enter as: 0000000001234
Non-Freezone Company Details
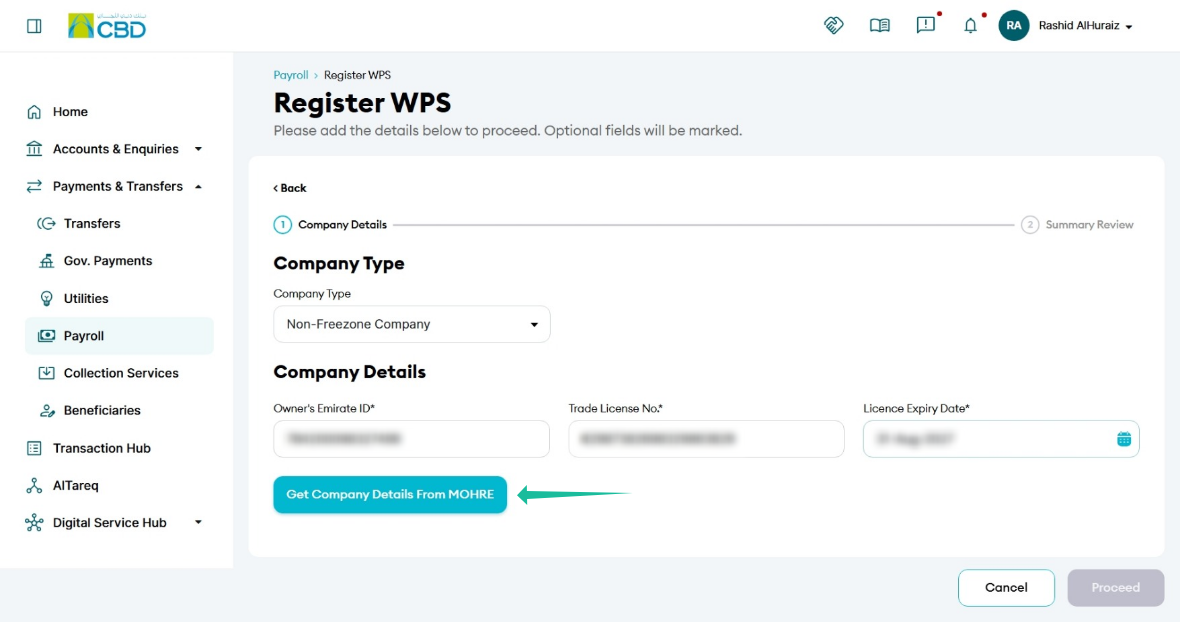
Provide the following information:
• Owner Emirates ID
• Trade License Number
• License Expiry Date
After entering the required details, click Get Company Details from MOHRE to retrieve the registered company information.
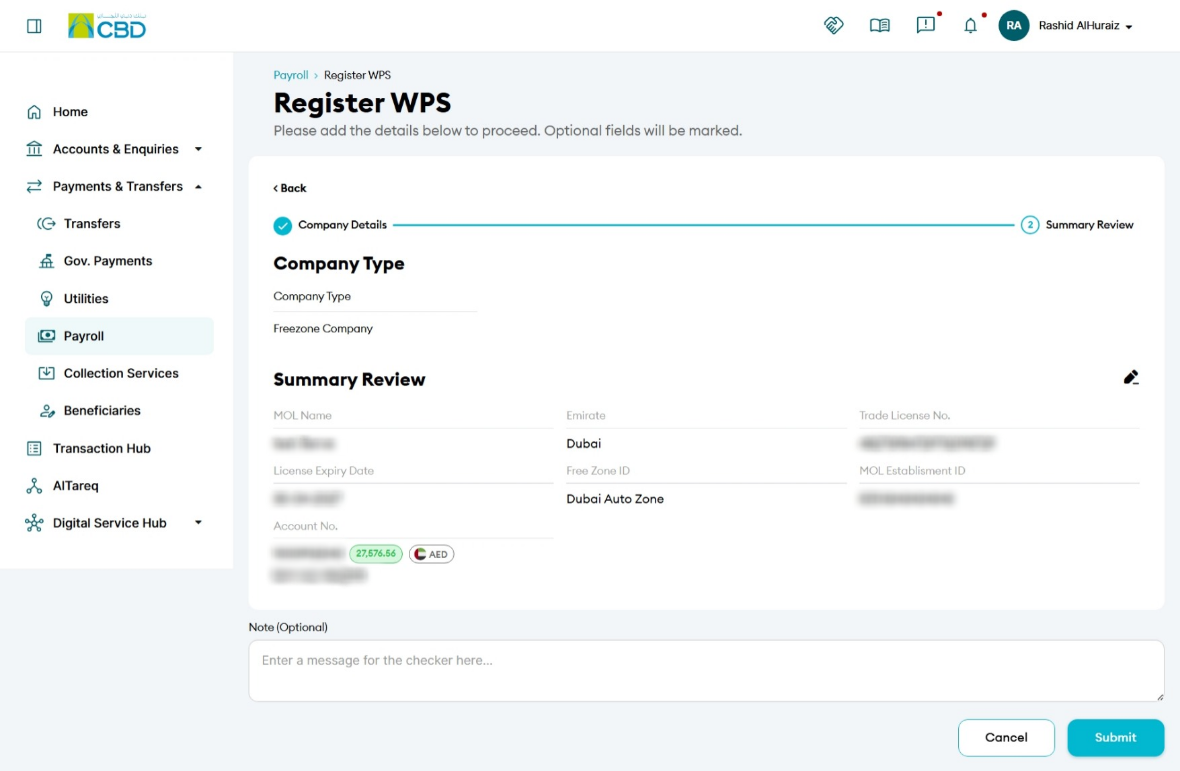
Step 3: Review and Submit
1. Review all entered information carefully.
2. Verify that the company details, license information, and MOL Establishment ID are correct.
3. Click Submit to proceed.
Step 4: Authenticate the Request
Complete authentication using one of the following methods:
Mobile App Authentication
• Approve the request through the iBusiness mobile app notification.
• Complete biometric or device verification.
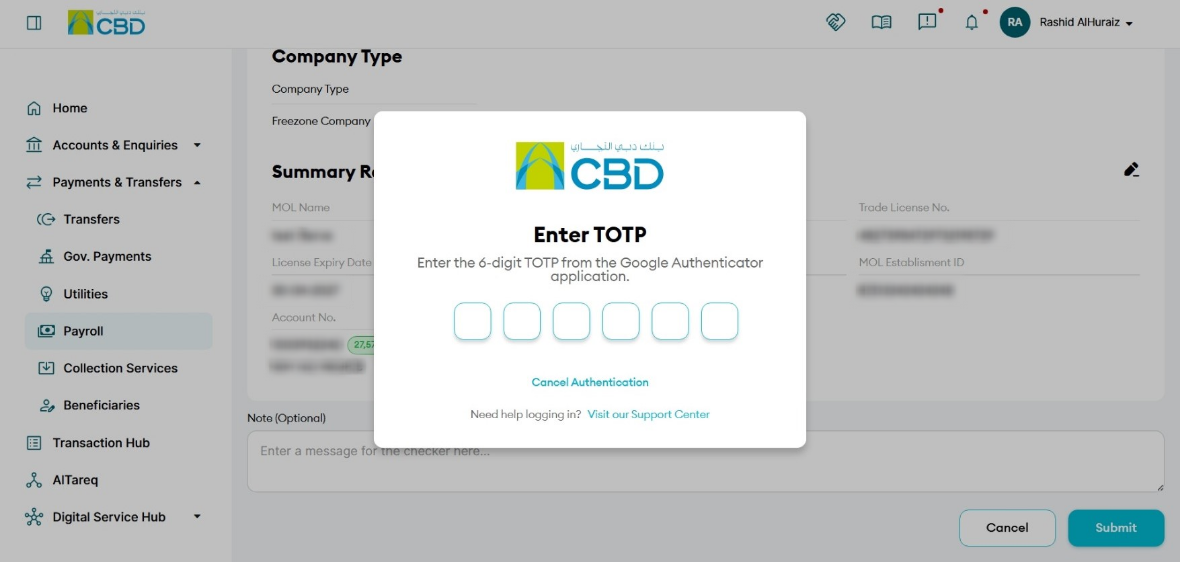
Google Authenticator
• Enter the One-Time Password (OTP) generated by Google Authenticator.
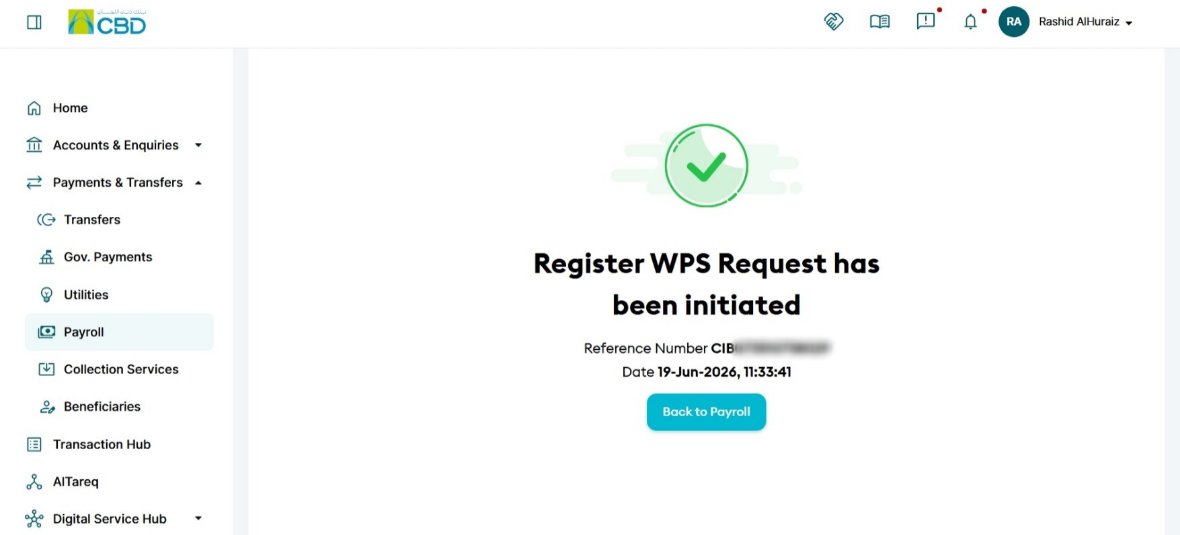
Once authentication is successful, a confirmation screen displaying a reference number will be generated.
Step 5: Approval (If Maker–Checker Is Enabled)
If your organization uses a Maker–Checker setup:
1. The request will be forwarded to the Approver's queue.
2. The Approver must:
- Log in to iBusiness
- Navigate to Transactions Hub ➜ Pending Your Authorizations
3. Locate the request under the transaction type Payroll.
4. Review the request details and select: Approve or Reject.
Support Notes / Best Practices
• Ensure the company type is selected correctly before proceeding.
• Verify that the Trade License Number and License Expiry Date match the company's official records.
• Confirm the MOL Establishment ID is entered in the correct format.
• For Non-Free Zone companies, ensure the Owner Emirates ID is valid and up to date.
• Keep a record of the generated reference number for tracking and audit purposes.
• Follow Maker–Checker approval procedures where applicable.