
Overview
This guide provides step-by-step instructions for submitting a Remittance Recall Request through the iBusiness Web Portal.
A remittance recall request can be used to request the return of funds for a transaction that has already been processed. Recall requests are subject to review and acceptance by the beneficiary bank and cannot be guaranteed once the funds have been credited to the beneficiary.
Step 1: Locate the Processed Transfer
- Log in to iBusiness.
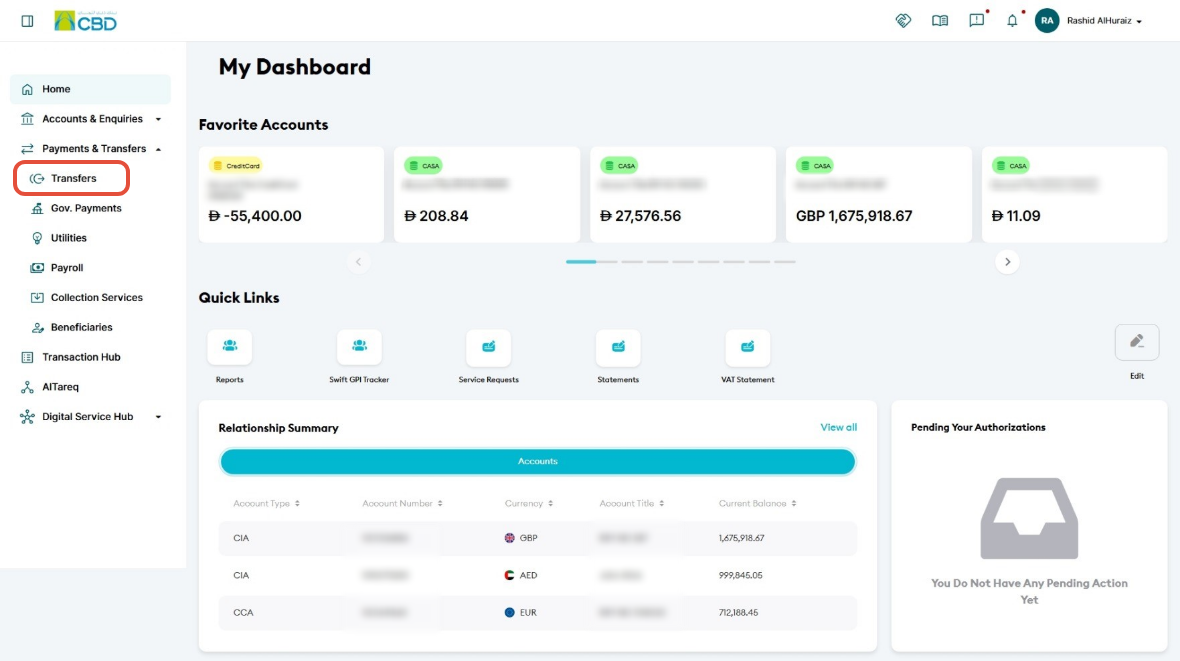
- Navigate to: Payment & Transfers ➜ Transfers
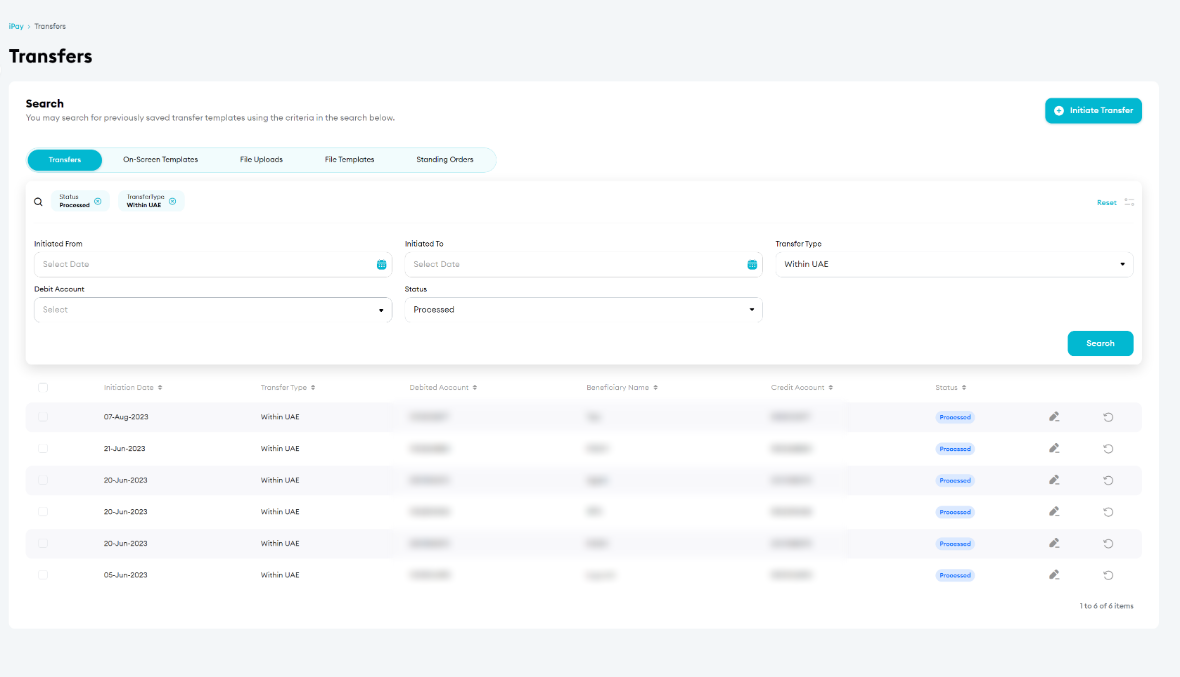
- Click the Search bar to open the Advanced Search options.
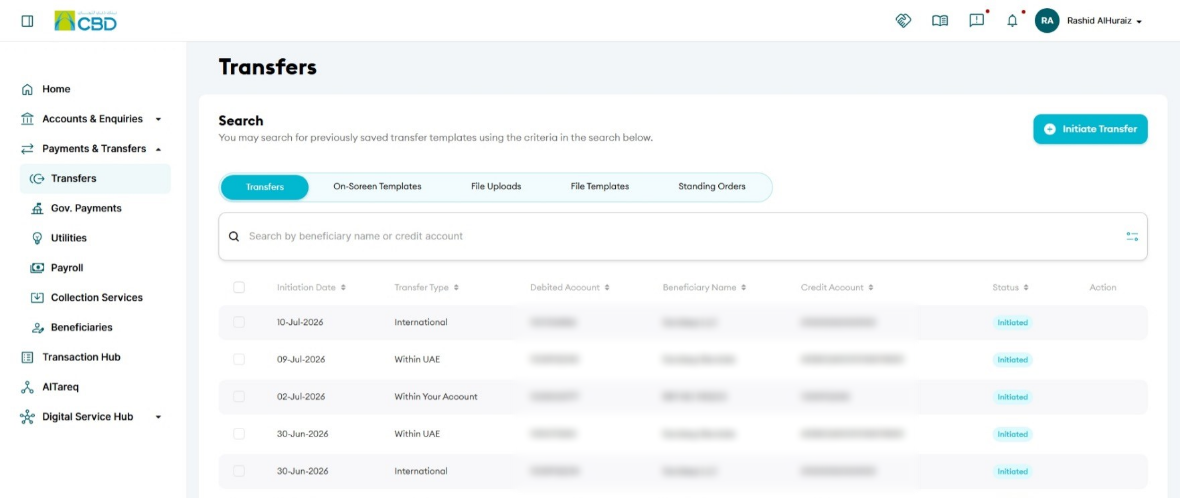
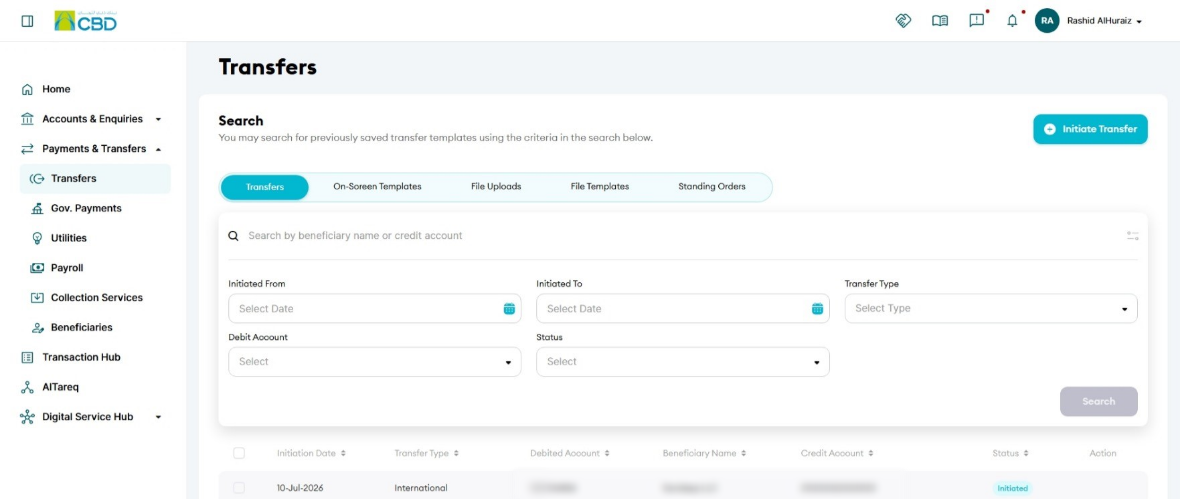
Step 2: Search for the Remittance
- Open the Status drop-down list.
- Select Processed.
- Click Search.
Only processed transactions are eligible for a recall request.
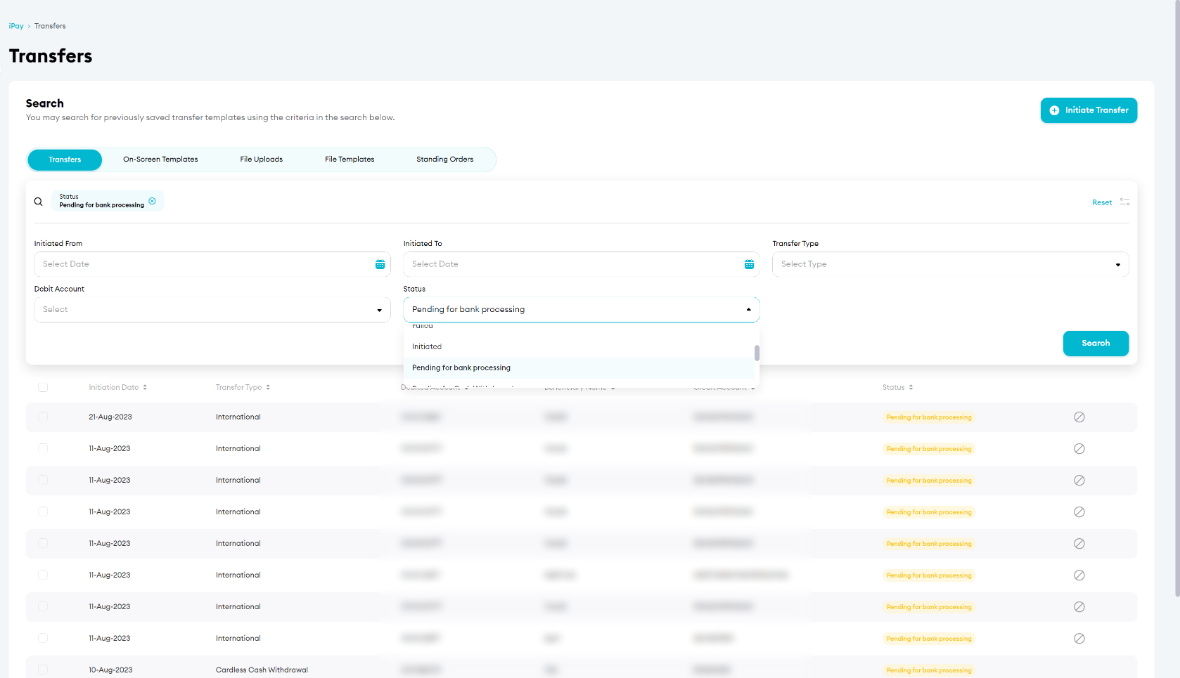
Step 3: Select the Remittance to Recall
- Review the list of processed transactions.
- Locate the remittance you want to recall.
- Click Recall icon
 next to the relevant transaction.
Step 4: Enter the Recall Reason
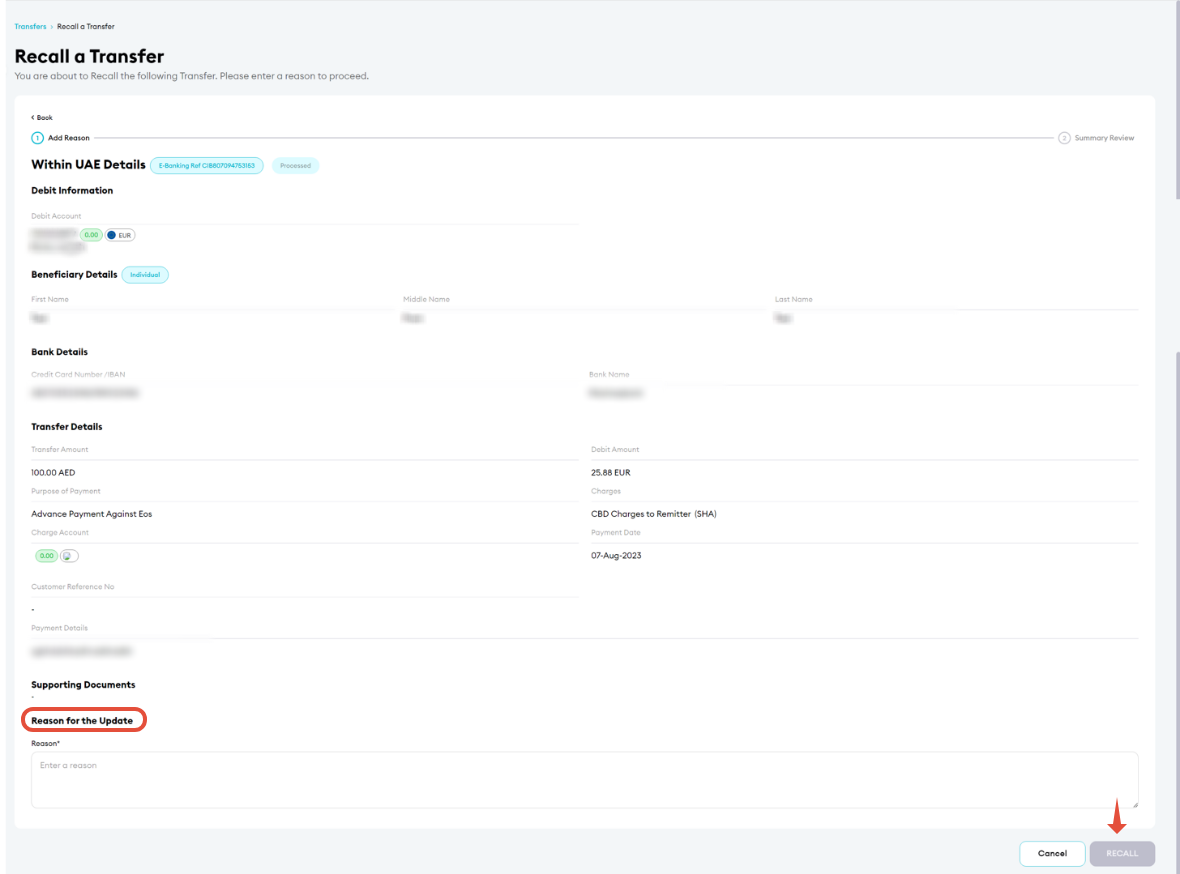
- Enter the reason for the recall request.
- Review the information entered.
- Click Recall.
Important: Provide a clear and detailed reason for the recall request to support processing and investigation.
Step 5: Review and Submit
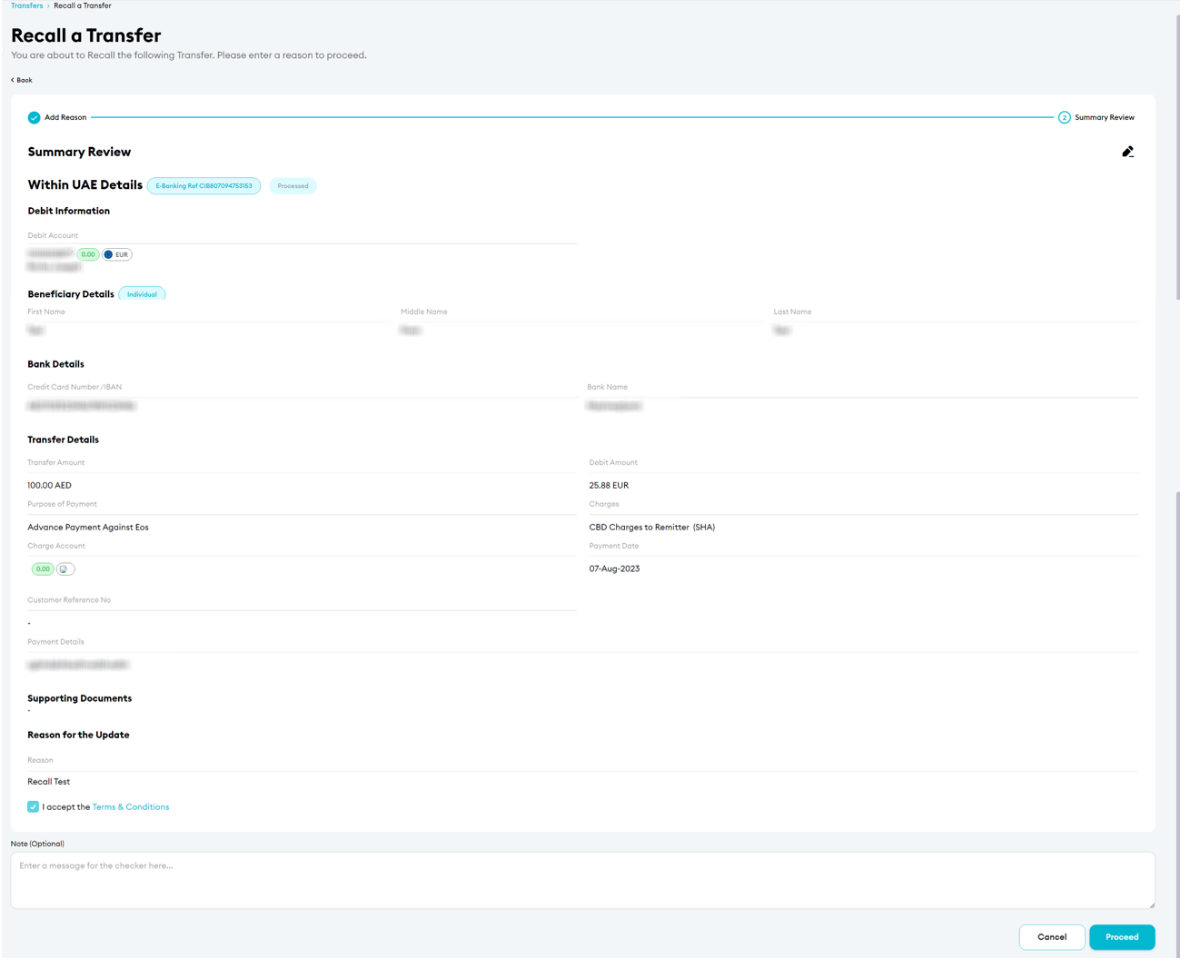
- Review the remittance details and recall reason.
- Confirm that all information is accurate.
- Accept the Terms and Conditions.
- Click Proceed.
Step 6: Authenticate the Request
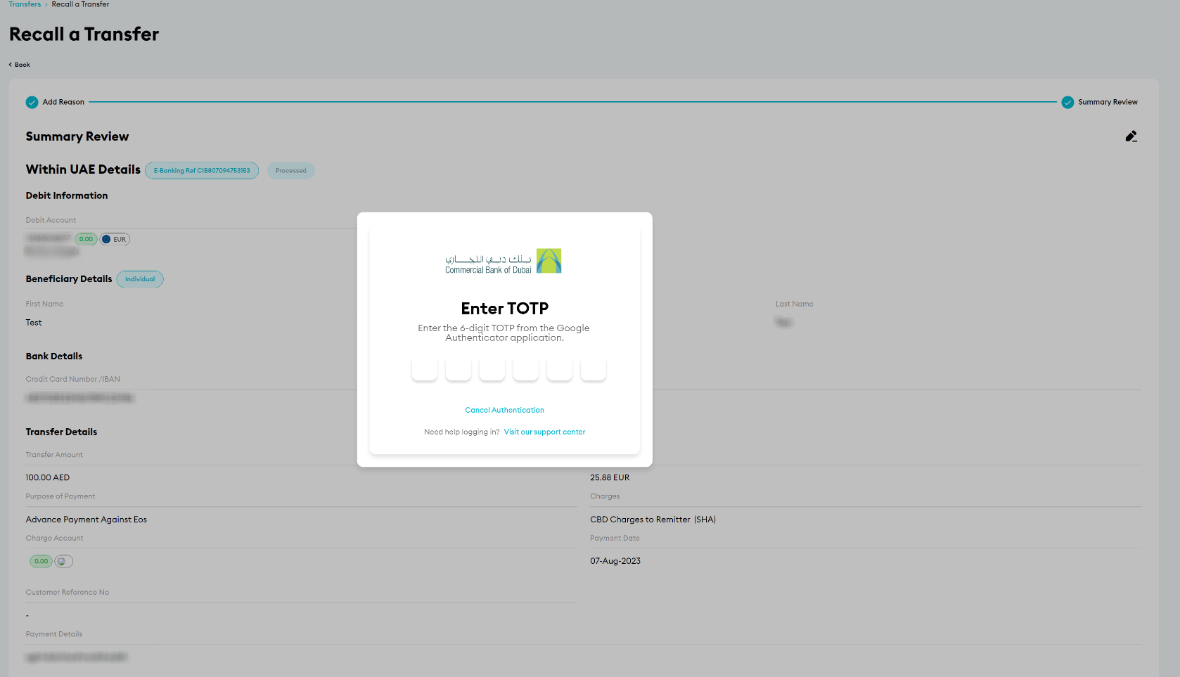
Complete authentication using one of the following methods:
iBusiness App Authentication
- A notification will be sent to the registered iBusiness Mobile App.
- Review the request details.
- Approve the request using biometric or device authentication.
Google Authenticator
- Open the Google Authenticator application.
- Enter the generated One-Time Password (OTP).
Once authentication is successful, the recall request will be submitted for processing.
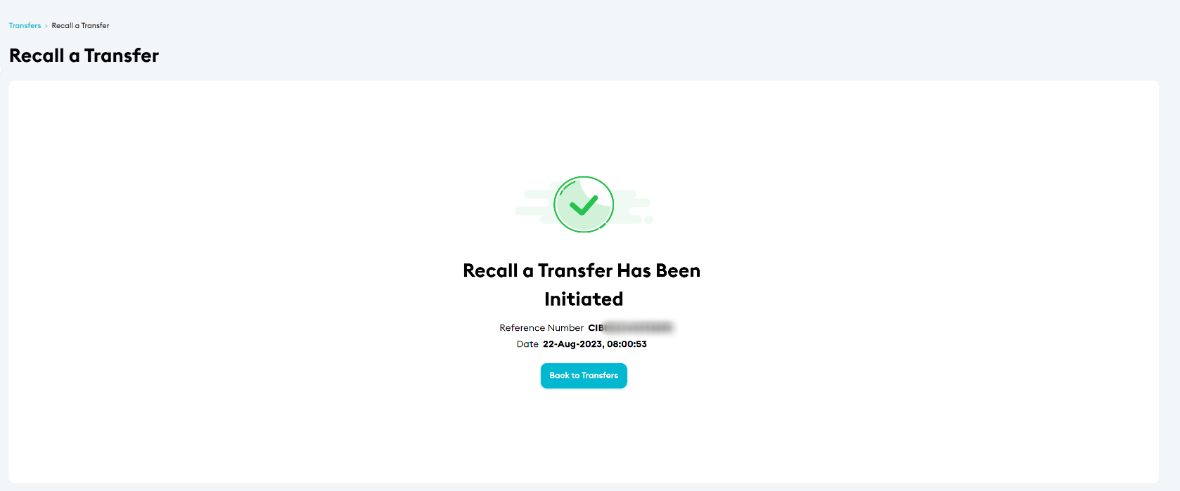
Step 7: Confirmation
After the request has been submitted successfully:
- A confirmation screen will be displayed.
- A unique reference number will be generated.
- The confirmation will include the date and time of submission.
Keep the reference number for future tracking and support enquiries.
Step 8: Approval (If Maker–Checker Is Enabled)
If your organization uses a Maker–Checker approval workflow:
- The recall request will be routed to the designated Approver.
- The Approver must: Log in to iBusiness
- Navigate to Transactions Hub ➜ Pending Your Authorizations
- Review the request details.
- Select: Approve or Reject
The recall request will only be submitted to the bank after all required approvals have been completed.
Support Notes / Best Practices
- Only transactions with a Processed status can be recalled.
- Submit the recall request as soon as possible after identifying the issue.
- A recall request does not guarantee that funds will be returned, as the request is subject to beneficiary bank approval and fund availability
- Ensure the recall reason is clear, accurate, and provides sufficient information for investigation.
- Retain the generated reference number for tracking, audit, and support purposes.