
Overview
This guide provides step-by-step instructions for submitting a Remittance Amendment Request through the iBusiness Web Portal.
An amendment request can be submitted for a remittance that has already been processed and requires additional instructions or modifications. All amendment requests are subject to review and processing by the bank.
Step 1: Locate the Remittance
- Log in to iBusiness.
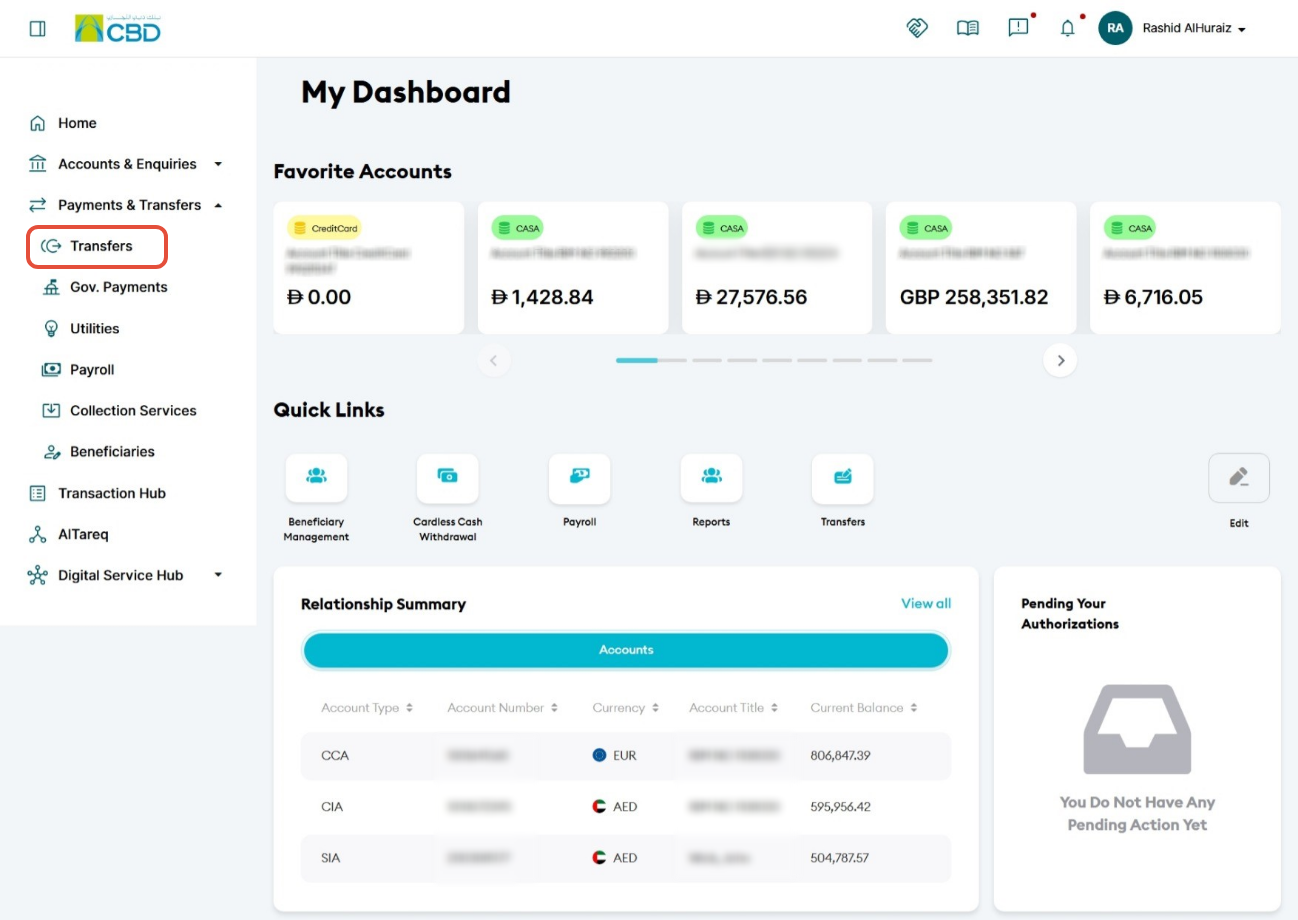
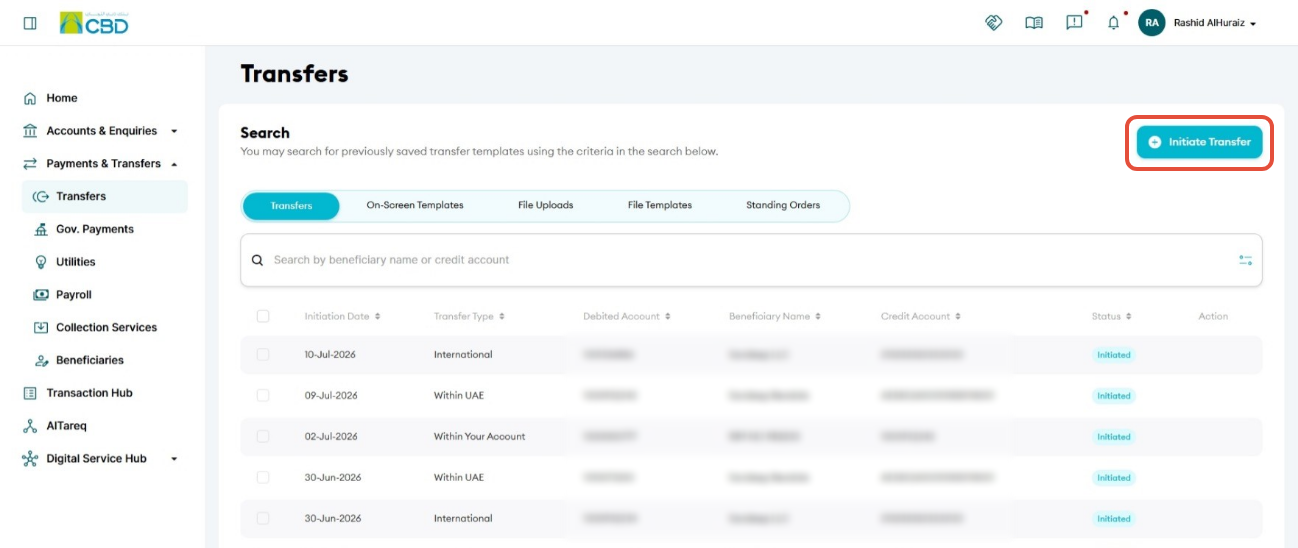
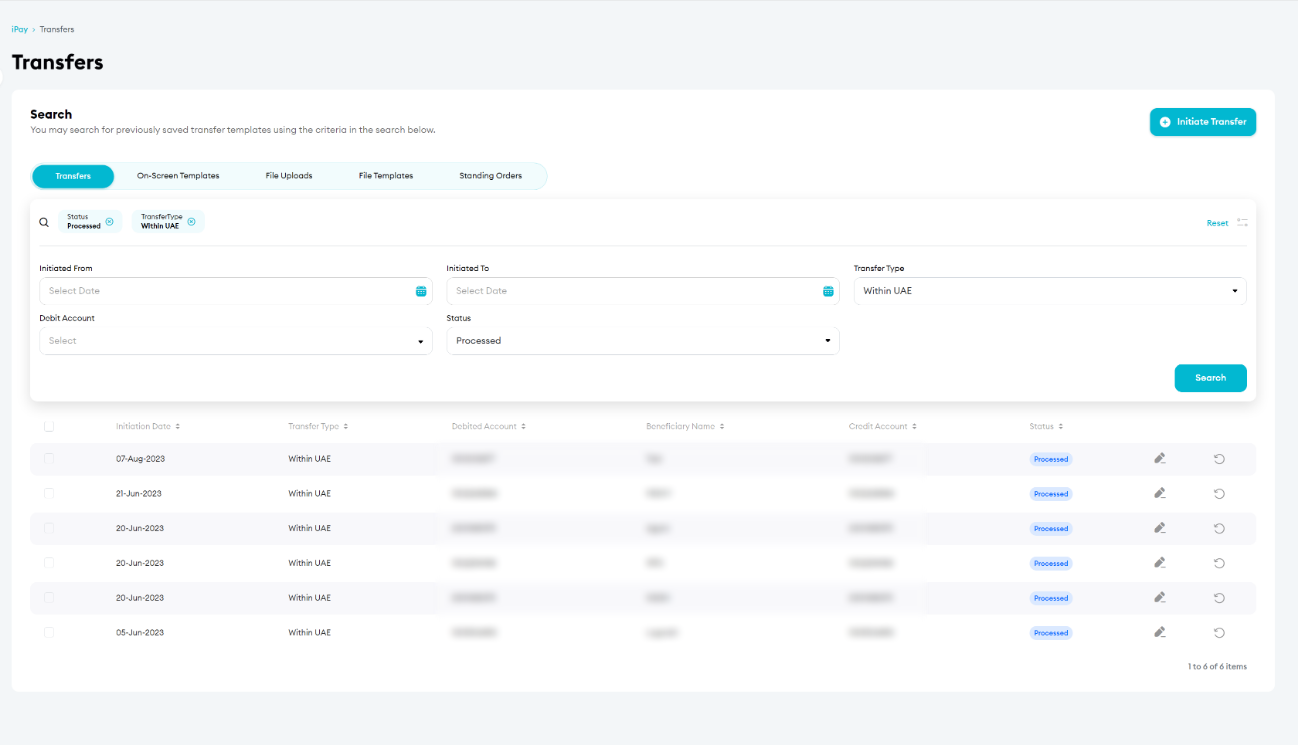
- Navigate to: Payments & Transfers ➜ Transfers
- Click the Search bar to open the Advanced Search options.
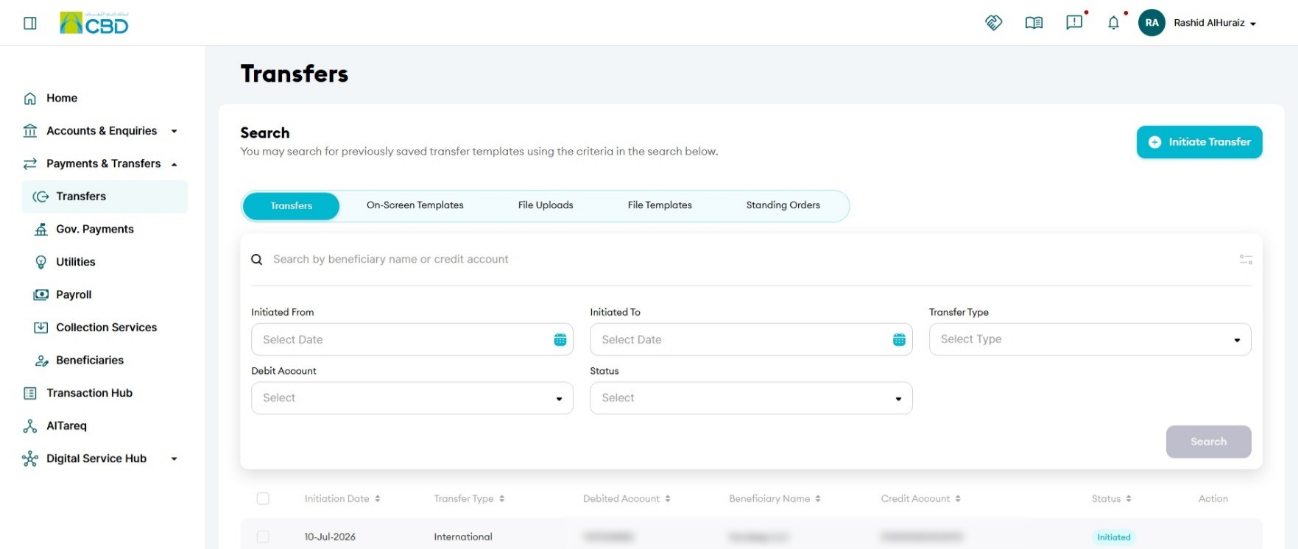
Step 2: Search for the Processed Transaction
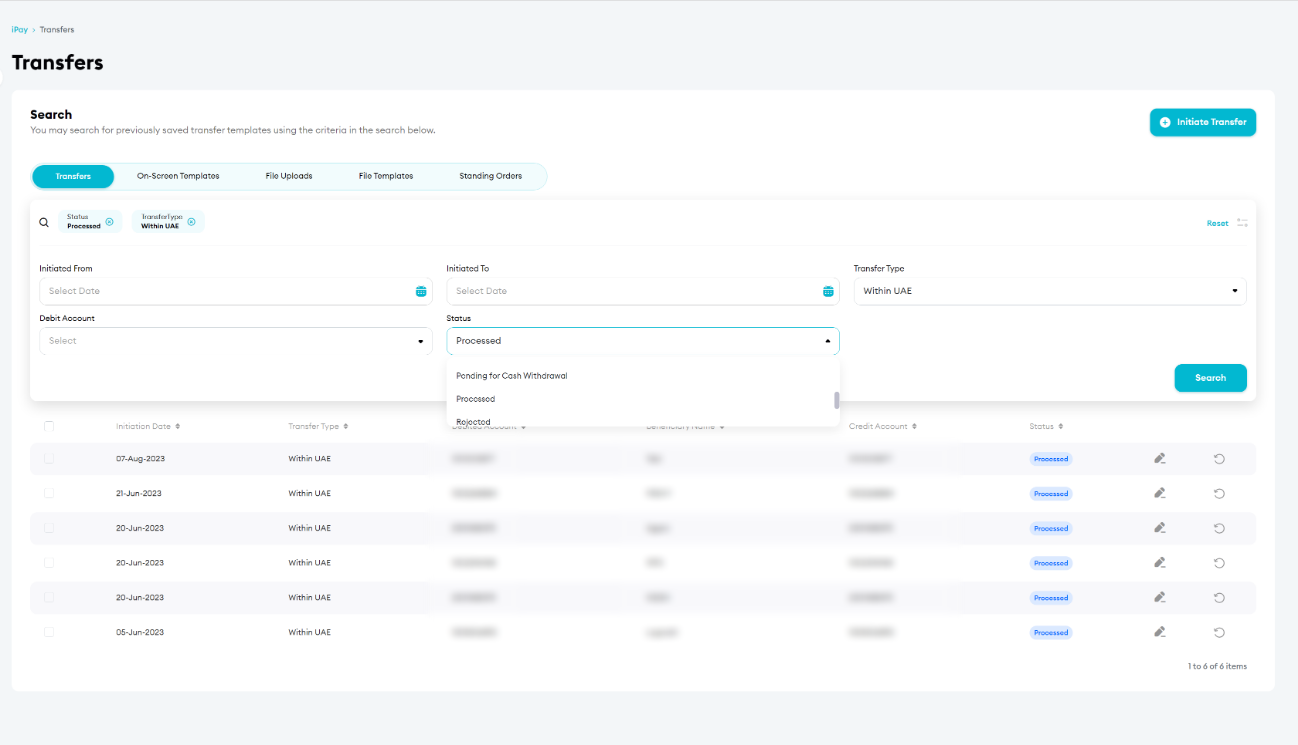
- Open the Status drop-down list.
- Select Processed.
- Click Search.
Only remittances with a Processed status can be selected for amendment.
Step 3: Select the Remittance to Amend
- Review the list of processed transactions.
- Locate the remittance you want to amend.
- Click Edit Icon
 next to the selected transaction.
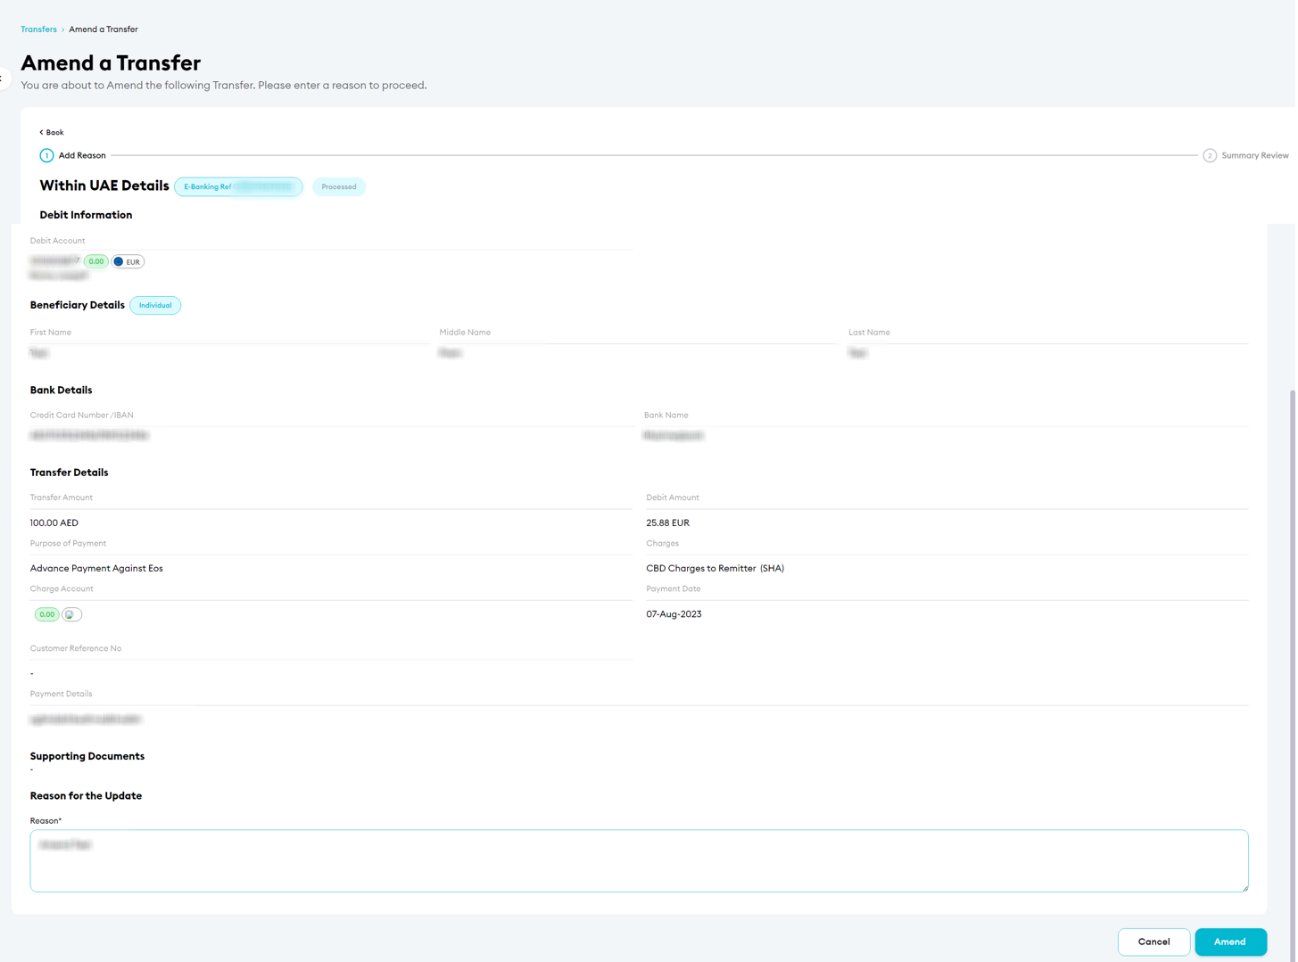
Step 4: Enter the Amendment Request
- Enter the reason for the amendment request.
- Provide clear and accurate details of the required amendment.
- Click Amend.
Important: Provide complete amendment instructions to help expedite the processing of your request.
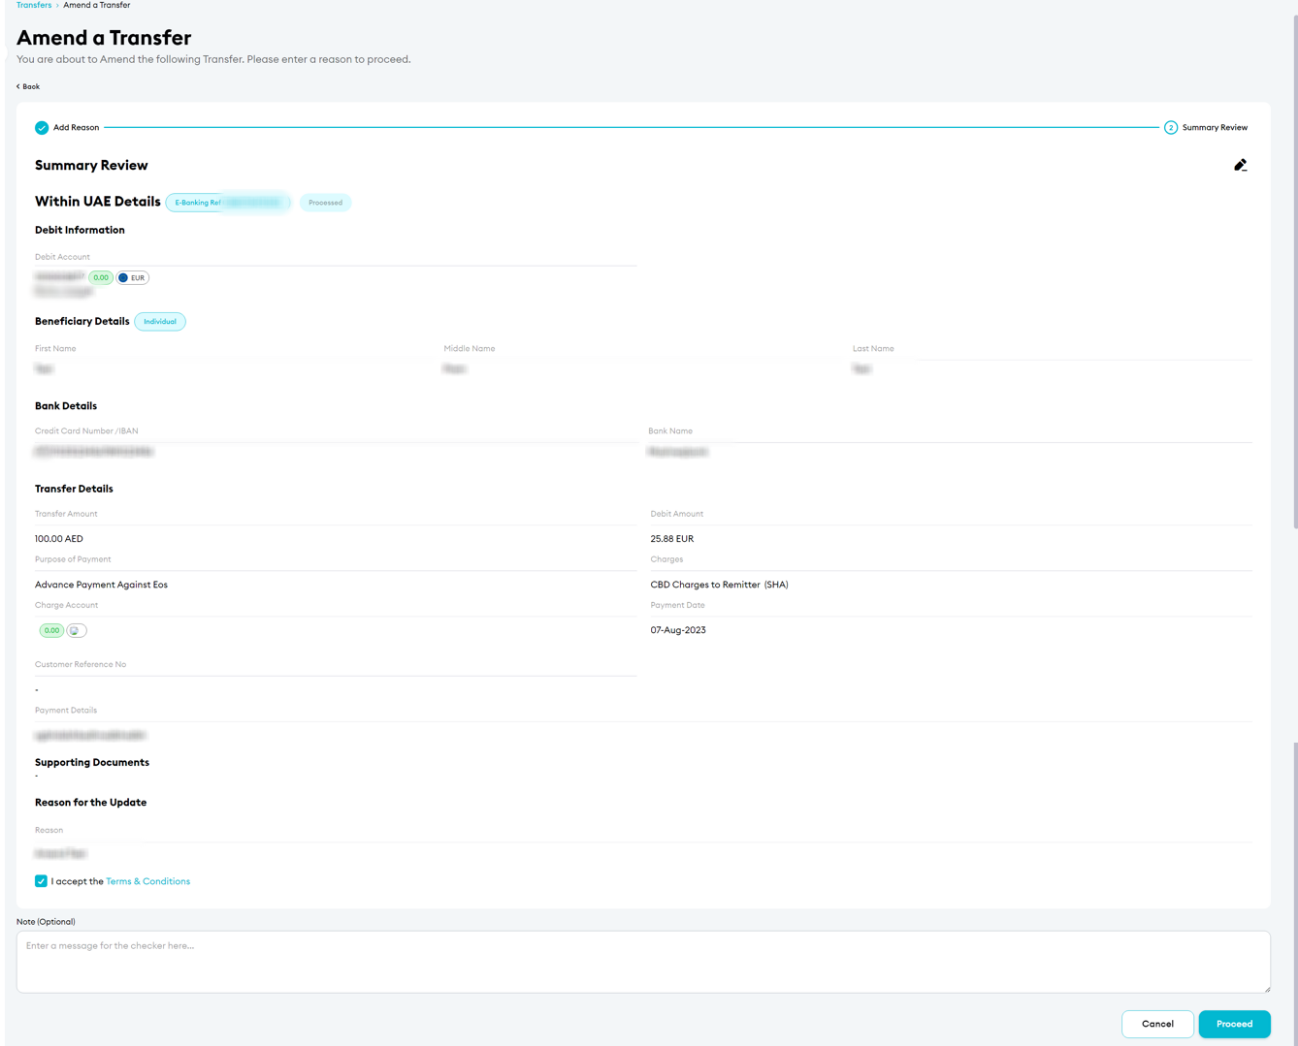
Step 5: Review and Submit
- Review the selected remittance details and amendment instructions.
- Confirm that all information is accurate.
- Accept the Terms and Conditions.
- Click Proceed.
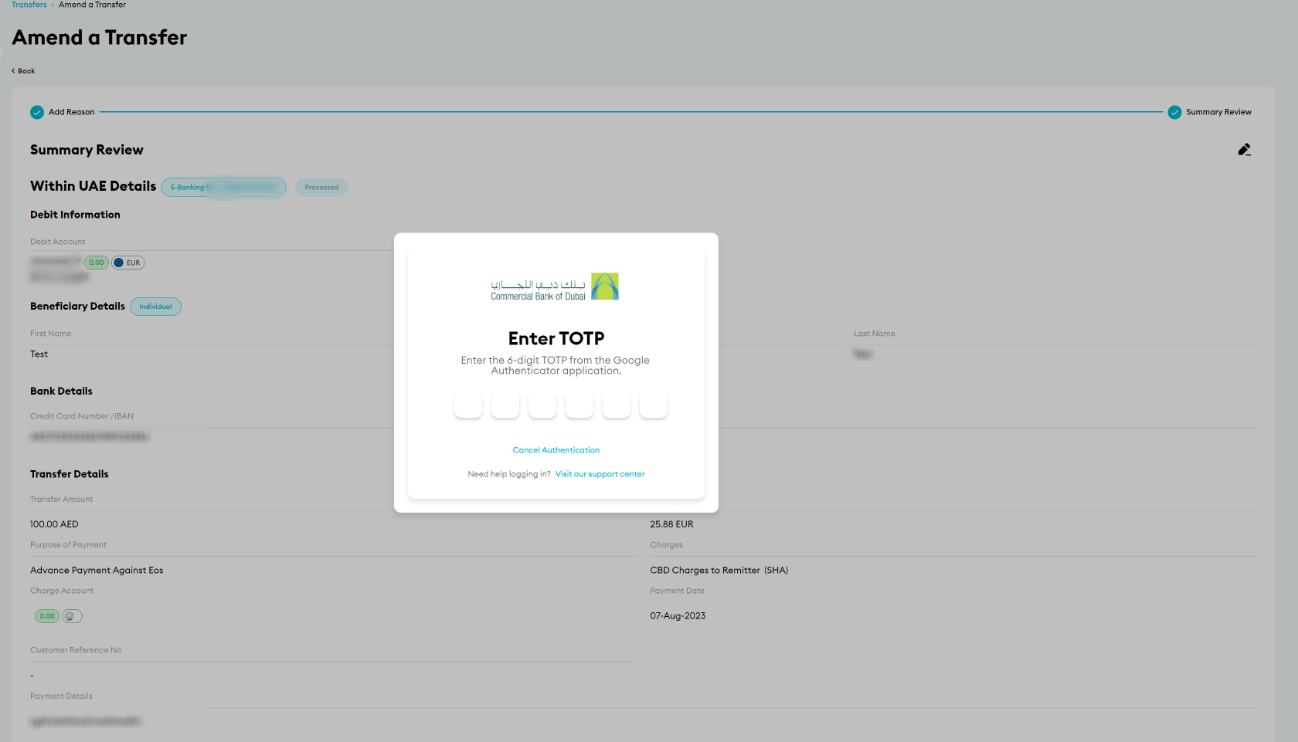
Step 6: Authenticate the Request
Complete authentication using one of the following methods:
iBusiness App Authentication
- A notification will be sent to the registered iBusiness Mobile App.
- Review the request details.
- Approve the request using biometric or device authentication.
Google Authenticator
- Open the Google Authenticator application.
- Enter the generated One-Time Password (OTP).
Once authentication is successful, the amendment request will be submitted for processing.
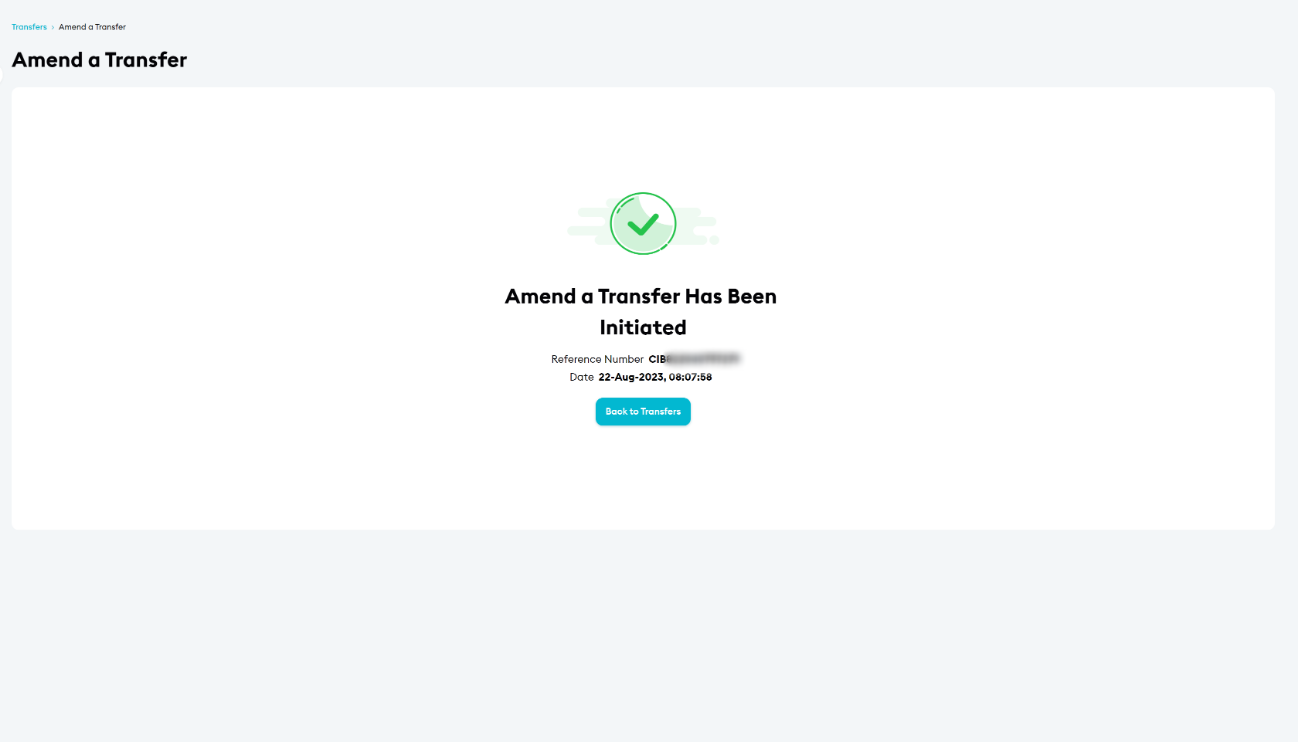
Step 7: Confirmation
After the request has been submitted successfully:
- A confirmation screen will be displayed.
- A unique reference number will be generated.
- The confirmation will include the date and time of submission.
Keep the reference number for future tracking and support enquiries.
Step 8: Approval (If Maker–Checker Is Enabled)
If your organization uses a Maker–Checker approval workflow:
- The amendment request will be routed to the designated Approver.
- The Approver must: Log in to iBusiness
- Navigate to Transactions Hub ➜ Pending Your Authorizations
- Review the amendment details.
- Select: Approve or Reject
The amendment request will only be submitted to the bank after all required approvals have been completed.
Support Notes / Best Practices
- Only remittances with a Processed status can be amended through this process.
- Submit amendment requests as soon as the issue is identified.
- Clearly describe the amendment required to avoid processing delays.
- Verify the remittance details before submitting the request.
- Retain the generated reference number for tracking, audit, and support purposes.
- Submission of an amendment request does not guarantee that the requested changes can be applied, as processing depends on the status of the payment and banking regulations.