
Overview
This guide provides step-by-step instructions for registering as an Aani Merchant using the iBusiness Mobile App. Registration allows merchants to enrol and start using Aani merchant services through the platform.
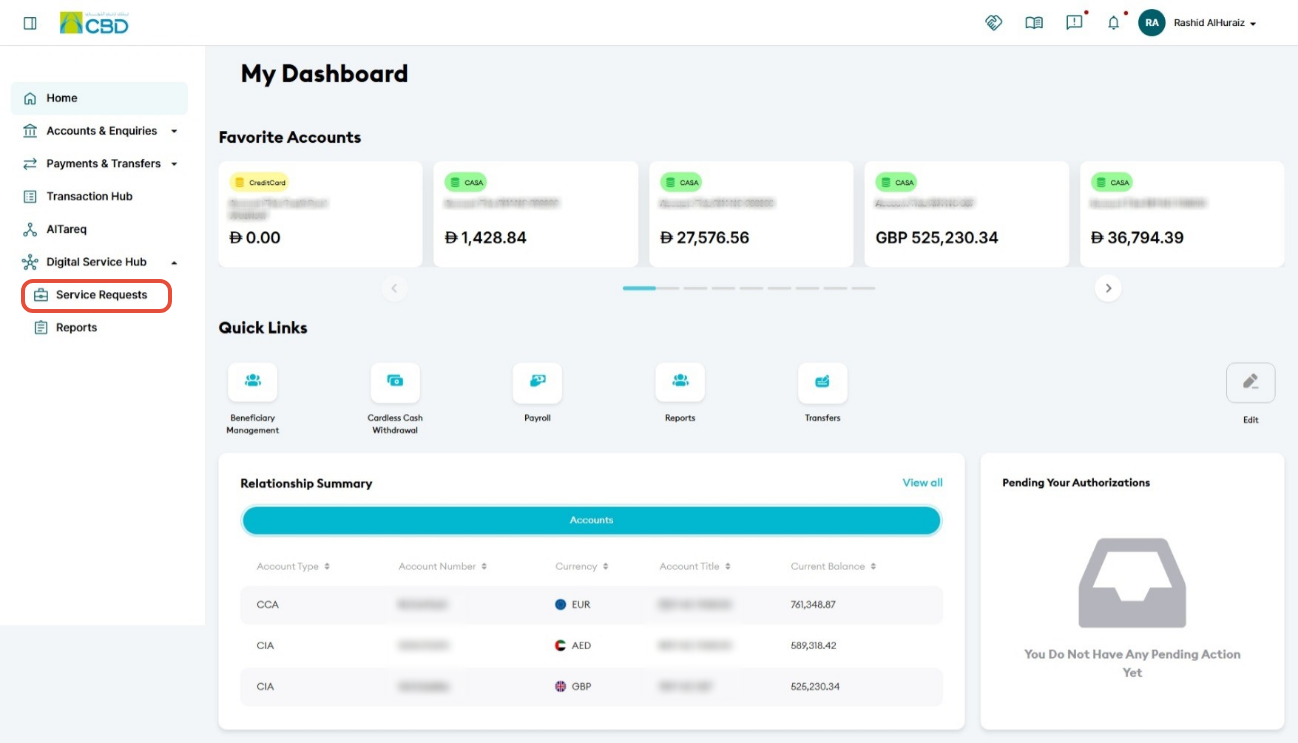
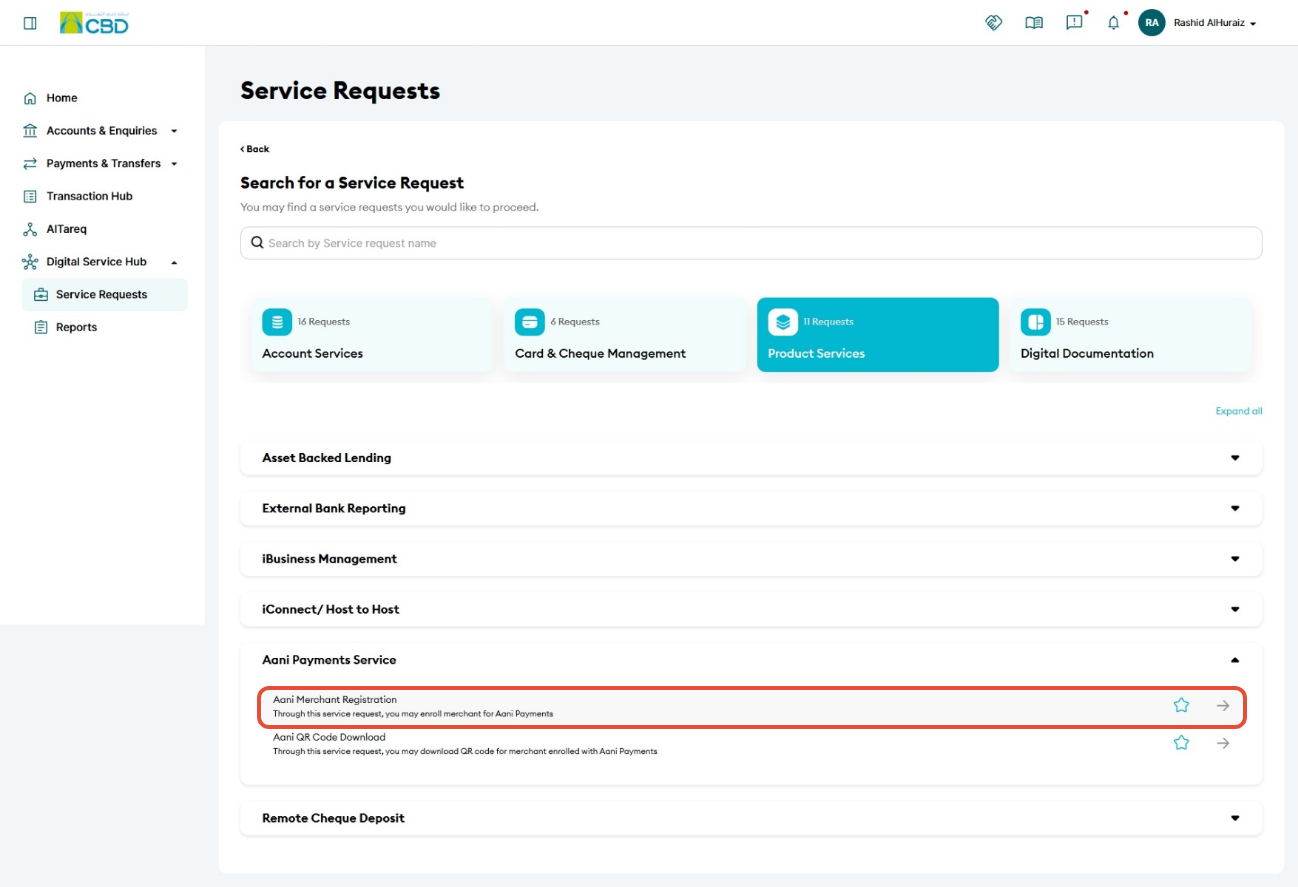
Step 1: Access Aani Payment Services
- Log in to the iBusiness web.
- Navigate to: Service Requests ➜ Product Services ➜ Aani Payment Services
- Select Aani Merchant Registration to begin the registration process.
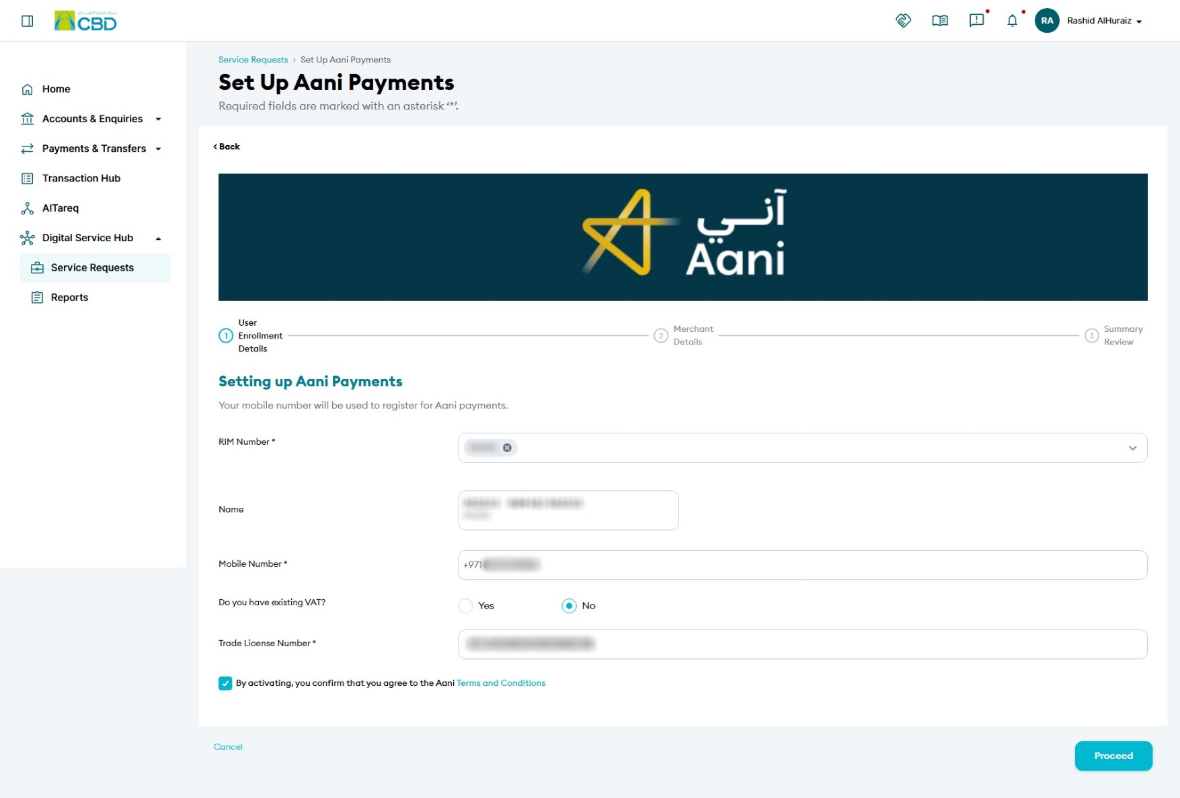
Step 2: Select the Account
- Choose the account that will be linked to the Aani Merchant service.
- Review the displayed account information.
- Tap Continue to proceed.
This account will be used for receiving Aani merchant collections and transactions.
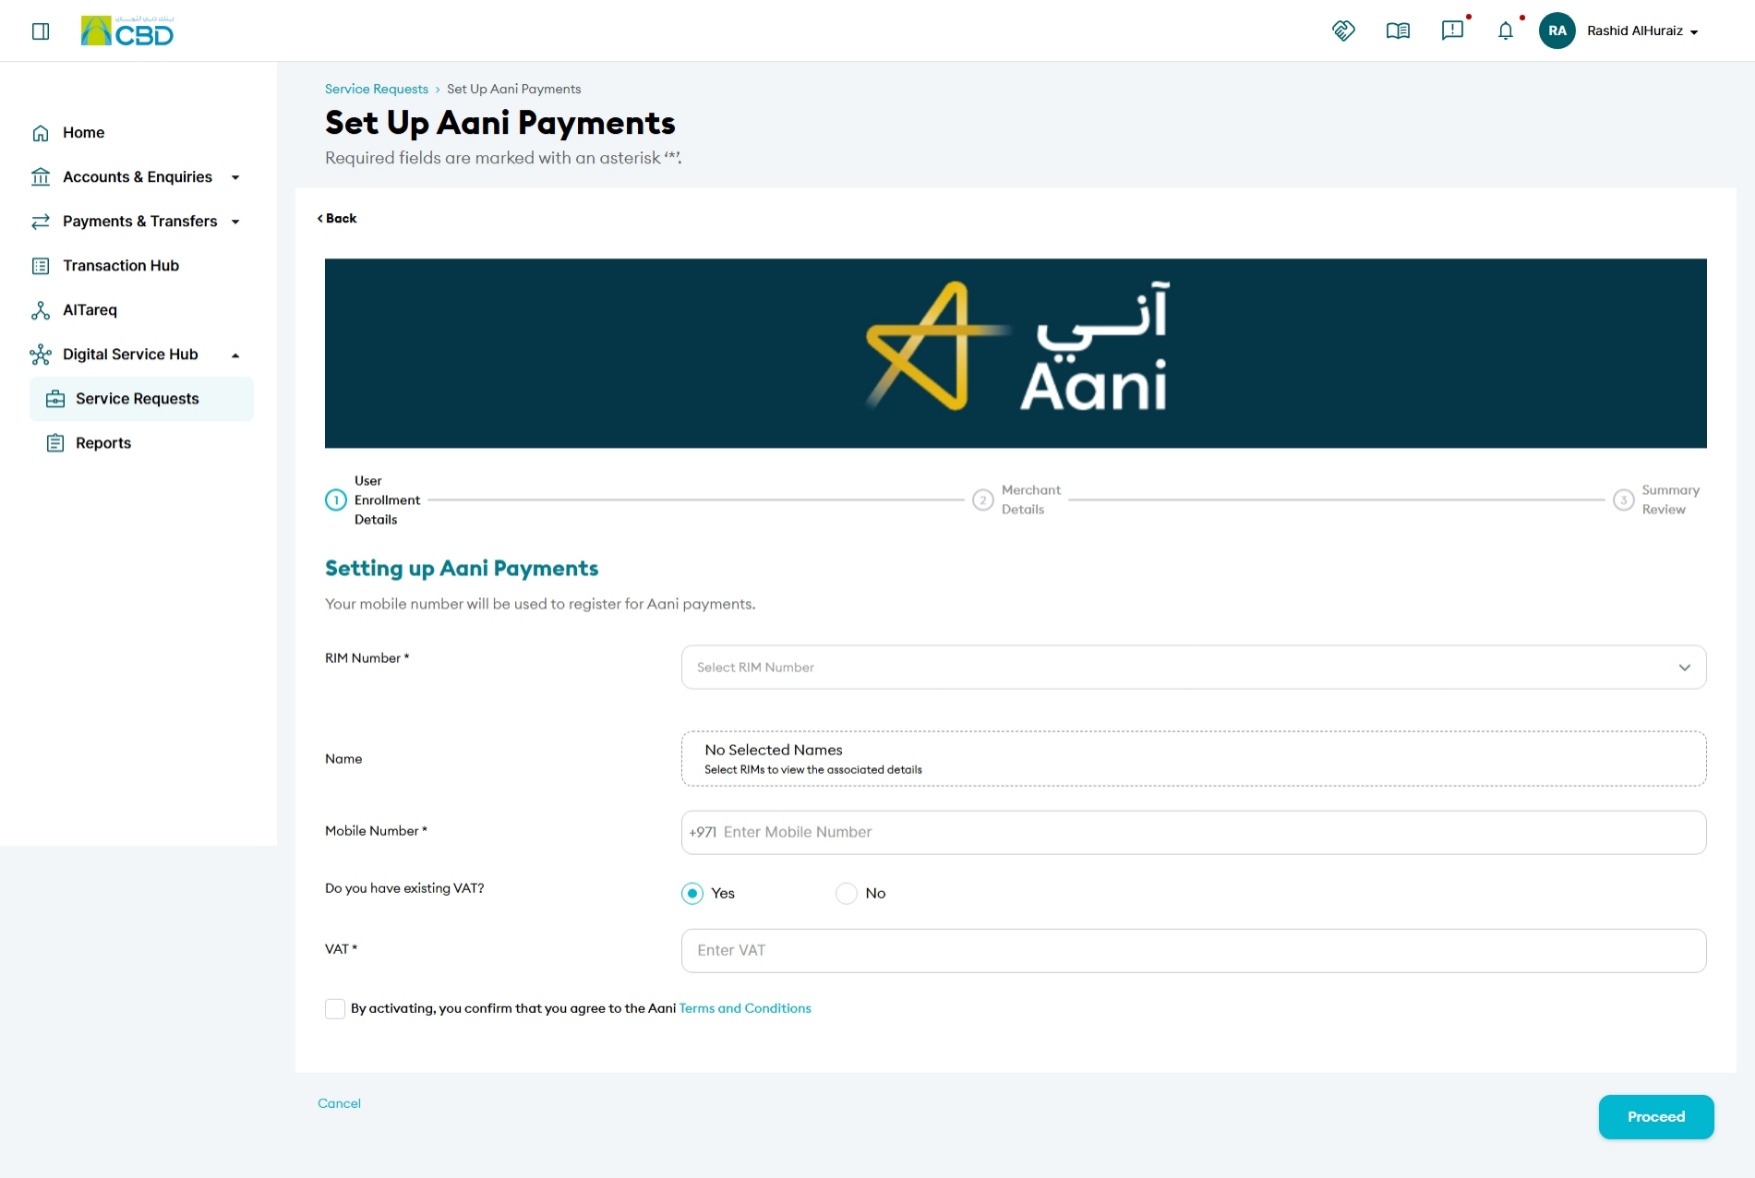
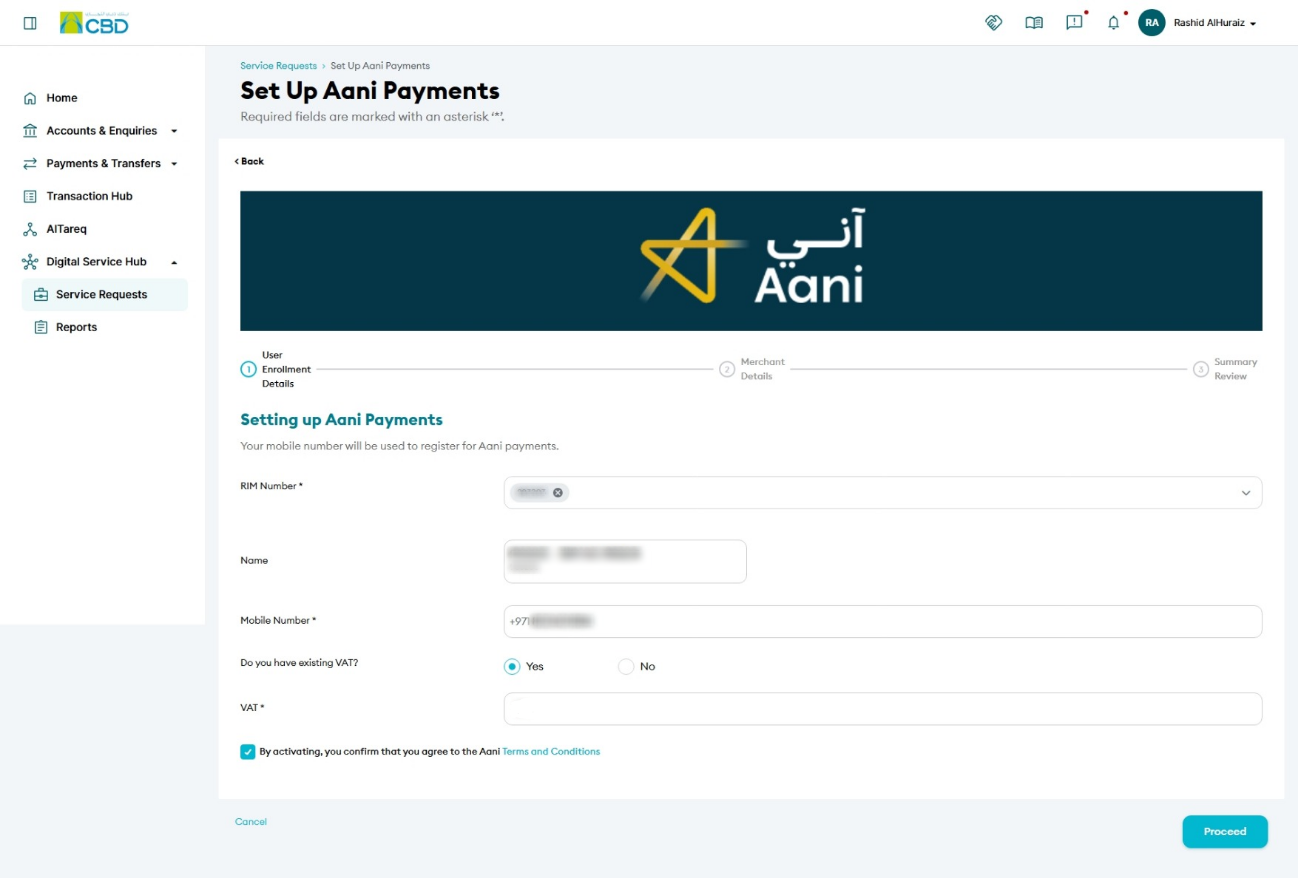
Option 1: Existing VAT Registration
If your business already has a VAT registration:
- Select the VAT registration option.
- Enter your VAT Registration Number.
- Verify that the information displayed matches your business records.
Option 2: No Existing VAT Registration
If your business does not have a VAT registration:
- Select the option indicating that you do not have a VAT number.
- Enter your Trade Licence Number.
- Verify that the business information displayed is correct.
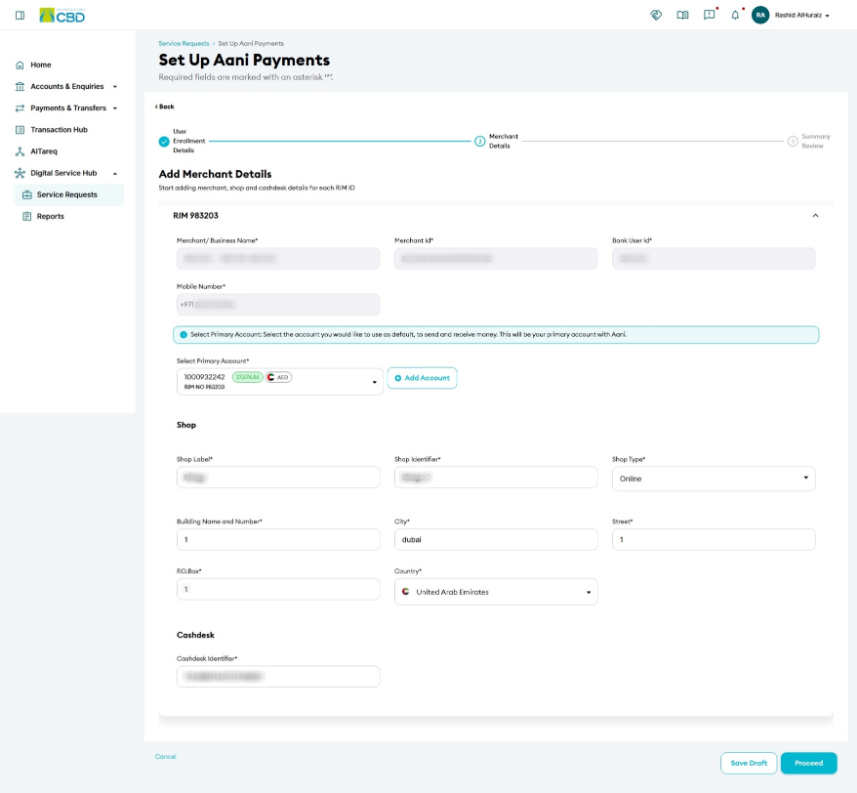
Step 3: Review Merchant Details
The application will display the merchant information associated with the selected account.
Review the details carefully, including:
- Company Name
- Account Information
- Business Details
- Registration Information
Ensure all information is correct before proceeding.
Step 4: Review and Submit the Request
- Review the registration summary.
- Verify the selected account and merchant details.
- Accept the Terms and Conditions, if applicable.
- Tap Submit.
This action submits the Aani Merchant Registration Request for authentication.

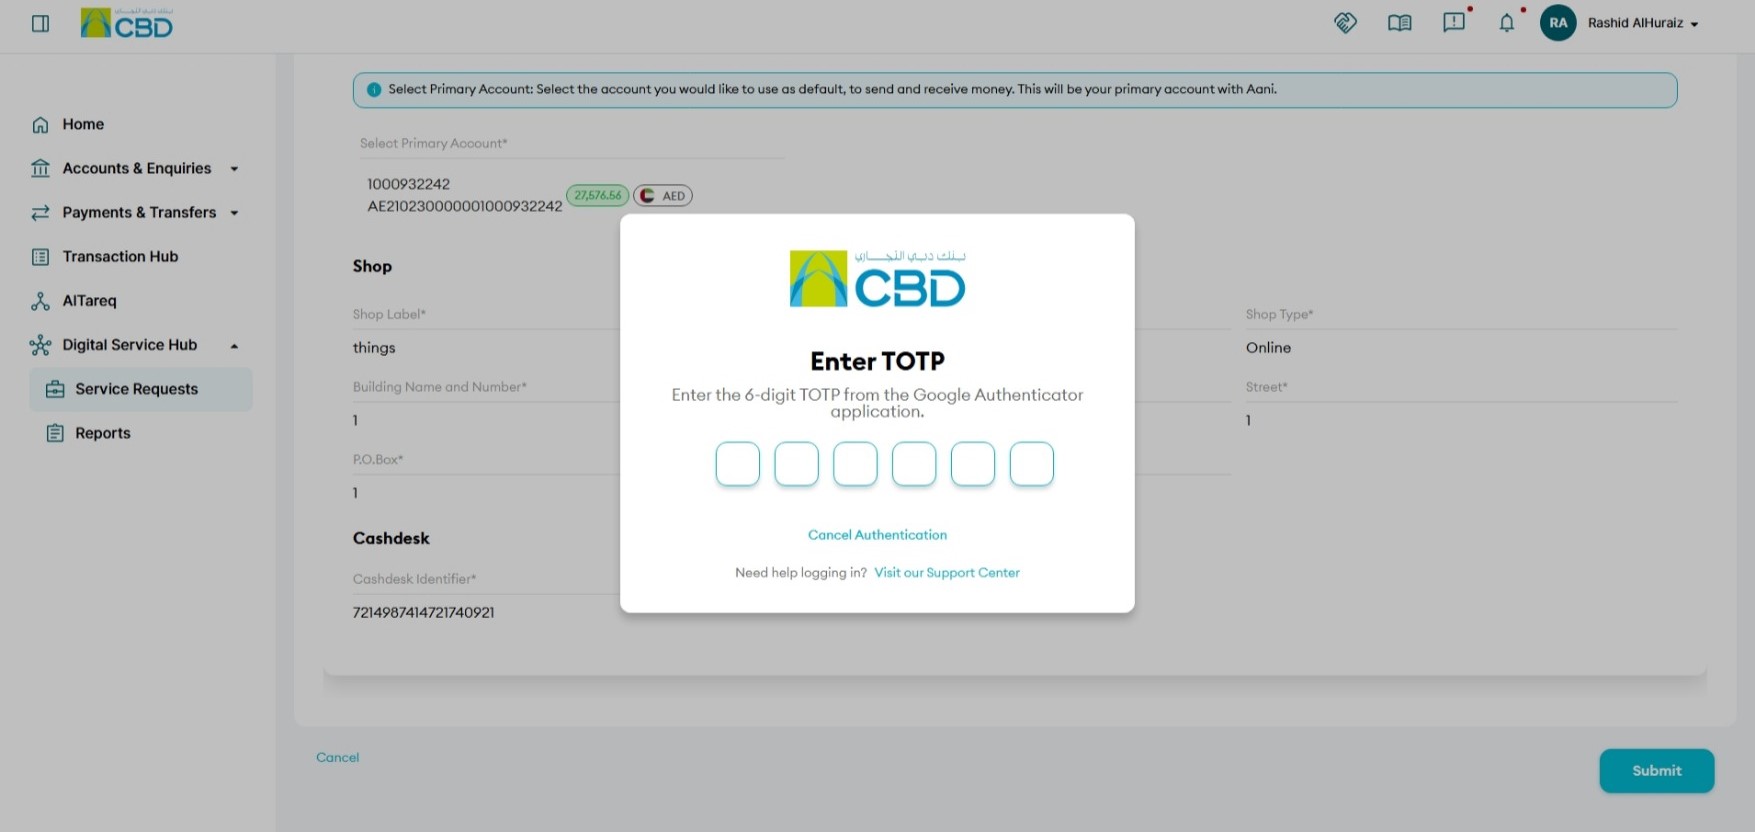
Step 5: Authenticate the Request
Complete authentication using one of the following methods:
iBusiness App Authentication
- A notification will be sent to the registered iBusiness Mobile App.
- Review the request details.
- Approve the request using biometric or device authentication.
Google Authenticator
- Open the Google Authenticator application.
- Retrieve the generated One-Time Password (OTP).
- Enter the OTP to complete authentication.
Once authentication is completed successfully, the registration request will be submitted for processing.
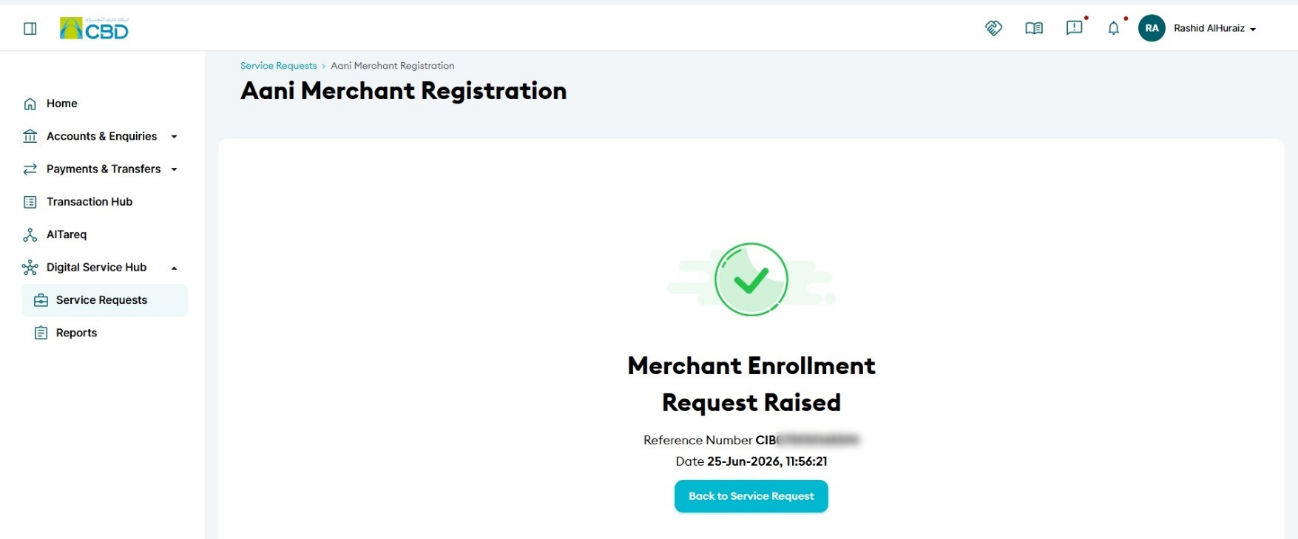
Step 6: Request Submitted Successfully
After successful authentication:
- A confirmation screen will be displayed.
- A reference number will be generated.
- Record the reference number for future enquiries or support requests.
Support Notes / Best Practices
- Ensure the correct account is selected before submitting the request.
- Review all merchant details carefully to avoid delays in processing.
- Keep the generated reference number for tracking and support purposes.
- Submission of the request does not immediately activate the Aani Merchant service. The request will be processed according to the bank's internal registration workflow.
- Ensure the mobile device has an active internet connection during authentication.